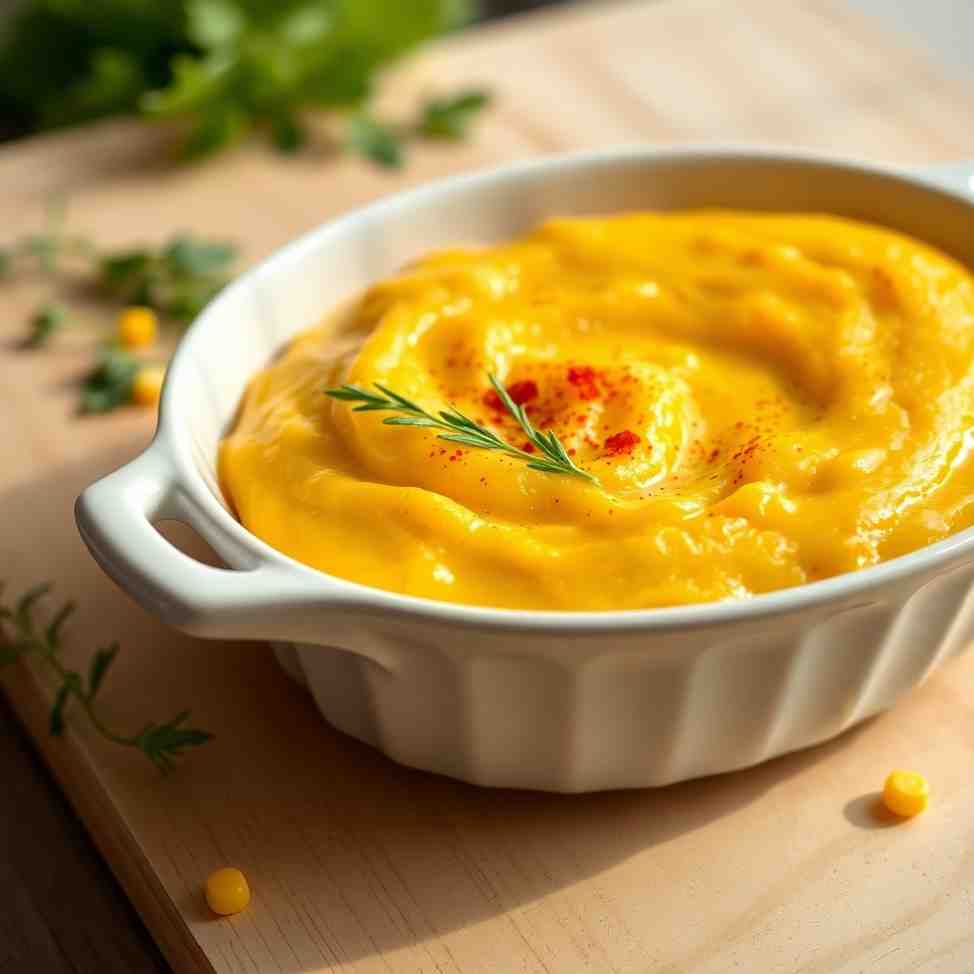
Hey there, fellow food lovers! Get ready to discover the ultimate best corn pudding recipe that’s about to become your new favorite comfort food. Imagine a dish that’s wonderfully sweet, incredibly custardy, and packed with the comforting goodness of sweet corn kernels in every bite. This isn't just any side dish; it's a true star, perfect for everything from your holiday table (hello, Thanksgiving and Christmas!) to a cozy Sunday dinner.
Why will you absolutely adore this recipe? For starters, it’s a total breeze to make – think one bowl, one pan, and a simple whisk-and-bake method that even the newest kitchen adventurer can master. We’ve struck the perfect balance here: it’s not too sweet, not dry or bready, and definitely no Jiffy or box mix in sight. Plus, it’s super versatile, working beautifully with fresh, frozen, or canned corn. And the best part? It’s a make-ahead marvel, meaning less stress for you. If you can crack a few eggs and wield a whisk, you’re well on your way to corn pudding perfection!
Ingredients
Directions
Prep the Pan and Oven
Preheat your oven to 350°F (175°C).
Lightly butter or spray your 2-quart or 9x13 inch baking dish with non-stick cooking spray. This prevents sticking and helps with easy serving.
Optional Water Bath Note: For an ultra-gentle, silky-smooth custard, you can place your prepared baking dish into a larger roasting pan. Pour hot water into the larger pan until it comes about halfway up the sides of the corn pudding dish. This helps regulate the temperature and ensures a super tender texture.
Make the Custard Base
In your large mixing bowl, crack the 4 large eggs. Whisk them vigorously until they are completely smooth and slightly frothy, with no visible streaks of white or yolk.
Add the ½ cup granulated sugar, ½ teaspoon salt, and ¼ teaspoon black pepper to the eggs. Whisk thoroughly until the sugar and seasonings are fully dissolved and no lumps remain.
Sprinkle in the 2 tablespoons of cornstarch (or flour) and whisk again until it's completely incorporated and the mixture is smooth. This is crucial for a lump-free pudding!
Finally, whisk in the melted and slightly cooled ½ cup butter and the 1 ½ cups half-and-half until everything is well combined and uniform.
Add the Corn
Stir the 15-ounce can of cream-style corn into your custard base. Mix until it’s evenly distributed throughout the mixture.
Gently fold in the 2 cups of whole-kernel corn (fresh, thawed frozen, or drained canned). You want to distribute them evenly without mashing them.
The mixture should look thick but still pourable, with plenty of those lovely whole corn kernels suspended throughout.
Bake
Carefully pour the corn pudding mixture into your prepared baking dish.
If using a water bath, place the roasting pan with the pudding dish into the preheated oven.
Bake for 45–60 minutes. The exact time will depend on the depth of your dish and your oven.
Visual Cues for Doneness: The edges of the pudding should be puffed up and deeply golden brown. The center should appear mostly set, but if you gently jiggle the dish, it should still have a slight, gentle wobble – like a perfectly baked cheesecake.
Optional Internal Temperature Guidance: If you have a thermometer, the center of the pudding should register around 170–175°F (77–79°C).
Rest and Serve
Once baked, remove the corn pudding from the oven (and the water bath, if using).
Allow it to rest on a wire rack for at least 10–15 minutes before serving. This resting time is essential for the custard to fully set and firm up.
Serving Styles:
For a soft, spoonable, and utterly comforting serving, scoop it directly from the dish with a large spoon.
If you prefer cleaner squares or wedges, let the pudding rest for a longer period (30-45 minutes) or even cool completely before slicing.
Best Corn Pudding Recipe Sweet, Creamy
Serves: 8 People
Prepare Time: 15 minutes
Cooking Time: 50 minutes
Calories: -
Difficulty:
Easy
Hey there, fellow food lovers! Get ready to discover the ultimate best corn pudding recipe that’s about to become your new favorite comfort food. Imagine a dish that’s wonderfully sweet, incredibly custardy, and packed with the comforting goodness of sweet corn kernels in every bite. This isn't just any side dish; it's a true star, perfect for everything from your holiday table (hello, Thanksgiving and Christmas!) to a cozy Sunday dinner.
Why will you absolutely adore this recipe? For starters, it’s a total breeze to make – think one bowl, one pan, and a simple whisk-and-bake method that even the newest kitchen adventurer can master. We’ve struck the perfect balance here: it’s not too sweet, not dry or bready, and definitely no Jiffy or box mix in sight. Plus, it’s super versatile, working beautifully with fresh, frozen, or canned corn. And the best part? It’s a make-ahead marvel, meaning less stress for you. If you can crack a few eggs and wield a whisk, you’re well on your way to corn pudding perfection!
Ingredients
Directions
Prep the Pan and Oven
Preheat your oven to 350°F (175°C).
Lightly butter or spray your 2-quart or 9x13 inch baking dish with non-stick cooking spray. This prevents sticking and helps with easy serving.
Optional Water Bath Note: For an ultra-gentle, silky-smooth custard, you can place your prepared baking dish into a larger roasting pan. Pour hot water into the larger pan until it comes about halfway up the sides of the corn pudding dish. This helps regulate the temperature and ensures a super tender texture.
Make the Custard Base
In your large mixing bowl, crack the 4 large eggs. Whisk them vigorously until they are completely smooth and slightly frothy, with no visible streaks of white or yolk.
Add the ½ cup granulated sugar, ½ teaspoon salt, and ¼ teaspoon black pepper to the eggs. Whisk thoroughly until the sugar and seasonings are fully dissolved and no lumps remain.
Sprinkle in the 2 tablespoons of cornstarch (or flour) and whisk again until it's completely incorporated and the mixture is smooth. This is crucial for a lump-free pudding!
Finally, whisk in the melted and slightly cooled ½ cup butter and the 1 ½ cups half-and-half until everything is well combined and uniform.
Add the Corn
Stir the 15-ounce can of cream-style corn into your custard base. Mix until it’s evenly distributed throughout the mixture.
Gently fold in the 2 cups of whole-kernel corn (fresh, thawed frozen, or drained canned). You want to distribute them evenly without mashing them.
The mixture should look thick but still pourable, with plenty of those lovely whole corn kernels suspended throughout.
Bake
Carefully pour the corn pudding mixture into your prepared baking dish.
If using a water bath, place the roasting pan with the pudding dish into the preheated oven.
Bake for 45–60 minutes. The exact time will depend on the depth of your dish and your oven.
Visual Cues for Doneness: The edges of the pudding should be puffed up and deeply golden brown. The center should appear mostly set, but if you gently jiggle the dish, it should still have a slight, gentle wobble – like a perfectly baked cheesecake.
Optional Internal Temperature Guidance: If you have a thermometer, the center of the pudding should register around 170–175°F (77–79°C).
Rest and Serve
Once baked, remove the corn pudding from the oven (and the water bath, if using).
Allow it to rest on a wire rack for at least 10–15 minutes before serving. This resting time is essential for the custard to fully set and firm up.
Serving Styles:
For a soft, spoonable, and utterly comforting serving, scoop it directly from the dish with a large spoon.
If you prefer cleaner squares or wedges, let the pudding rest for a longer period (30-45 minutes) or even cool completely before slicing.
Recipe Nutritional Values
The following nutritional values are per serving (one piece of cake)
Calories
~300-350 per serving
Carbohydrates
~30-35g per serving
Protein
~8-10g per serving
Fat
~18-22g per serving
Additional Information
A fantastic source of dietary fiber, thanks to the generous amount of corn.
Provides essential vitamins and minerals, including Vitamin C, B vitamins, and potassium.
A comforting, energy-rich side dish that satisfies.
Recipe Success Tips
Ingredient Substitutions & Variations
Fresh vs. Frozen vs. Canned Whole-Kernel Corn: You can swap these interchangeably by volume (2 cups). Fresh summer corn will offer a slightly crisper texture and brighter sweetness, while frozen and canned provide convenience year-round. Just make sure frozen corn is thawed and both are well-drained.
Make It More Savory / Less Sweet: To reduce the sweetness, simply cut the granulated sugar down to ¼ cup. To boost savory notes, consider adding an extra pinch of salt, a dash more black pepper, a tiny bit of garlic powder, or a small amount of finely chopped shallots or chives to the custard base.
Optional Add-Ins:
Crisp Bacon Bits: For a smoky, savory twist, fold in about ½ cup of cooked and crumbled bacon bits into the corn mixture before baking, or sprinkle on top during the last few minutes. Don't overload, as this recipe is designed to highlight the corn.
Light Cheesy Crust: As mentioned in the ingredients, a small handful (¼ cup) of shredded sharp cheddar or Parmesan sprinkled over the top for the last 10-15 minutes of baking adds a delightful savory crust.
Fresh Herbs: Finely chopped green onions or chives scattered over the top after baking add a fresh, oniony brightness.
Simple Gluten-Friendly Note: If you're using flour as your thickener, you can easily swap it for a 1:1 gluten-free all-purpose flour blend. The texture might be slightly different, perhaps a touch softer, but it will still set beautifully.
Make-Ahead & Storage Instructions
This corn pudding is incredibly convenient for meal prepping or holiday planning!
Make-Ahead Options:
Option A: Assemble, Refrigerate, Bake Fresh: You can prepare the entire corn pudding mixture (Steps 1-3) up to 12–24 hours in advance. Pour it into your prepared baking dish, cover it tightly with plastic wrap, and refrigerate. When ready to bake, remove it from the fridge while your oven preheats, allowing it to come closer to room temperature for more even baking. Then, bake as directed.
Option B: Bake Now, Reheat Later: Bake the corn pudding completely, then let it cool thoroughly at room temperature. Once cooled, cover the dish tightly with foil or plastic wrap and refrigerate for up to 3-4 days. To reheat, place the covered dish in a 300°F (150°C) oven for 20-30 minutes, or until warmed through. You can uncover for the last 5-10 minutes if you want to crisp up the top.
How to Store Leftovers:
Cool any leftover corn pudding completely. Transfer it to an airtight container or cover the baking dish tightly with plastic wrap or foil.
Store in the refrigerator for up to 3-4 days. This helps prevent it from drying out and keeps it fresh.
Can You Freeze Corn Pudding?
Yes, corn pudding freezes surprisingly well for casual meals, though you might notice a very slight change in texture (it can be a little softer after thawing).
To freeze: Bake and cool the pudding completely. You can freeze it whole in the baking dish (if freezer-safe) or portion it into individual
Frequently Asked Questions
Not quite! While often grouped, there are key differences. Corn pudding, like our recipe, is a true custard-based dish, meaning it relies on eggs and dairy to set into a spoonable, creamy texture. Corn casserole (or Jiffy corn casserole) often uses a cornbread mix (like Jiffy) as its base, resulting in a breadier, more cake-like texture. Our recipe is creamy, not bready, and definitely no box mix!
Our recipe is designed to be versatile! You can use fresh, frozen (thawed), or canned whole-kernel corn, all measured by cups. Fresh summer corn will give you a slightly crisper bite and natural sweetness, while frozen and canned are fantastic for convenience and year-round enjoyment. We also use canned cream-style corn for its built-in creaminess and body, which is essential for that perfect custard texture.
Look for these visual cues: the edges should be puffed and deeply golden, while the center should still have a gentle jiggle when you lightly shake the pan. If you're using a thermometer, it should register around 170-175°F (77-79°C) in the center. Remember, it will continue to set as it cools, so don't overbake!
A runny center usually means it's under-baked. This can happen if your oven temperature is off, if you used a very deep baking dish that required more cooking time, or if the custard simply didn't reach its setting temperature. To fix it, you can sometimes return it to the oven for another 10-15 minutes, covering it loosely with foil if the top is getting too brown. Next time, ensure your oven is preheated properly and check for those visual cues of doneness.
The secret lies in the perfect balance of eggs, dairy (milk or half-and-half), and a touch of cornstarch. The eggs provide the structure for the custard, the dairy adds richness, and the cornstarch helps it set smoothly without being rubbery. Our recipe also uses both cream-style corn for its built-in creaminess and whole-kernel corn for texture, creating that ideal, melt-in-your-mouth experience.
Yes, you can! To double the recipe, use a larger baking dish (like a 9x13-inch for a single recipe, so maybe two 9x13s or a very large roasting pan for a double batch). Be aware that doubling will significantly increase the bake time. If halving, use a smaller dish, like an 8x8-inch, and reduce the bake time accordingly. Always keep an eye on those doneness cues!
You can, but the texture will be different. Creamed corn contributes significantly to the pudding's creamy, custardy body. If you omit it, you'll need to increase the amount of whole-kernel corn and potentially add a bit more milk and cornstarch (or flour) to compensate for the lost liquid and thickening agents. It will still be delicious but will have a less uniform, more textured consistency.
Corn pudding is a classic comfort food side that pairs beautifully with a variety of dishes! It's a holiday staple alongside Thanksgiving turkey, glazed ham, or roast beef. For everyday meals, it's wonderful with roast chicken, pork tenderloin, or even grilled fish. Don't forget your greens! It complements green beans, collard greens, roasted Brussels sprouts, or a simple garden salad perfectly.
A good corn pudding strikes a perfect balance: it's creamy like a custard, not dry or bready, with plenty of sweet corn kernels in every bite. It's not overly sweet, allowing it to complement both savory main courses and stand alone as a delightful side. It should be easy to make, forgiving for beginners, and versatile enough to use fresh, frozen, or canned corn. Our recipe hits all these marks!
Recommended Kitchen Tools
Time-Saving Tools & Ingredients Making corn pudding should be a joy, not a chore! Here are a few tools that can help you get this delicious dish on the table faster and with less fuss.
Electric Hand Mixer
Problem: Whisking eggs and incorporating sugar and cornstarch by hand can be tiring and time-consuming, especially if you want a super smooth, lump-free custard base. Agitate: Lumps mean uneven texture, and a tired arm means less fun in the kitchen. Who wants a lumpy pudding or a sore wrist before the baking even begins? Solution: An electric hand mixer makes quick work of blending your custard ingredients until perfectly smooth and airy. It saves your arm strength and ensures a silky base in minutes.
Large, Sturdy Mixing Bowl
Problem: Juggling multiple bowls for different ingredients or having a bowl that's too small can lead to spills, extra cleanup, and a disjointed workflow. Agitate: Nothing's worse than trying to fold in corn kernels only to have them spill over the sides, creating a sticky mess and wasting precious ingredients. Solution: A generously sized mixing bowl allows you to combine all your ingredients in one place, minimizing mess and making the entire whisking and folding process seamless. Look for one with a non-slip base for added stability.
Silicone Spatula
Problem: Traditional spoons or rigid spatulas can leave a lot of delicious batter clinging to the sides of your bowl, leading to waste and uneven portioning. Agitate: Every bit of that creamy corn pudding batter is precious! Leaving it behind means less for your serving dish and a feeling of inefficiency. Solution: A flexible silicone spatula is your best friend for scraping down the sides of the bowl, ensuring every last drop of your custard mixture makes it into the baking dish. It’s also gentle on non-stick surfaces and super easy to clean.
Calories per Ingredient
Click any ingredient for detailed nutritional information:
Nutritional Benefits:
Excellent source of high-quality protein, essential amino acids, and choline (important for brain health)They also contain vitamins D, B6, B12, and minerals like selenium and zinc
Nutritional Benefits:
Provides fat-soluble vitamins A, E, and K2In moderation, it contributes to satiety and can be part of a balanced diet
Nutritional Benefits:
Primarily provides energy in the form of carbohydratesOur recipe uses a moderate amount for balanced sweetness, not as a primary health ingredient
Nutritional Benefits:
Excellent source of calcium for bone health, vitamin D (often fortified), and proteinHalf-and-half offers a richer texture due to higher fat content
Nutritional Benefits:
Primarily used as a thickening agentIt's gluten-free and can help create a smooth, stable custard texture
Nutritional Benefits:
Provides dietary fiber, some vitamins (like C and B vitamins), and mineralsIts creamy texture adds body and sweetness to the pudding
Nutritional Benefits:
Rich in dietary fiber, which aids digestion, and antioxidantsContains vitamins B, C, and magnesium, contributing to overall health
Nutritional Benefits:
Essential for fluid balance and nerve functionUsed in cooking to enhance flavors
Hey there! I’m just someone who seriously loves good food and believes that cooking doesn’t have to be complicated to be amazing. Whether it’s a quick weeknight dinner or a cozy weekend meal, I’m all about sharing easy, tasty recipes that actually work.