
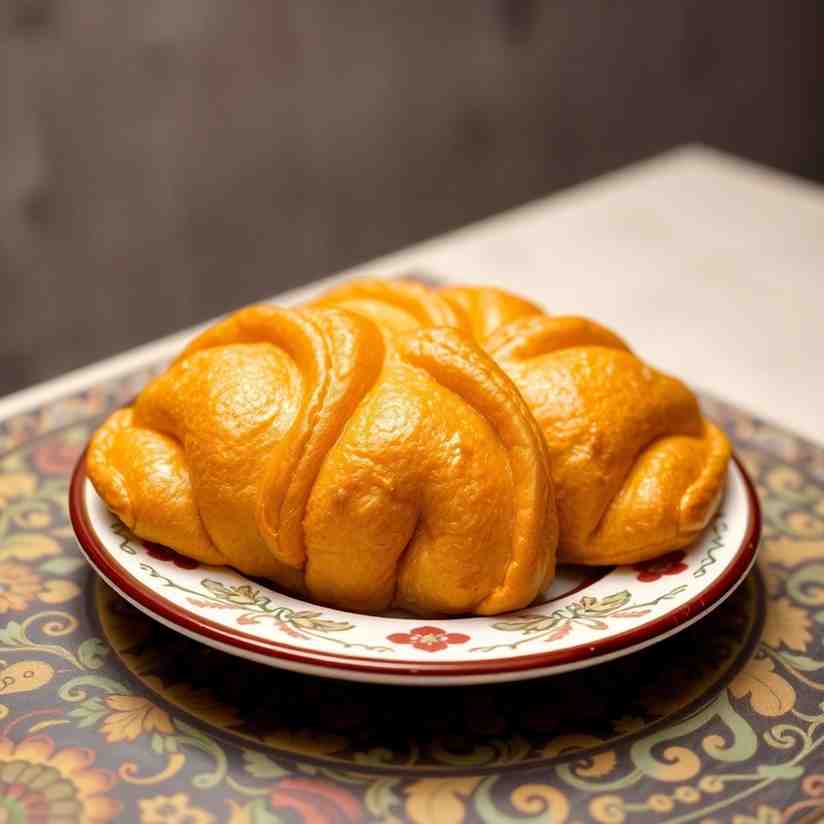
Flaky Elephant's Ear Pastry Make Afghan Gosh-e-Fil Today
Flaky Elephant's Ear Pastry Make Afghan Gosh-e-Fil Today
- Serves: 8 People
- Prepare Time: 30 minutes
- Cooking Time: 25 minutes
- Calories: 350
- Difficulty: Easy
Ever tried a sweet treat that transports you straight to a vibrant Afghan celebration? Get ready to discover Flaky Elephant's Ear Pastry, also known as Gosh-e-Fil! These delightful, crisp, ear-shaped fried pastries are a true taste of Afghan hospitality. While the name might sound exotic, making them is surprisingly simple, and you don't need any fancy equipment. If you've been looking for baking pastry recipes that are both unique and achievable, you're in the right place.
Gosh-e-Fil are a beloved dessert, perfect with a cup of tea or as a special treat for Eid and other gatherings. They're lightly sweet, relying on a generous dusting of powdered sugar, fragrant pistachios, and sometimes delicate dried rose petals for their signature charm. Forget dense, heavy dough for pastry – we're talking about a wonderfully light and crisp result. This guide will walk you through every step, from mixing your simple puff pastry dough to achieving that perfect golden crispness, ensuring your pastries with puff pastry (or our traditional dough!) turn out just right, every single time. Get ready to bake a little piece of Afghanistan!
Ingredients
Directions
- Mix and Knead the Dough
- In a large mixing bowl, whisk together the all-purpose flour, granulated sugar, salt, and ground cardamom until well combined. Sifting the flour first can help prevent lumps!
- In a separate medium bowl, whisk the eggs, melted butter (or oil), and milk together until smooth.
- Gradually pour the wet ingredients into the dry ingredients, mixing with a spoon or your hands until a shaggy dough forms.
- Turn the dough out onto a lightly floured surface. Knead the dough for about 8-10 minutes. It will start out sticky, but as you knead, it will become smooth, soft, and elastic. It should be soft to the touch but not gluey. If it's too sticky, dust your surface with a teaspoon of flour at a time, but try not to add too much.
- Rest the Dough
- Form the kneaded dough into a ball. Place it back in the mixing bowl, cover it with a damp kitchen towel, and let it rest at room temperature for about 1 hour. This resting period is crucial! It allows the gluten to relax, making the dough much easier to roll out thinly without it shrinking back.
- Roll & Cut the “Ears”
- Lightly flour your work surface and your rolling pin. Take your rested dough and roll it out evenly to a thickness of about 3–5 mm (which is roughly 1/8–1/4 inch). You want it thin enough to be crisp but not so thin that it's brittle or tears easily.
- Using a 2-inch round cookie cutter or the rim of a small glass, cut out circles from the dough. Gather any scraps, gently knead them together, and let them rest for a few minutes before re-rolling.
- Now for the "ear" shape! Gently pinch one side of each dough circle to form a little point, creating that distinctive "elephant ear" look. If your dough is tearing as you shape, it might be a little too dry. Lightly dab the torn edges with a tiny bit of water and let the dough rest for another few minutes before continuing.
- Heat the Oil (Crisp, Not Greasy!)
- Pour your neutral high-heat oil into a heavy, wide pan or Dutch oven. You'll want about 1½–2 inches of oil depth.
- Heat the oil over medium-high heat to 350°F (180°C).
- With a thermometer: Simply wait for the thermometer to reach the target temperature.
- Without a thermometer: Drop a tiny scrap of dough into the hot oil. It should bubble steadily and rise to the surface in about 3-4 seconds. If it burns instantly, the oil is too hot. If it just sits at the bottom without bubbling, it's not hot enough and your pastries will be greasy.
- Fry the Elephant Ears
- Carefully place a few shaped elephant ears into the hot oil. Don't overcrowd the pan, as this will drop the oil temperature and lead to greasy pastries. Fry them in small batches.
- The ears will initially sink, then float to the surface. Fry them until they are a beautiful light golden brown and wonderfully crisp, flipping them once to ensure even cooking. This usually takes about 2–3 minutes per side. Listen for a steady sizzling sound – that's a good sign they're cooking correctly.
- Once golden and crisp, use a slotted spoon or spider skimmer to transfer the fried pastries to a wire cooling rack placed over a tray or paper towels. This allows excess oil to drain away, keeping them crisp.
- Dust, Garnish & Cool
- While the pastries are still slightly warm (this helps the sugar stick!), generously dust them with powdered sugar. Use a fine-mesh sieve for an even coating.
- Sprinkle finely ground pistachios into the "ear canal" center of each pastry, and add dried rose petals if you're using them for that authentic touch.
- Let the Gosh-e-Fil cool completely on the rack before storing. If you store them warm, the trapped steam can make them soft and lose their crispness.
Flaky Elephant's Ear Pastry Make Afghan Gosh-e-Fil Today

- Serves: 8 People
- Prepare Time: 30 minutes
- Cooking Time: 25 minutes
- Calories: 350
- Difficulty: Easy
Ever tried a sweet treat that transports you straight to a vibrant Afghan celebration? Get ready to discover Flaky Elephant's Ear Pastry, also known as Gosh-e-Fil! These delightful, crisp, ear-shaped fried pastries are a true taste of Afghan hospitality. While the name might sound exotic, making them is surprisingly simple, and you don't need any fancy equipment. If you've been looking for baking pastry recipes that are both unique and achievable, you're in the right place.
Gosh-e-Fil are a beloved dessert, perfect with a cup of tea or as a special treat for Eid and other gatherings. They're lightly sweet, relying on a generous dusting of powdered sugar, fragrant pistachios, and sometimes delicate dried rose petals for their signature charm. Forget dense, heavy dough for pastry – we're talking about a wonderfully light and crisp result. This guide will walk you through every step, from mixing your simple puff pastry dough to achieving that perfect golden crispness, ensuring your pastries with puff pastry (or our traditional dough!) turn out just right, every single time. Get ready to bake a little piece of Afghanistan!
Ingredients
Directions
- Mix and Knead the Dough
- In a large mixing bowl, whisk together the all-purpose flour, granulated sugar, salt, and ground cardamom until well combined. Sifting the flour first can help prevent lumps!
- In a separate medium bowl, whisk the eggs, melted butter (or oil), and milk together until smooth.
- Gradually pour the wet ingredients into the dry ingredients, mixing with a spoon or your hands until a shaggy dough forms.
- Turn the dough out onto a lightly floured surface. Knead the dough for about 8-10 minutes. It will start out sticky, but as you knead, it will become smooth, soft, and elastic. It should be soft to the touch but not gluey. If it's too sticky, dust your surface with a teaspoon of flour at a time, but try not to add too much.
- Rest the Dough
- Form the kneaded dough into a ball. Place it back in the mixing bowl, cover it with a damp kitchen towel, and let it rest at room temperature for about 1 hour. This resting period is crucial! It allows the gluten to relax, making the dough much easier to roll out thinly without it shrinking back.
- Roll & Cut the “Ears”
- Lightly flour your work surface and your rolling pin. Take your rested dough and roll it out evenly to a thickness of about 3–5 mm (which is roughly 1/8–1/4 inch). You want it thin enough to be crisp but not so thin that it's brittle or tears easily.
- Using a 2-inch round cookie cutter or the rim of a small glass, cut out circles from the dough. Gather any scraps, gently knead them together, and let them rest for a few minutes before re-rolling.
- Now for the "ear" shape! Gently pinch one side of each dough circle to form a little point, creating that distinctive "elephant ear" look. If your dough is tearing as you shape, it might be a little too dry. Lightly dab the torn edges with a tiny bit of water and let the dough rest for another few minutes before continuing.
- Heat the Oil (Crisp, Not Greasy!)
- Pour your neutral high-heat oil into a heavy, wide pan or Dutch oven. You'll want about 1½–2 inches of oil depth.
- Heat the oil over medium-high heat to 350°F (180°C).
- With a thermometer: Simply wait for the thermometer to reach the target temperature.
- Without a thermometer: Drop a tiny scrap of dough into the hot oil. It should bubble steadily and rise to the surface in about 3-4 seconds. If it burns instantly, the oil is too hot. If it just sits at the bottom without bubbling, it's not hot enough and your pastries will be greasy.
- Fry the Elephant Ears
- Carefully place a few shaped elephant ears into the hot oil. Don't overcrowd the pan, as this will drop the oil temperature and lead to greasy pastries. Fry them in small batches.
- The ears will initially sink, then float to the surface. Fry them until they are a beautiful light golden brown and wonderfully crisp, flipping them once to ensure even cooking. This usually takes about 2–3 minutes per side. Listen for a steady sizzling sound – that's a good sign they're cooking correctly.
- Once golden and crisp, use a slotted spoon or spider skimmer to transfer the fried pastries to a wire cooling rack placed over a tray or paper towels. This allows excess oil to drain away, keeping them crisp.
- Dust, Garnish & Cool
- While the pastries are still slightly warm (this helps the sugar stick!), generously dust them with powdered sugar. Use a fine-mesh sieve for an even coating.
- Sprinkle finely ground pistachios into the "ear canal" center of each pastry, and add dried rose petals if you're using them for that authentic touch.
- Let the Gosh-e-Fil cool completely on the rack before storing. If you store them warm, the trapped steam can make them soft and lose their crispness.
The following nutritional values are per serving (one piece of cake) Calories 320-350 kcal Carbohydrates 35-40g Protein 5-7g Fat 18-22g Making Gosh-e-Fil is a delightful process, and while you don't need fancy gadgets, a few smart tools can make your baking journey even smoother and quicker. Here are some of our top recommendations to help you along the way! Problem: Frying can feel like a guessing game, especially when you're trying to hit that perfect oil temperature. Problem: Working with dough, especially when it's a little sticky, can get messy. Trying to cleanly divide it or scrape it off your counter can be a real hassle. Problem: Safely retrieving delicate fried pastries from sizzling hot oil can be tricky, and you don't want to damage them or splash hot oil. Click any ingredient for detailed nutritional information:Recipe Nutritional Values
Additional Information
Recipe Success Tips
Ingredient Substitutions & Variations
Cultural Variations
Make-Ahead & Storage Instructions
Frequently Asked Questions
Recommended Kitchen Tools
Oil Thermometer (Probe or Clip-on)
Agitate: Too hot, and your beautiful pastries burn on the outside while staying raw in the middle. Too cool, and they'll soak up too much oil, turning greasy and heavy instead of wonderfully light and crispy.
Solution: A simple probe or clip-on oil thermometer takes all the guesswork out. It ensures your oil is consistently at 350°F (180°C), guaranteeing perfectly golden, crisp Gosh-e-Fil every single time. Say goodbye to greasy pastries!Bench Scraper / Dough Cutter
Agitate: You often end up with dough clinging to your hands and your work surface, turning kneading and portioning into a frustrating, time-consuming chore. Uneven cuts can also lead to pastries that cook inconsistently.
Solution: A bench scraper is a true kitchen hero! It makes quick work of scooping, dividing, and cleaning your work surface. It helps keep your hands clean and ensures you get uniform portions for consistent cooking results, saving you precious time and effort.Slotted Spoon or Spider Skimmer
Agitate: Using regular tongs or a fork might pierce or break your carefully shaped pastries, or worse, cause hot oil to splash, making the frying process feel a bit risky and potentially marring your beautiful Gosh-e-Fil.
Solution: A slotted spoon or spider skimmer is designed for this job! It allows you to gently lift the pastries, letting all the excess oil drain away immediately. This keeps them wonderfully crisp and intact, making your frying experience safer, more efficient, and much more enjoyable.Calories per Ingredient
You may also like


Hey there! I’m just someone who seriously loves good food and believes that cooking doesn’t have to be complicated to be amazing. Whether it’s a quick weeknight dinner or a cozy weekend meal, I’m all about sharing easy, tasty recipes that actually work.


