
How to Make Chomchom - A Sweet Indian Delight
How to Make Chomchom - A Sweet Indian Delight
- Serves: 12 People
- Prepare Time: 45 minutes
- Cooking Time: 30 minutes
- Calories: -
- Difficulty: Medium
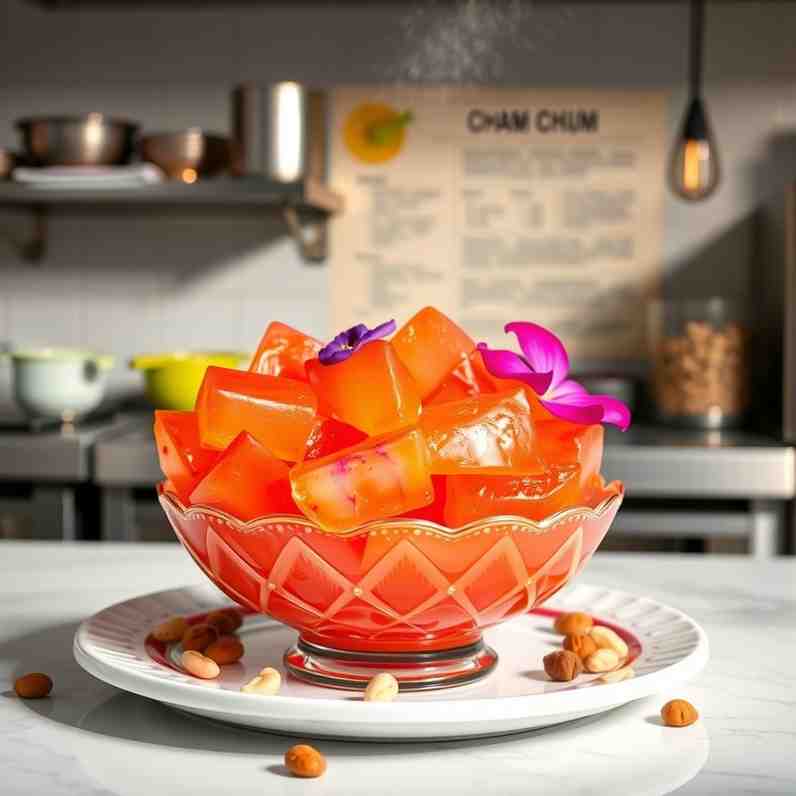
Ever dreamt of mastering the art of cooked Indian food right in your own kitchen? Get ready to whip up a true culinary masterpiece with our guide to Chomchom Delight! This isn't just any sweet; it's a luscious, milk-based treat, often called "Chum Chum," that holds a special place in Bengali cuisine. Imagine biting into a soft, spongy confection, fragrant with cardamom and rose water, and sometimes bursting with a rich, creamy filling. It’s a staple during joyous occasions and festivals like Diwali, bringing smiles to everyone's faces. Whether you're a beginner looking for cooking for beginners recipes or an experienced baker wanting to perfect your easy sweet food to make, this recipe is easy to follow, promising to guide you through every step. We'll share all the secrets to make authentic Bengali Chomchom, from preparing the perfect chena to the final, beautiful garnish, ensuring you create the best of sweets that taste just like home-cooked magic. Let’s get started on this sweet journey to cook Indian food at home!
Ingredients
Directions
- Preparing the Chena (Indian Cottage Cheese):
- Boil the Milk: Pour the full-fat milk into a heavy-bottomed pot and bring it to a rolling boil over medium-high heat, stirring occasionally to prevent scorching.
- Curdle the Milk: Once the milk boils, reduce the heat to low. Gradually add 2 tablespoons of lemon juice (or vinegar), stirring gently. The milk will start to curdle, separating into solids (chena) and watery whey. If it doesn't curdle completely, add the remaining lemon juice, a teaspoon at a time, until the whey looks clear and greenish-yellow.
- Drain the Whey: Turn off the heat. Immediately line a colander with a clean muslin cloth or cheesecloth and place it over a large bowl. Pour the curdled milk into the colander to separate the chena from the whey.
- Rinse the Chena: Gather the edges of the cloth and gently rinse the chena under cold running water for 2-3 minutes. This step is crucial to wash away any lingering lemon flavor and to stop the cooking process, ensuring a soft chena.
- Squeeze Out Excess Moisture: Twist the cloth tightly to squeeze out as much water as possible. Hang the chena in the cloth for 30-45 minutes to allow any remaining moisture to drip away. The chena should be crumbly but not dry.
- Shaping the Chomchom:
- Mash the Chena: Transfer the drained chena to a wide plate or a large, clean surface. Begin mashing and kneading the chena vigorously with the heel of your palm for 7-8 minutes. The goal is to break down any granular texture and make it very smooth and lump-free. It should feel like soft dough, with a slight sheen.
- Add Binders: Add the cornflour, all-purpose flour, and baking soda (if using) to the mashed chena. Knead for another 2-3 minutes until everything is well combined and the dough is uniform.
- Shape the Chomchom: Divide the chena mixture into 12-15 equal portions. Gently roll each portion between your palms into a smooth ball, then slightly elongate them into an oval or cylindrical shape, characteristic of Chomchom. Ensure there are no cracks on the surface, as cracks can cause them to break during cooking. (Optional: You can add a tiny drop of food coloring to a few portions for vibrant, colorful Chomchoms.)
- Cooking the Chomchom in Sugar Syrup:
- Prepare the Syrup: In a large, wide-mouthed pot (preferably a pressure cooker or a deep, heavy-bottomed pan with a lid), combine the water, granulated sugar, and crushed cardamom pods. Bring the mixture to a rolling boil over high heat, stirring until the sugar dissolves completely.
- Cook the Chomchom: Once the syrup is boiling vigorously, carefully add the shaped Chomchom pieces to the pot. Do not overcrowd the pot; cook in batches if necessary. Cover the pot with a lid and cook on high heat for 10 minutes.
- Flip and Continue Cooking: After 10 minutes, gently open the lid and carefully flip each Chomchom piece. Re-cover and continue to cook for another 15-20 minutes on medium-high heat. The Chomchom will absorb the syrup and nearly double in size.
- Check for Doneness: A cooked Chomchom will feel spongy and spring back when lightly pressed.
- Cooling and Stuffing:
- Cool the Chomchom: Turn off the heat and carefully transfer the cooked Chomchoms, along with some syrup, into a large bowl. Let them cool completely at room temperature for at least 3-4 hours, or ideally overnight. This allows them to fully absorb the syrup and firm up.
- Prepare the Stuffing: In a small bowl, combine the crumbled mawa (or milk powder, if using, mixed with 1 tablespoon of milk), powdered sugar, and finely chopped dried figs. Mix well to form a thick, cohesive stuffing.
- Stuff the Chomchom: Once the Chomchoms are cool, gently make a slit lengthwise in the center of each piece, being careful not to cut all the way through. Spoon or pipe a small amount of the prepared stuffing into each Chomchom.
- Final Touches: Roll the stuffed Chomchoms in shredded coconut to coat them completely. Arrange them on a serving platter and garnish generously with chopped pistachios. Serve chilled or at room temperature.
How to Make Chomchom - A Sweet Indian Delight

- Serves: 12 People
- Prepare Time: 45 minutes
- Cooking Time: 30 minutes
- Calories: -
- Difficulty: Medium
Ever dreamt of mastering the art of cooked Indian food right in your own kitchen? Get ready to whip up a true culinary masterpiece with our guide to Chomchom Delight! This isn't just any sweet; it's a luscious, milk-based treat, often called "Chum Chum," that holds a special place in Bengali cuisine. Imagine biting into a soft, spongy confection, fragrant with cardamom and rose water, and sometimes bursting with a rich, creamy filling. It’s a staple during joyous occasions and festivals like Diwali, bringing smiles to everyone's faces. Whether you're a beginner looking for cooking for beginners recipes or an experienced baker wanting to perfect your easy sweet food to make, this recipe is easy to follow, promising to guide you through every step. We'll share all the secrets to make authentic Bengali Chomchom, from preparing the perfect chena to the final, beautiful garnish, ensuring you create the best of sweets that taste just like home-cooked magic. Let’s get started on this sweet journey to cook Indian food at home!
Ingredients
Directions
- Preparing the Chena (Indian Cottage Cheese):
- Boil the Milk: Pour the full-fat milk into a heavy-bottomed pot and bring it to a rolling boil over medium-high heat, stirring occasionally to prevent scorching.
- Curdle the Milk: Once the milk boils, reduce the heat to low. Gradually add 2 tablespoons of lemon juice (or vinegar), stirring gently. The milk will start to curdle, separating into solids (chena) and watery whey. If it doesn't curdle completely, add the remaining lemon juice, a teaspoon at a time, until the whey looks clear and greenish-yellow.
- Drain the Whey: Turn off the heat. Immediately line a colander with a clean muslin cloth or cheesecloth and place it over a large bowl. Pour the curdled milk into the colander to separate the chena from the whey.
- Rinse the Chena: Gather the edges of the cloth and gently rinse the chena under cold running water for 2-3 minutes. This step is crucial to wash away any lingering lemon flavor and to stop the cooking process, ensuring a soft chena.
- Squeeze Out Excess Moisture: Twist the cloth tightly to squeeze out as much water as possible. Hang the chena in the cloth for 30-45 minutes to allow any remaining moisture to drip away. The chena should be crumbly but not dry.
- Shaping the Chomchom:
- Mash the Chena: Transfer the drained chena to a wide plate or a large, clean surface. Begin mashing and kneading the chena vigorously with the heel of your palm for 7-8 minutes. The goal is to break down any granular texture and make it very smooth and lump-free. It should feel like soft dough, with a slight sheen.
- Add Binders: Add the cornflour, all-purpose flour, and baking soda (if using) to the mashed chena. Knead for another 2-3 minutes until everything is well combined and the dough is uniform.
- Shape the Chomchom: Divide the chena mixture into 12-15 equal portions. Gently roll each portion between your palms into a smooth ball, then slightly elongate them into an oval or cylindrical shape, characteristic of Chomchom. Ensure there are no cracks on the surface, as cracks can cause them to break during cooking. (Optional: You can add a tiny drop of food coloring to a few portions for vibrant, colorful Chomchoms.)
- Cooking the Chomchom in Sugar Syrup:
- Prepare the Syrup: In a large, wide-mouthed pot (preferably a pressure cooker or a deep, heavy-bottomed pan with a lid), combine the water, granulated sugar, and crushed cardamom pods. Bring the mixture to a rolling boil over high heat, stirring until the sugar dissolves completely.
- Cook the Chomchom: Once the syrup is boiling vigorously, carefully add the shaped Chomchom pieces to the pot. Do not overcrowd the pot; cook in batches if necessary. Cover the pot with a lid and cook on high heat for 10 minutes.
- Flip and Continue Cooking: After 10 minutes, gently open the lid and carefully flip each Chomchom piece. Re-cover and continue to cook for another 15-20 minutes on medium-high heat. The Chomchom will absorb the syrup and nearly double in size.
- Check for Doneness: A cooked Chomchom will feel spongy and spring back when lightly pressed.
- Cooling and Stuffing:
- Cool the Chomchom: Turn off the heat and carefully transfer the cooked Chomchoms, along with some syrup, into a large bowl. Let them cool completely at room temperature for at least 3-4 hours, or ideally overnight. This allows them to fully absorb the syrup and firm up.
- Prepare the Stuffing: In a small bowl, combine the crumbled mawa (or milk powder, if using, mixed with 1 tablespoon of milk), powdered sugar, and finely chopped dried figs. Mix well to form a thick, cohesive stuffing.
- Stuff the Chomchom: Once the Chomchoms are cool, gently make a slit lengthwise in the center of each piece, being careful not to cut all the way through. Spoon or pipe a small amount of the prepared stuffing into each Chomchom.
- Final Touches: Roll the stuffed Chomchoms in shredded coconut to coat them completely. Arrange them on a serving platter and garnish generously with chopped pistachios. Serve chilled or at room temperature.
You may also like


Hey there! I’m just someone who seriously loves good food and believes that cooking doesn’t have to be complicated to be amazing. Whether it’s a quick weeknight dinner or a cozy weekend meal, I’m all about sharing easy, tasty recipes that actually work.

