
Easy Peanut Brittle - Sweet & Salty Crunch
Easy Peanut Brittle - Sweet & Salty Crunch

- Serves: 12 People
- Prepare Time: 10 minutes
- Cooking Time: 25 minutes
- Calories: -
- Difficulty: Medium
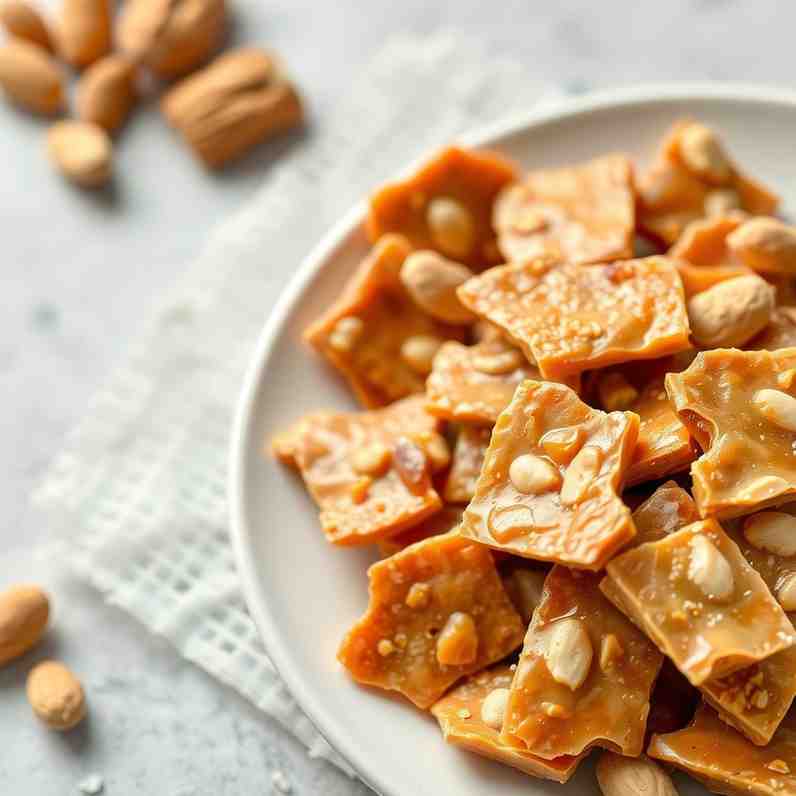
Craving that irresistible crunch and sweet-and-salty flavor that only peanut brittle can deliver? You're in the right place! This classic candy, with its gorgeous golden hue and satisfying snap, is a nostalgic favorite that pops up everywhere from holiday tins to thoughtful homemade gifts. It might look fancy, but we promise you, making homemade peanut brittle is much easier than you think.
Forget sticky messes, burnt sugar, or brittle that breaks your teeth! Our fool-proof stovetop recipe simplifies the process, guiding you through each stage to ensure you get perfectly crunchy, buttery, and utterly delicious peanut brittle every single time. You only need a few basic pantry ingredients and, ideally, a candy thermometer (don't worry, we've got a simple backup if you don't have one!). Get ready to impress everyone with this sweet treat!
Ingredients
Directions
- Prep Your Pan & Measure Everything First things first: line a large rimmed baking sheet (about 13x18 inches) with parchment paper or a silicone baking mat.
- Do NOT use wax paper – it will melt! Next, measure out all your ingredients (peanuts, butter, baking soda, and vanilla) and place them in small bowls right next to your stovetop. This is crucial because once the sugar syrup is ready, things move fast. You can even lightly warm your baking sheet in a low oven (around 200°F/95°C) for a few minutes; this gives you a little extra time to spread the brittle later.
- Start the Sugar Syrup In a heavy-bottomed 3-quart saucepan (this helps prevent scorching), combine the granulated sugar, light corn syrup, and water. Stir gently with a heat-safe spatula until the sugar is fully moistened and combined. Place the saucepan over medium heat, stirring occasionally, until the sugar dissolves completely and the mixture begins to boil. Once it starts boiling, stop stirring. Clip your candy thermometer to the side of the pan, making sure the tip isn't touching the bottom.
- Cook to the First Stage (Soft-Crack) Let the syrup gently boil without stirring until it reaches approximately 250°F (121°C). This is often called the "soft-crack" stage. As it cooks, you'll notice the syrup becoming clear to a very pale gold, and the bubbles will be small and fast. The mixture will also thicken slightly. Stir only if absolutely necessary to prevent scorching on the bottom, but generally, let it do its thing.
- Add Peanuts and Cook to Hard-Crack Once the syrup hits 250°F, stir in your roasted peanuts and the salt. Continue to cook, stirring frequently to ensure the peanuts are evenly coated and don't stick to the bottom, until the mixture reaches exactly 300°F (149°C). This is the "hard-crack" stage, and it's where the magic happens! You'll see the color deepen to a beautiful rich, deep golden amber, and you'll smell a stronger, inviting nutty aroma.
- Warning: Pay close attention here! The temperature can jump very quickly from 290°F to 300°F and then to burnt in a matter of seconds. Stay right by the stove!
- Finish with Butter, Soda & Vanilla As soon as your thermometer hits 300°F, immediately remove the pan from the heat. Quickly stir in the butter and vanilla extract. Once those are incorporated, quickly stir in the baking soda. You'll instantly see a fascinating reaction: the mixture will foam up, lighten in color, and expand significantly. This is exactly what you want – those air bubbles are making your brittle wonderfully crunchy and delicate!
- Pour and Spread Quickly Without delay, immediately pour the hot, foamy mixture onto your prepared baking sheet. Using two heat-safe spatulas (or the back of a spoon), work quickly to spread the brittle into a thin, even layer. Aim for roughly ¼ inch thickness for that ideal crisp, snappy texture. Remember, thinner brittle equals crisper shards, while thicker brittle will give you chunkier, more substantial bites.
- Cool, Break & Serve Now for the hardest part: waiting! Let the peanut brittle cool completely and undisturbed at room temperature. This usually takes about 30 minutes, or until it's fully hard and brittle. Once it's solid, use your hands or a small mallet to break it into irregular, delicious pieces. Be careful of any sharp edges! Serve your gorgeous peanut brittle in a candy dish, pack it into gift tins, or even crush it to sprinkle over ice cream for an extra sweet treat!
Easy Peanut Brittle - Sweet & Salty Crunch

- Serves: 12 People
- Prepare Time: 10 minutes
- Cooking Time: 25 minutes
- Calories: -
- Difficulty: Medium
Craving that irresistible crunch and sweet-and-salty flavor that only peanut brittle can deliver? You're in the right place! This classic candy, with its gorgeous golden hue and satisfying snap, is a nostalgic favorite that pops up everywhere from holiday tins to thoughtful homemade gifts. It might look fancy, but we promise you, making homemade peanut brittle is much easier than you think.
Forget sticky messes, burnt sugar, or brittle that breaks your teeth! Our fool-proof stovetop recipe simplifies the process, guiding you through each stage to ensure you get perfectly crunchy, buttery, and utterly delicious peanut brittle every single time. You only need a few basic pantry ingredients and, ideally, a candy thermometer (don't worry, we've got a simple backup if you don't have one!). Get ready to impress everyone with this sweet treat!
Ingredients
Directions
- Prep Your Pan & Measure Everything First things first: line a large rimmed baking sheet (about 13x18 inches) with parchment paper or a silicone baking mat.
- Do NOT use wax paper – it will melt! Next, measure out all your ingredients (peanuts, butter, baking soda, and vanilla) and place them in small bowls right next to your stovetop. This is crucial because once the sugar syrup is ready, things move fast. You can even lightly warm your baking sheet in a low oven (around 200°F/95°C) for a few minutes; this gives you a little extra time to spread the brittle later.
- Start the Sugar Syrup In a heavy-bottomed 3-quart saucepan (this helps prevent scorching), combine the granulated sugar, light corn syrup, and water. Stir gently with a heat-safe spatula until the sugar is fully moistened and combined. Place the saucepan over medium heat, stirring occasionally, until the sugar dissolves completely and the mixture begins to boil. Once it starts boiling, stop stirring. Clip your candy thermometer to the side of the pan, making sure the tip isn't touching the bottom.
- Cook to the First Stage (Soft-Crack) Let the syrup gently boil without stirring until it reaches approximately 250°F (121°C). This is often called the "soft-crack" stage. As it cooks, you'll notice the syrup becoming clear to a very pale gold, and the bubbles will be small and fast. The mixture will also thicken slightly. Stir only if absolutely necessary to prevent scorching on the bottom, but generally, let it do its thing.
- Add Peanuts and Cook to Hard-Crack Once the syrup hits 250°F, stir in your roasted peanuts and the salt. Continue to cook, stirring frequently to ensure the peanuts are evenly coated and don't stick to the bottom, until the mixture reaches exactly 300°F (149°C). This is the "hard-crack" stage, and it's where the magic happens! You'll see the color deepen to a beautiful rich, deep golden amber, and you'll smell a stronger, inviting nutty aroma.
- Warning: Pay close attention here! The temperature can jump very quickly from 290°F to 300°F and then to burnt in a matter of seconds. Stay right by the stove!
- Finish with Butter, Soda & Vanilla As soon as your thermometer hits 300°F, immediately remove the pan from the heat. Quickly stir in the butter and vanilla extract. Once those are incorporated, quickly stir in the baking soda. You'll instantly see a fascinating reaction: the mixture will foam up, lighten in color, and expand significantly. This is exactly what you want – those air bubbles are making your brittle wonderfully crunchy and delicate!
- Pour and Spread Quickly Without delay, immediately pour the hot, foamy mixture onto your prepared baking sheet. Using two heat-safe spatulas (or the back of a spoon), work quickly to spread the brittle into a thin, even layer. Aim for roughly ¼ inch thickness for that ideal crisp, snappy texture. Remember, thinner brittle equals crisper shards, while thicker brittle will give you chunkier, more substantial bites.
- Cool, Break & Serve Now for the hardest part: waiting! Let the peanut brittle cool completely and undisturbed at room temperature. This usually takes about 30 minutes, or until it's fully hard and brittle. Once it's solid, use your hands or a small mallet to break it into irregular, delicious pieces. Be careful of any sharp edges! Serve your gorgeous peanut brittle in a candy dish, pack it into gift tins, or even crush it to sprinkle over ice cream for an extra sweet treat!
You may also like

Hey there! I’m just someone who seriously loves good food and believes that cooking doesn’t have to be complicated to be amazing. Whether it’s a quick weeknight dinner or a cozy weekend meal, I’m all about sharing easy, tasty recipes that actually work.


