
Bake the Best Kueh Lapis - Easy Singapore Cake Recipe
Bake the Best Kueh Lapis - Easy Singapore Cake Recipe
- Serves: 12 People
- Prepare Time: 45 minutes
- Cooking Time: 2 hours 30
- Calories: -
- Difficulty: Medium
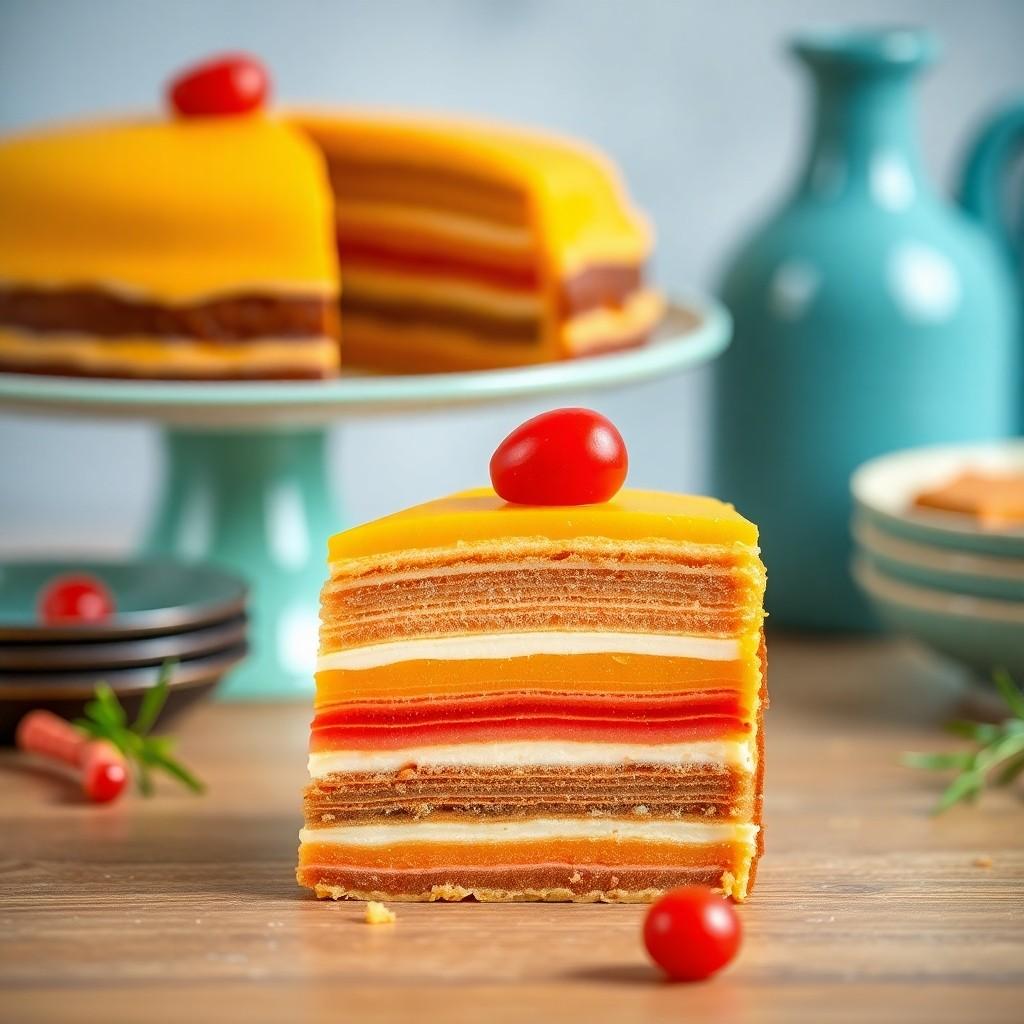
Ever wondered about the secret behind those mesmerizing, multi-layered cakes you see at special occasions? Get ready to uncover the magic of Kueh Lapis! This stunning cake recipe, a true jewel of Southeast Asian dessert recipes, isn't just a treat for the taste buds; it's a testament to culinary artistry. Originating from Indonesia and widely celebrated across regions like Brunei, Malaysia, and as a popular cake Singapore delight, Kueh Lapis (also known as Spekkoek) is more than just a sweet; it’s a symbol of celebration and precision baking.
Each vibrant layer tells a story, and while it might look intricate, our goal is to make this a truly delightful journey for you. The secret to an outstanding Kueh Lapis lies in the quality of your ingredients – think rich, creamy butter and fresh eggs – and a touch of patience. Forget about store-bought when you can create a masterpiece that will have everyone asking for your baking recipes! Whether you're a seasoned baker or just starting your adventure with easy recipes, this guide will walk you through creating a moist, fragrant, and perfectly layered Kueh Lapis that rivals any bakery. Let's get baking!
Ingredients
Directions
- Equipment You'll Need:
- 9x9 inch (23x23 cm) square baking pan
- Parchment paper
- Electric mixer (stand mixer or hand mixer)
- Spatula
- Small ladle or measuring cup for pouring layers
- Oven with broiler function
- Preparation:Preheat Oven & Prepare Pan: Preheat your oven to 350°F (175°C). Line the bottom of your 9x9 inch baking pan with parchment paper, allowing it to overhang slightly on two sides for easy removal. Lightly grease the sides of the pan.
- Cream Butter & Sugar: In a large mixing bowl, cream the softened butter and granulated sugar together using an electric mixer on medium-high speed until light, fluffy, and pale yellow (about 5-7 minutes). This step is crucial for incorporating air and achieving a tender texture.
- Add Eggs: Gradually add the 20 egg yolks, one at a time, beating well after each addition until fully incorporated. The mixture will become very rich and thick. Then, add the 4 whole eggs, one at a time, mixing until just combined.
- Fold in Wet Ingredients: Stir in the sweetened condensed milk, vanilla extract, and optional brandy/rum until well combined.
- Fold in Dry Ingredients: In a separate small bowl, whisk together the sifted all-purpose flour, Lapis spices, and salt. Gradually fold the dry ingredients into the wet batter in three additions, using a spatula. Mix gently until just combined; do not overmix, as this can lead to a tough cake.
- Divide Batter: Divide the batter into approximately 15-18 equal portions. This will ensure you have enough for thin, even layers. A small ladle or a ¼ cup measuring cup works well for this
- Layering & Baking:
- First Layer: Spoon one portion of batter into the prepared baking pan, spreading it evenly to cover the bottom. Tap the pan gently on the counter to remove any air bubbles.
- Bake First Layer: Place the pan in the preheated oven and bake for 6-8 minutes, or until the layer is golden brown and set. The exact time will depend on your oven.
- Broil for Browning (Optional but Recommended): For a deeper golden color, you can briefly use the broiler for 1-2 minutes. Watch it very closely to prevent burning!
- Second Layer & Beyond: Once the first layer is baked, remove the pan from the oven. Gently press down the surface of the baked layer with a flat-bottomed object (like another smaller pan or a wrapped brick) to compress it slightly. This helps create dense, even layers. Spoon the next portion of batter evenly over the baked layer. Return to the oven and bake for another 6-8 minutes, or until golden. Continue this process, baking and gently pressing each layer, until all the batter is used.
- Adjusting Oven Heat: After the first few layers, you might notice the cake browning too quickly. If so, reduce your oven temperature slightly to 325°F (160°C) or move the rack lower. The key is consistent, even heat.
- Final Layer: For the last layer, bake it for a bit longer, about 10-12 minutes, to ensure it's fully cooked through and has a beautiful golden top.
- Cooling: Once all layers are baked, remove the cake from the oven. Let it cool in the pan on a wire rack for at least 30 minutes before attempting to lift it out using the parchment paper overhang. Allow it to cool completely before slicing. This can take several hours, or even overnight.
- Troubleshooting Tips for Common Mistakes:
- Layers Burning: Your oven is too hot, or you're broiling for too long. Reduce the oven temperature or shorten broiler time. Also, ensure your pan isn't too close to the heating element.
- Uneven Layers: This usually happens if you're not spreading the batter thinly and evenly enough, or if you're using inconsistent amounts for each layer. Use a measured amount for each layer and spread quickly.
- Cake Too Dry/Crumbly: Overmixing the flour can develop too much gluten, making the cake tough. Ensure you're not overbaking each layer; they should be just set and golden.
- Layers Separating: This can occur if the previous layer wasn't pressed down properly, or if the new batter isn't spread evenly, creating gaps. Make sure to gently compress each layer.
Bake the Best Kueh Lapis - Easy Singapore Cake Recipe
- Serves: 12 People
- Prepare Time: 45 minutes
- Cooking Time: 2 hours 30
- Calories: -
- Difficulty: Medium
Ever wondered about the secret behind those mesmerizing, multi-layered cakes you see at special occasions? Get ready to uncover the magic of Kueh Lapis! This stunning cake recipe, a true jewel of Southeast Asian dessert recipes, isn't just a treat for the taste buds; it's a testament to culinary artistry. Originating from Indonesia and widely celebrated across regions like Brunei, Malaysia, and as a popular cake Singapore delight, Kueh Lapis (also known as Spekkoek) is more than just a sweet; it’s a symbol of celebration and precision baking.
Each vibrant layer tells a story, and while it might look intricate, our goal is to make this a truly delightful journey for you. The secret to an outstanding Kueh Lapis lies in the quality of your ingredients – think rich, creamy butter and fresh eggs – and a touch of patience. Forget about store-bought when you can create a masterpiece that will have everyone asking for your baking recipes! Whether you're a seasoned baker or just starting your adventure with easy recipes, this guide will walk you through creating a moist, fragrant, and perfectly layered Kueh Lapis that rivals any bakery. Let's get baking!
Ingredients
Directions
- Equipment You'll Need:
- 9x9 inch (23x23 cm) square baking pan
- Parchment paper
- Electric mixer (stand mixer or hand mixer)
- Spatula
- Small ladle or measuring cup for pouring layers
- Oven with broiler function
- Preparation:Preheat Oven & Prepare Pan: Preheat your oven to 350°F (175°C). Line the bottom of your 9x9 inch baking pan with parchment paper, allowing it to overhang slightly on two sides for easy removal. Lightly grease the sides of the pan.
- Cream Butter & Sugar: In a large mixing bowl, cream the softened butter and granulated sugar together using an electric mixer on medium-high speed until light, fluffy, and pale yellow (about 5-7 minutes). This step is crucial for incorporating air and achieving a tender texture.
- Add Eggs: Gradually add the 20 egg yolks, one at a time, beating well after each addition until fully incorporated. The mixture will become very rich and thick. Then, add the 4 whole eggs, one at a time, mixing until just combined.
- Fold in Wet Ingredients: Stir in the sweetened condensed milk, vanilla extract, and optional brandy/rum until well combined.
- Fold in Dry Ingredients: In a separate small bowl, whisk together the sifted all-purpose flour, Lapis spices, and salt. Gradually fold the dry ingredients into the wet batter in three additions, using a spatula. Mix gently until just combined; do not overmix, as this can lead to a tough cake.
- Divide Batter: Divide the batter into approximately 15-18 equal portions. This will ensure you have enough for thin, even layers. A small ladle or a ¼ cup measuring cup works well for this
- Layering & Baking:
- First Layer: Spoon one portion of batter into the prepared baking pan, spreading it evenly to cover the bottom. Tap the pan gently on the counter to remove any air bubbles.
- Bake First Layer: Place the pan in the preheated oven and bake for 6-8 minutes, or until the layer is golden brown and set. The exact time will depend on your oven.
- Broil for Browning (Optional but Recommended): For a deeper golden color, you can briefly use the broiler for 1-2 minutes. Watch it very closely to prevent burning!
- Second Layer & Beyond: Once the first layer is baked, remove the pan from the oven. Gently press down the surface of the baked layer with a flat-bottomed object (like another smaller pan or a wrapped brick) to compress it slightly. This helps create dense, even layers. Spoon the next portion of batter evenly over the baked layer. Return to the oven and bake for another 6-8 minutes, or until golden. Continue this process, baking and gently pressing each layer, until all the batter is used.
- Adjusting Oven Heat: After the first few layers, you might notice the cake browning too quickly. If so, reduce your oven temperature slightly to 325°F (160°C) or move the rack lower. The key is consistent, even heat.
- Final Layer: For the last layer, bake it for a bit longer, about 10-12 minutes, to ensure it's fully cooked through and has a beautiful golden top.
- Cooling: Once all layers are baked, remove the cake from the oven. Let it cool in the pan on a wire rack for at least 30 minutes before attempting to lift it out using the parchment paper overhang. Allow it to cool completely before slicing. This can take several hours, or even overnight.
- Troubleshooting Tips for Common Mistakes:
- Layers Burning: Your oven is too hot, or you're broiling for too long. Reduce the oven temperature or shorten broiler time. Also, ensure your pan isn't too close to the heating element.
- Uneven Layers: This usually happens if you're not spreading the batter thinly and evenly enough, or if you're using inconsistent amounts for each layer. Use a measured amount for each layer and spread quickly.
- Cake Too Dry/Crumbly: Overmixing the flour can develop too much gluten, making the cake tough. Ensure you're not overbaking each layer; they should be just set and golden.
- Layers Separating: This can occur if the previous layer wasn't pressed down properly, or if the new batter isn't spread evenly, creating gaps. Make sure to gently compress each layer.
The following nutritional values are per serving (one piece of cake) Calories ~450-550 kcal Carbohydrates ~40-50g Protein ~8-10g Fat ~30-40g Time-Saving Tools & Ingredients Sometimes, a little help in the kitchen goes a long way, especially when you're tackling a masterpiece like Kueh Lapis. Here are a few recommendations to make your baking journey smoother and quicker: Problem: Creaming butter and sugar, and then slowly incorporating a dozen (or more!) egg yolks can be a real arm workout and time-consuming if done by hand. Achieving that light, airy texture is crucial but tough. Problem: Uneven heat distribution or a sticky pan can lead to layers burning in some spots and sticking in others, making removal difficult and presentation messy. Cleaning up burnt bits is also a chore. Problem: Measuring out individual spices like cardamom, cinnamon, and cloves can be fiddly and time-consuming, especially if you're aiming for a precise, consistent flavor profile. Click any ingredient for detailed nutritional information:Recipe Nutritional Values
Additional Information
Recipe Success Tips
Ingredient Substitutions & Variations
Cultural Variations
Make-Ahead & Storage Instructions
Frequently Asked Questions
Recommended Kitchen Tools
Stand Mixer with Paddle Attachment
Agitate: Without consistent mixing, your batter might be lumpy or not aerated enough, leading to a denser, less delicate Kueh Lapis. Uneven mixing also means you're spending more energy and effort than necessary.
Solution: A stand mixer handles the heavy lifting, creaming ingredients perfectly and consistently. This frees you up to prep other ingredients or simply relax a bit, ensuring a smooth, well-aerated batter with minimal effort and in a fraction of the time.Good Quality, Non-Stick Square Baking Pan (8x8 or 9x9 inches)
Agitate: A pan that doesn't release easily can ruin your beautifully layered cake when you try to unmold it. Plus, if the heat isn't even, some layers might be undercooked while others are overdone, creating a frustrating experience.
Solution: Investing in a heavy-duty, non-stick pan with straight sides ensures even heat distribution for perfectly cooked layers and easy release. This saves you time on both baking and cleanup, guaranteeing a pristine Kueh Lapis every time.Pre-Measured Spice Mixes
Agitate: Fumbling with tiny spoons and multiple spice jars can interrupt your flow and add unnecessary minutes to your prep. Plus, getting the balance wrong can throw off the entire flavor of your Kueh Lapis.
Solution: Consider buying or creating your own pre-mixed blend of the traditional Kueh Lapis spices. This way, you just scoop and add, ensuring perfect consistency and saving precious minutes during the most intensive part of the baking process.Calories per Ingredient
You may also like


Hey there! I’m just someone who seriously loves good food and believes that cooking doesn’t have to be complicated to be amazing. Whether it’s a quick weeknight dinner or a cozy weekend meal, I’m all about sharing easy, tasty recipes that actually work.

