
Oreshki Walnut Cookies - Easy Sweet Treats & Cookie Recipe
Oreshki Walnut Cookies - Easy Sweet Treats & Cookie Recipe

- Serves: 45 People
- Prepare Time: 30 minutes
- Cooking Time: 45-60 minut
- Calories: -
- Difficulty: Medium
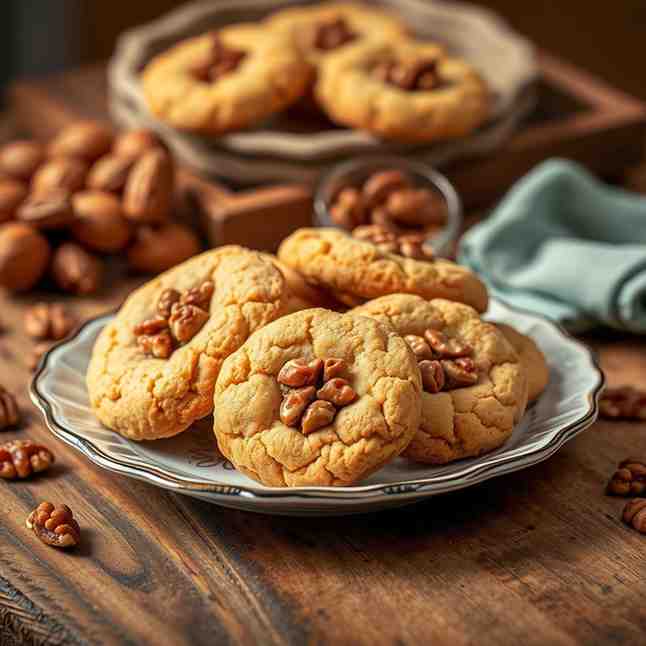
Hey there, cookie lovers! If you’re on the hunt for delicious homemade cookies, quick easy sweet snacks, or something truly special to impress your friends, you’ve hit the jackpot. Get ready to discover Oreshki Walnut Cookies, those adorable, bite-sized sandwich cookies that look just like little walnuts. Each one boasts a crisp, buttery shell cradling a creamy, dreamy caramel-like dulce de leche filling. It's truly one of the best baked cookies you'll ever try!
These charming treats aren't just pretty faces; they’re a beloved part of Slavic and Armenian holiday traditions, often bringing smiles and warmth to family gatherings. They’re sturdy, utterly delicious, and perfectly sized for a single bite of pure joy. If you love trying new homemade cookies and cute finger-food desserts, these are a must-make. They’re fantastic sweet treat cookies, perfect for any occasion, and surprisingly easy to make sweet treats once you get the hang of it. So, let's dive into the world of Oreshki and add a new favorite to your recipes and ingredients list!
Ingredients
Directions
- Make the Dough
- In a large mixing bowl, combine the granulated sugar and egg yolks (or whole eggs) using a hand mixer or stand mixer. Beat until the mixture is pale yellow and slightly thick.
- Add the softened butter, vanilla extract, baking soda, and white vinegar to the egg mixture. Beat until well combined and creamy.
- Gradually fold in the all-purpose flour, about a cup at a time, mixing on low speed or by hand until just combined. Be careful not to overmix.
- The dough should be soft but not sticky, easy to handle, and pliable. If it feels too dry and crumbly, add a tiny splash of milk (½ teaspoon at a time). If it’s too sticky, sprinkle in a tablespoon of flour.
- Chill the Dough & Portion Balls
- Shape the dough into a disk, wrap it tightly in plastic wrap, and chill in the refrigerator for 30-60 minutes. This chilling time firms up the dough, making it much easier to handle and improving the flavor.
- Once chilled, use a kitchen scale to portion the dough into small, uniform balls, ideally 6-7 grams each for most standard molds. If you don't have a scale, aim for rounded ½ teaspoon-sized balls. Consistency in size is key for even baking!
- Pro Tip: Pre-portion all your dough balls onto a baking sheet lined with parchment paper before you start cooking. This will make the cooking process much faster and smoother.
- Cook the Walnut Shells
- Preheat the mold: If using a stovetop oreshnitsa, preheat it over medium heat for several minutes. You can test if it’s hot enough by placing a tiny piece of dough inside – it should sizzle gently. For an electric oreshki maker, preheat according to the manufacturer’s instructions until the indicator light signals it's ready.
- Fill the mold: Place one dough ball into each cavity of the preheated mold. Close the mold firmly but gently – you want enough pressure to spread the dough into the shape without it flooding excessively out the sides.
- Cook time & visual cues:
- Stovetop: Cook for approximately 1-2 minutes per side, flipping the mold halfway through. Look for a beautiful golden-brown color on the shells.
- Electric: Cook for about 2-3 minutes total, or until the shells are golden and crisp.
- Unmolding & trimming: Carefully open the mold and gently release the warm shells. A thin spatula or small knife can help if they stick. Trim any excess dough from the edges using a small knife.
- Don't throw away these trimmings! Save the crumbs; they’re perfect for adding to your filling later.
- Prepare the Dulce de Leche Filling
- Option A – Store-bought dulce de leche (fastest): If your dulce de leche is too thick, warm it slightly in the microwave (in 10-second bursts) or over a double boiler until it’s more pliable. In a bowl, combine the dulce de leche with the softened butter and optional softened cream cheese. Stir vigorously until the mixture is completely smooth and uniform.
- Option B – Homemade dulce de leche overview (brief): If you're feeling ambitious, you can make dulce de leche at home. Safe methods include oven-baking a can of sweetened condensed milk, using a slow cooker, an Instant Pot, or simmering sealed cans carefully in water.
- Safety first! Always ensure cans are fully submerged if simmering, and allow them to cool completely before opening to prevent injury.
- Once your filling base is ready, stir in the saved cookie crumbs from trimming the shells, or the finely chopped toasted walnuts/pecans, if desired.
- The filling should be thick enough to hold its shape when scooped but still easily spreadable. If it's too runny, add more crumbs or chill it for a bit. If it's too thick, a tiny splash of milk or cream can loosen it up.
- Fill & Assemble the Cookies
- Take one cookie shell half and spoon a small amount of the dulce de leche filling into its hollow. Don't overfill; leave a little room so it doesn't ooze out too much when pressed.
- Place another cookie shell half on top, pressing them gently together to form a whole walnut. Wipe away any excess filling that may squeeze out the sides.
- Arrange the assembled cookies on a tray, either seam-side up or on their sides.
- Rest time is crucial! Let the filled cookies rest in the refrigerator for several hours, ideally 3-4 hours or even overnight. This allows the filling to set properly and, beautifully, softens the cookie shells slightly, giving them that perfect, melt-in-your-mouth texture.
Oreshki Walnut Cookies - Easy Sweet Treats & Cookie Recipe

- Serves: 45 People
- Prepare Time: 30 minutes
- Cooking Time: 45-60 minut
- Calories: -
- Difficulty: Medium
Hey there, cookie lovers! If you’re on the hunt for delicious homemade cookies, quick easy sweet snacks, or something truly special to impress your friends, you’ve hit the jackpot. Get ready to discover Oreshki Walnut Cookies, those adorable, bite-sized sandwich cookies that look just like little walnuts. Each one boasts a crisp, buttery shell cradling a creamy, dreamy caramel-like dulce de leche filling. It's truly one of the best baked cookies you'll ever try!
These charming treats aren't just pretty faces; they’re a beloved part of Slavic and Armenian holiday traditions, often bringing smiles and warmth to family gatherings. They’re sturdy, utterly delicious, and perfectly sized for a single bite of pure joy. If you love trying new homemade cookies and cute finger-food desserts, these are a must-make. They’re fantastic sweet treat cookies, perfect for any occasion, and surprisingly easy to make sweet treats once you get the hang of it. So, let's dive into the world of Oreshki and add a new favorite to your recipes and ingredients list!
Ingredients
Directions
- Make the Dough
- In a large mixing bowl, combine the granulated sugar and egg yolks (or whole eggs) using a hand mixer or stand mixer. Beat until the mixture is pale yellow and slightly thick.
- Add the softened butter, vanilla extract, baking soda, and white vinegar to the egg mixture. Beat until well combined and creamy.
- Gradually fold in the all-purpose flour, about a cup at a time, mixing on low speed or by hand until just combined. Be careful not to overmix.
- The dough should be soft but not sticky, easy to handle, and pliable. If it feels too dry and crumbly, add a tiny splash of milk (½ teaspoon at a time). If it’s too sticky, sprinkle in a tablespoon of flour.
- Chill the Dough & Portion Balls
- Shape the dough into a disk, wrap it tightly in plastic wrap, and chill in the refrigerator for 30-60 minutes. This chilling time firms up the dough, making it much easier to handle and improving the flavor.
- Once chilled, use a kitchen scale to portion the dough into small, uniform balls, ideally 6-7 grams each for most standard molds. If you don't have a scale, aim for rounded ½ teaspoon-sized balls. Consistency in size is key for even baking!
- Pro Tip: Pre-portion all your dough balls onto a baking sheet lined with parchment paper before you start cooking. This will make the cooking process much faster and smoother.
- Cook the Walnut Shells
- Preheat the mold: If using a stovetop oreshnitsa, preheat it over medium heat for several minutes. You can test if it’s hot enough by placing a tiny piece of dough inside – it should sizzle gently. For an electric oreshki maker, preheat according to the manufacturer’s instructions until the indicator light signals it's ready.
- Fill the mold: Place one dough ball into each cavity of the preheated mold. Close the mold firmly but gently – you want enough pressure to spread the dough into the shape without it flooding excessively out the sides.
- Cook time & visual cues:
- Stovetop: Cook for approximately 1-2 minutes per side, flipping the mold halfway through. Look for a beautiful golden-brown color on the shells.
- Electric: Cook for about 2-3 minutes total, or until the shells are golden and crisp.
- Unmolding & trimming: Carefully open the mold and gently release the warm shells. A thin spatula or small knife can help if they stick. Trim any excess dough from the edges using a small knife.
- Don't throw away these trimmings! Save the crumbs; they’re perfect for adding to your filling later.
- Prepare the Dulce de Leche Filling
- Option A – Store-bought dulce de leche (fastest): If your dulce de leche is too thick, warm it slightly in the microwave (in 10-second bursts) or over a double boiler until it’s more pliable. In a bowl, combine the dulce de leche with the softened butter and optional softened cream cheese. Stir vigorously until the mixture is completely smooth and uniform.
- Option B – Homemade dulce de leche overview (brief): If you're feeling ambitious, you can make dulce de leche at home. Safe methods include oven-baking a can of sweetened condensed milk, using a slow cooker, an Instant Pot, or simmering sealed cans carefully in water.
- Safety first! Always ensure cans are fully submerged if simmering, and allow them to cool completely before opening to prevent injury.
- Once your filling base is ready, stir in the saved cookie crumbs from trimming the shells, or the finely chopped toasted walnuts/pecans, if desired.
- The filling should be thick enough to hold its shape when scooped but still easily spreadable. If it's too runny, add more crumbs or chill it for a bit. If it's too thick, a tiny splash of milk or cream can loosen it up.
- Fill & Assemble the Cookies
- Take one cookie shell half and spoon a small amount of the dulce de leche filling into its hollow. Don't overfill; leave a little room so it doesn't ooze out too much when pressed.
- Place another cookie shell half on top, pressing them gently together to form a whole walnut. Wipe away any excess filling that may squeeze out the sides.
- Arrange the assembled cookies on a tray, either seam-side up or on their sides.
- Rest time is crucial! Let the filled cookies rest in the refrigerator for several hours, ideally 3-4 hours or even overnight. This allows the filling to set properly and, beautifully, softens the cookie shells slightly, giving them that perfect, melt-in-your-mouth texture.
You may also like


Hey there! I’m just someone who seriously loves good food and believes that cooking doesn’t have to be complicated to be amazing. Whether it’s a quick weeknight dinner or a cozy weekend meal, I’m all about sharing easy, tasty recipes that actually work.

