
Armenian Manti Dumplings with Yogurt & Broth
Armenian Manti Dumplings with Yogurt & Broth
- Serves: 4 People
- Prepare Time: 60 minutes
- Cooking Time: 60 minutes
- Calories: -
- Difficulty: Easy
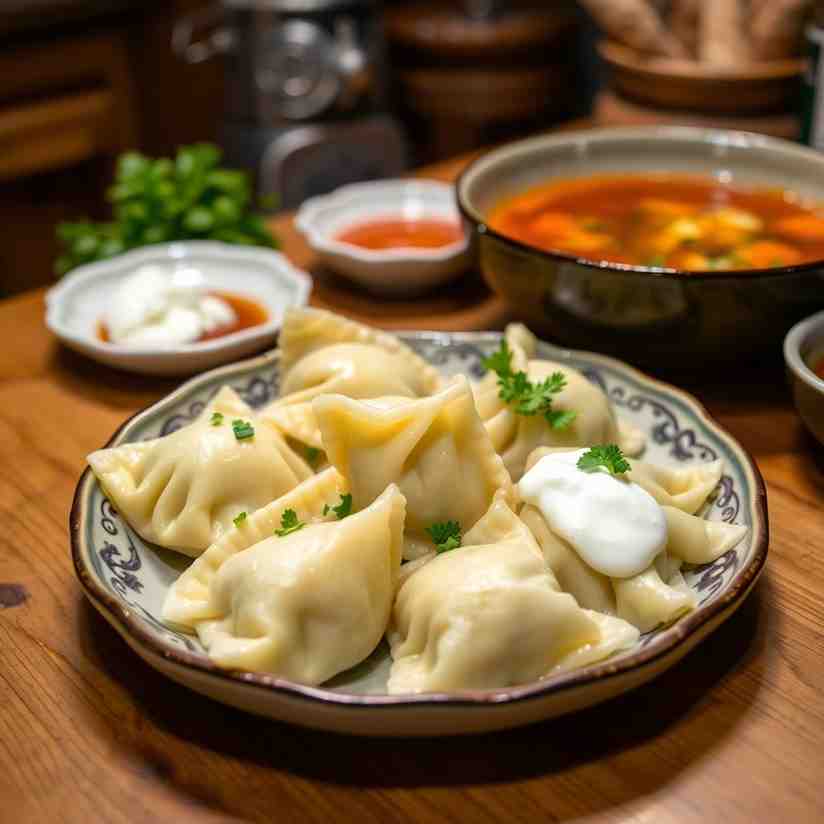
Welcome to a culinary journey into the heart of Armenian tradition with our definitive recipe for Armenian Manti, also known as Sini Manti! Imagine tender, canoe-shaped Armenian dumplings baked to a golden crisp, then finished in a rich, savory tomato-chicken broth. Each bite is a symphony of textures and flavors, especially when crowned with cool, garlicky yogurt and a sprinkle of vibrant sumac.
This isn't just any dumpling recipe; it's an experience. You'll love the crispy edges giving way to chewy centers, the warmth of the aromatic broth contrasting with the tangy yogurt. While it feels like a special-occasion dish, our recipe is adapted for your US home kitchen, offering make-ahead options to ease your commitment. Get ready to create a truly memorable meal that brings traditional Armenian flavors right to your table. Whether you're a beginner or an experienced baker, we've broken down every step to make this beautiful dish accessible and enjoyable.
Ingredients
Directions
- Make the Dough
- In a large mixing bowl (or stand mixer), combine the wet ingredients (eggs, water, olive oil) and salt.
- Gradually work in the all-purpose flour until a smooth, non-sticky dough forms.
- Knead until the dough is soft and elastic, but not tacky. Adjust with a spoonful of extra flour or water if needed.
- Cover the dough and let it rest for at least 30 minutes. This makes it much easier to roll later.
- Mix the Filling
- In a separate bowl, combine the ground meat, very finely minced onion, fresh flat-leaf parsley, salt, black pepper, paprika, allspice, and optional Aleppo pepper or chili. Add a tiny bit of tomato paste or sauce for moisture.
- Mix gently until all ingredients are evenly combined, being careful not to overwork the meat.
- Chill the filling in the refrigerator while the dough rests. This helps it firm up and makes it easier to pinch into dumplings.
- Roll and Cut the Dough
- Divide the rested dough into manageable pieces for easier handling.
With a rolling pin: Roll the dough out to "credit-card thin" (about 1/16th of an inch), rotating and dusting lightly with flour as needed to prevent sticking.- Using a sharp knife or pizza cutter, cut the rolled dough into 1½–2-inch squares. Trim any uneven edges.
- Fill and Shape the Dumplings
- Place about ½ teaspoon of the meat filling in the center of each dough square.
- To form the canoe or boat shape, pinch two opposite corners of the square firmly together over the filling. Ensure the dough at the ends is as thin as around the filling.
- Stand the shaped dumplings upright in your baking pan. Pack them closely in neat rows, leaving just a hair of space between each one to prevent tipping.
- First Bake: Crisp the Dumplings
- Preheat your oven to 375–400°F (check your oven's sweet spot for even browning).
- Generously butter or oil a large, light-colored baking pan or Dutch oven.
- Arrange the manti upright in a single, tight layer in the prepared pan.
- Bake for 35–40 minutes, or until the edges of the dumplings are golden and crisp. You can check one dumpling inside to ensure the dough is mostly cooked through.
- Make the Broth
- While the manti are in their first bake, prepare the broth. In a saucepan, combine chicken or beef broth, tomato sauce or paste, minced garlic, olive oil or butter, salt, pepper, and optional smoked paprika or Aleppo pepper.
- Simmer gently for 5–10 minutes to allow the flavors to meld.
- Taste and adjust seasoning (salt, pepper, and heat) as desired.
- Keep the broth hot, but not at a hard boil.
- Finish the Manti in Broth
- Carefully remove the pan of baked manti from the oven.
- Pour the hot broth around the dumplings so it comes about ½–¾ up their sides.
- Return the pan to the oven for a short second bake, about 10–15 minutes. The manti will absorb some of the broth, plump slightly, and a shallow layer of broth should remain at the bottom of the pan.
- Remove from the oven and let rest for a few minutes to allow everything to settle and for the flavors to fully meld.
- Make the Garlicky Yogurt & Pepper Oil
- In a small bowl, stir together the plain full-fat Greek yogurt (or plain yogurt) with minced garlic and salt. If the yogurt is too thick, thin it with just a spoon of water.
- For the optional pepper oil, briefly warm a small amount of olive oil with Aleppo pepper or chili flakes for 30–60 seconds, then remove from heat.
- Serve
- Ladle some of the broth and plump Armenian dumplings into wide bowls.
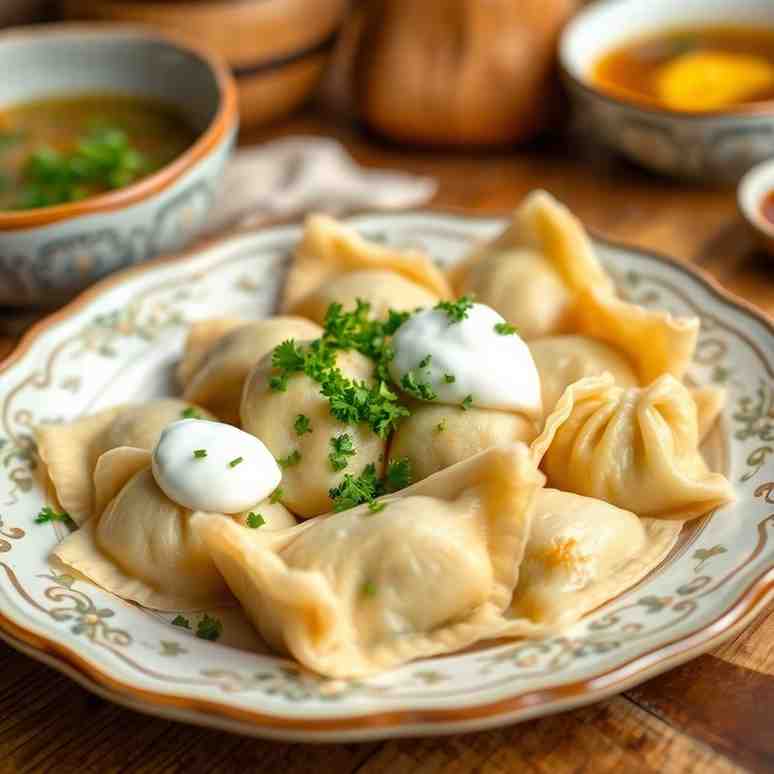
- Top generously with a dollop of the cold garlicky yogurt.
- Sprinkle with sumac for a tangy finish.
- Drizzle with the optional pepper oil.
- Garnish with extra fresh parsley or dried mint, if desired. Serve immediately and enjoy!
Armenian Manti Dumplings with Yogurt & Broth
- Serves: 4 People
- Prepare Time: 60 minutes
- Cooking Time: 60 minutes
- Calories: -
- Difficulty: Easy
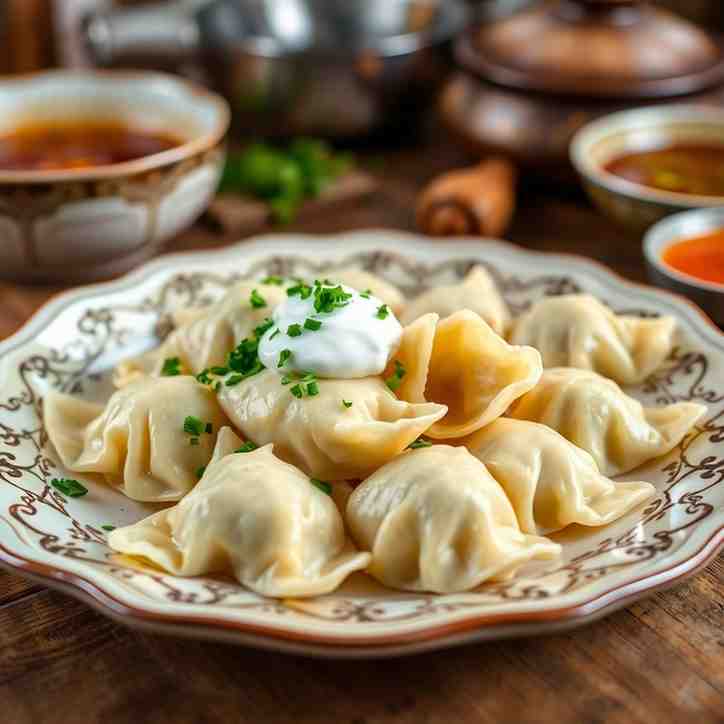
Welcome to a culinary journey into the heart of Armenian tradition with our definitive recipe for Armenian Manti, also known as Sini Manti! Imagine tender, canoe-shaped Armenian dumplings baked to a golden crisp, then finished in a rich, savory tomato-chicken broth. Each bite is a symphony of textures and flavors, especially when crowned with cool, garlicky yogurt and a sprinkle of vibrant sumac.
This isn't just any dumpling recipe; it's an experience. You'll love the crispy edges giving way to chewy centers, the warmth of the aromatic broth contrasting with the tangy yogurt. While it feels like a special-occasion dish, our recipe is adapted for your US home kitchen, offering make-ahead options to ease your commitment. Get ready to create a truly memorable meal that brings traditional Armenian flavors right to your table. Whether you're a beginner or an experienced baker, we've broken down every step to make this beautiful dish accessible and enjoyable.
Ingredients
Directions
- Make the Dough
- In a large mixing bowl (or stand mixer), combine the wet ingredients (eggs, water, olive oil) and salt.
- Gradually work in the all-purpose flour until a smooth, non-sticky dough forms.
- Knead until the dough is soft and elastic, but not tacky. Adjust with a spoonful of extra flour or water if needed.
- Cover the dough and let it rest for at least 30 minutes. This makes it much easier to roll later.
- Mix the Filling
- In a separate bowl, combine the ground meat, very finely minced onion, fresh flat-leaf parsley, salt, black pepper, paprika, allspice, and optional Aleppo pepper or chili. Add a tiny bit of tomato paste or sauce for moisture.
- Mix gently until all ingredients are evenly combined, being careful not to overwork the meat.
- Chill the filling in the refrigerator while the dough rests. This helps it firm up and makes it easier to pinch into dumplings.
- Roll and Cut the Dough
- Divide the rested dough into manageable pieces for easier handling.
With a rolling pin: Roll the dough out to "credit-card thin" (about 1/16th of an inch), rotating and dusting lightly with flour as needed to prevent sticking.- Using a sharp knife or pizza cutter, cut the rolled dough into 1½–2-inch squares. Trim any uneven edges.
- Fill and Shape the Dumplings
- Place about ½ teaspoon of the meat filling in the center of each dough square.
- To form the canoe or boat shape, pinch two opposite corners of the square firmly together over the filling. Ensure the dough at the ends is as thin as around the filling.
- Stand the shaped dumplings upright in your baking pan. Pack them closely in neat rows, leaving just a hair of space between each one to prevent tipping.
- First Bake: Crisp the Dumplings
- Preheat your oven to 375–400°F (check your oven's sweet spot for even browning).
- Generously butter or oil a large, light-colored baking pan or Dutch oven.
- Arrange the manti upright in a single, tight layer in the prepared pan.
- Bake for 35–40 minutes, or until the edges of the dumplings are golden and crisp. You can check one dumpling inside to ensure the dough is mostly cooked through.
- Make the Broth
- While the manti are in their first bake, prepare the broth. In a saucepan, combine chicken or beef broth, tomato sauce or paste, minced garlic, olive oil or butter, salt, pepper, and optional smoked paprika or Aleppo pepper.
- Simmer gently for 5–10 minutes to allow the flavors to meld.
- Taste and adjust seasoning (salt, pepper, and heat) as desired.
- Keep the broth hot, but not at a hard boil.
- Finish the Manti in Broth
- Carefully remove the pan of baked manti from the oven.
- Pour the hot broth around the dumplings so it comes about ½–¾ up their sides.
- Return the pan to the oven for a short second bake, about 10–15 minutes. The manti will absorb some of the broth, plump slightly, and a shallow layer of broth should remain at the bottom of the pan.
- Remove from the oven and let rest for a few minutes to allow everything to settle and for the flavors to fully meld.
- Make the Garlicky Yogurt & Pepper Oil
- In a small bowl, stir together the plain full-fat Greek yogurt (or plain yogurt) with minced garlic and salt. If the yogurt is too thick, thin it with just a spoon of water.
- For the optional pepper oil, briefly warm a small amount of olive oil with Aleppo pepper or chili flakes for 30–60 seconds, then remove from heat.
- Serve
- Ladle some of the broth and plump Armenian dumplings into wide bowls.
- Top generously with a dollop of the cold garlicky yogurt.
- Sprinkle with sumac for a tangy finish.
- Drizzle with the optional pepper oil.
- Garnish with extra fresh parsley or dried mint, if desired. Serve immediately and enjoy!
The following nutritional values are per serving (one piece of cake) Making Armenian Manti is a labor of love, but that doesn't mean you can't smarten up your kitchen routine! Here are some savvy tools and ingredient choices that can help you shave off some time without sacrificing tradition or flavor. Problem: Rolling dough credit-card thin by hand takes time, practice, and can be quite the arm workout. Uneven thickness can lead to inconsistent cooking and texture in your delicate dumplings. Problem: Kneading dough by hand until it's smooth and elastic can be tiring and time-consuming, especially if you're not used to it. Problem: Finely mincing an onion by hand can be tedious, time-consuming, and often leads to watery eyes. Problem: Making homemade chicken or beef broth from scratch adds hours to your total prep time, requiring simmering bones and straining. Click any ingredient for detailed nutritional information:Recipe Nutritional Values
Additional Information
Recipe Success Tips
Ingredient Substitutions & Variations
Make-Ahead & Storage Instructions
Troubleshooting & Expert Tips
Cultural Context & History
Frequently Asked Questions
Recommended Kitchen Tools
Time-Saving Tools & Ingredients
Agitate: Spending precious minutes wrestling with a rolling pin can make this "project" recipe feel even more daunting, and nobody wants tough or undercooked manti.
Solution: A pasta roller attachment for your stand mixer (or a standalone pasta machine) is a game-changer! It makes quick work of achieving perfectly thin, uniform dough sheets with minimal effort, ensuring every dumpling cooks beautifully and freeing up your hands for shaping.Time-Saving Tools & Ingredients
Agitate: Inconsistent kneading can result in a dough that's either too tough or too sticky, making it difficult to roll and shape your manti.
Solution: A stand mixer with a dough hook handles all the heavy lifting of kneading, ensuring a perfectly smooth, elastic dough with minimal effort on your part. This means less hand fatigue and more consistent results, allowing you to focus on the fun parts of the recipe.Time-Saving Tools & Ingredients
Agitate: Large, uneven pieces of onion in your filling can throw off the texture and flavor balance of your delicate manti.
Solution: A food processor can quickly and evenly mince your onion to the perfect, fine consistency in seconds. This saves your eyes and ensures a smooth, well-blended meat filling that will cook perfectly inside each tiny dumpling.Time-Saving Tools & Ingredients
Agitate: While homemade broth is wonderful, it's not always practical for a busy weeknight or a full weekend of cooking, and skipping it entirely would mean missing out on a crucial flavor component.
Solution: Opt for a high-quality, low-sodium store-bought chicken or beef broth. It provides a flavorful, ready-to-use base for your manti's signature tomato broth, allowing you to achieve delicious results without the extensive time commitment of making it from scratch.Calories per Ingredient
You may also like


Hey there! I’m just someone who seriously loves good food and believes that cooking doesn’t have to be complicated to be amazing. Whether it’s a quick weeknight dinner or a cozy weekend meal, I’m all about sharing easy, tasty recipes that actually work.


