
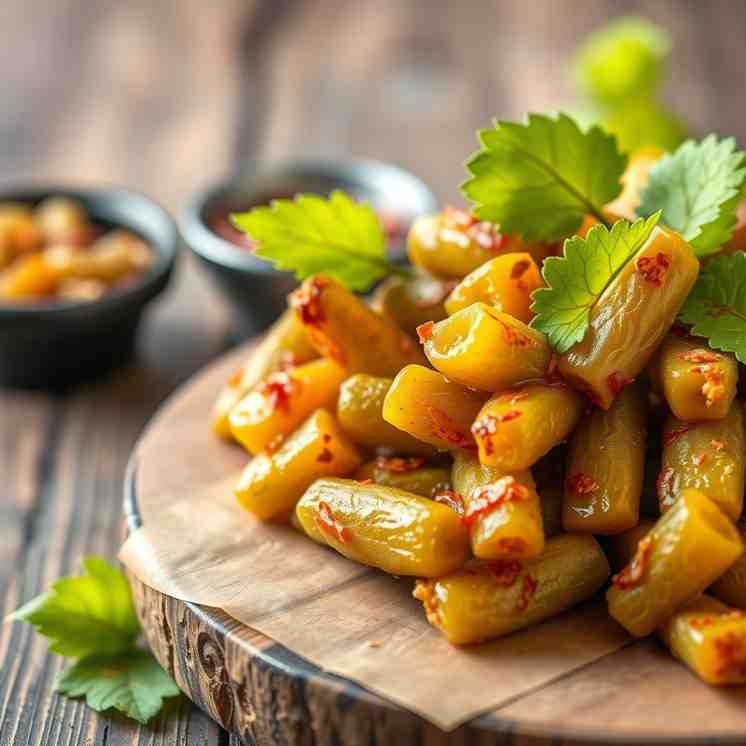
Crispy Pickles with Grape Leaves
Crispy Pickles with Grape Leaves

- Serves: 6 People
- Prepare Time: 30 minutes
- Cooking Time: 15 minutes
- Calories: -
- Difficulty: Medium
Ever wonder how to get that perfect, satisfying crunch in your homemade dill pickles? Forget those sad, soggy spears! We're diving into an old-school secret that really works: pickles with grape leaves. This traditional trick isn't just folklore; it's backed by science and has been used for generations to ensure your pickled cucumbers stay wonderfully firm.
In this guide, you'll discover everything about using grape leaves in your pickle jar – from the "why" behind their magical crisping power to a comprehensive, easy-to-follow recipe. Whether you're a seasoned canner or just starting your pickling journey, get ready to master the art of making crispy dill pickles that will be the envy of every potluck. Let's get those jars packed and ready for some serious crunch!
Ingredients
Directions
- Prep the Cucumbers
- Wash and sort: Thoroughly wash your cucumbers under cold running water. Sort through them, discarding any that are soft, damaged, or have blemishes.
- Ice-water soak: For extra crispness, soak your washed cucumbers in a large bowl of ice water for at least 30 minutes. This helps firm them up before pickling.
- Trim blossom ends: This is a crucial step! The blossom end (the end opposite the stem) contains enzymes that can cause pickles to soften. Trim about 1/16th of an inch off this end.
- Prep the Grape Leaves & Jars
- Rinse leaves: Rinse your chosen grape leaves (fresh, thawed frozen, or well-rinsed preserved) under cold water and trim any thick stems.
- Sterilize jars: Sterilize your Mason jars according to current guidelines. A common method is to wash jars in hot, soapy water, rinse them well, and then keep them hot (e.g., in simmering water or a hot dishwasher cycle) until ready to fill. Remember to check a reputable canning source like NCHFP for full details if you're unsure.
- Make the Brine
- Combine ingredients: In a large non-reactive pot, combine 4 cups of water, 4 cups of 5% white vinegar, and 1/4 cup of pickling salt. If using, add 1-2 tablespoons of sugar.
- Bring to a boil: Heat the mixture over medium-high heat, stirring until the salt (and sugar) is fully dissolved.
- Keep hot: Once boiling, reduce heat to low and keep the brine hot until you are ready to fill the jars.
- Pack the Jars (Including the Grape Leaves)
- Add grape leaves: Place 1-2 small grape leaves (or pieces of larger leaves) at the bottom and/or along the sides of each sterilized jar. This ensures good contact with the cucumbers.
- Add flavorings: Distribute your fresh dill sprigs or heads, peeled garlic cloves, mustard seeds, peppercorns, and red pepper flakes evenly among the jars.
- Pack cucumbers: Pack the cucumbers tightly into each jar, standing them upright if possible. Avoid crushing them. Leave about 1/2 inch of headspace (the space between the top of the food and the rim of the jar).
- Add Brine & Remove Air Bubbles
- Pour hot brine: Carefully pour the hot brine over the packed cucumbers, ensuring they are fully submerged. Maintain the 1/2 inch headspace.
- Remove air bubbles: Use a non-metallic utensil (like a plastic spatula or chopstick) to gently dislodge any trapped air bubbles by running it around the inside of the jar. Add more hot brine if needed to maintain headspace.
- Wipe rims, apply lids: Wipe the rims of the jars clean with a damp paper towel. Center a new, pre-warmed lid on each jar, and screw on the bands fingertip tight (just until resistance is met, then a slight turn more).
- Process the Jars
- Water-bath processing: Carefully place the filled jars into your water-bath canner, ensuring they are covered by at least 1 inch of water. Bring the water to a rolling boil.
- Processing times: Process pint jars for 10 minutes and quart jars for 15 minutes. If you live at an altitude above 1,000 feet, consult a reliable canning guide for adjusted processing times.
- Refrigerator-only option: If you prefer not to water-bath process, simply skip this step and refrigerate the jars immediately after filling and sealing. These "refrigerator pickles" will last for several weeks.
- Cool, Check Seals, and Cure Time
- Cool jars: Once processing is complete, turn off the heat and carefully remove the jars from the canner using a jar lifter. Place them on a towel-lined counter, spaced apart, to cool undisturbed for 12-24 hours.
- Check seals: After cooling, check the seals. The center of the lid should be concave and not flex when pressed. If a lid hasn't sealed, refrigerate that jar and consume within a few weeks.
- Cure time: For the best flavor and crunch, allow your pickles to cure for at least 3-4 weeks in a cool, dark pantry before opening. This allows the flavors to meld and develop fully.
- Taste Test & Adjust for Next Time
- Taste test: After the curing period, open a jar and enjoy your hard work!
- What to tweak: Consider if you want more grape leaves for an even crisper bite, less garlic, more spice, or a different blend of herbs in your next batch. Your taste buds are the ultimate guide!
You may also like

Hey there! I’m just someone who seriously loves good food and believes that cooking doesn’t have to be complicated to be amazing. Whether it’s a quick weeknight dinner or a cozy weekend meal, I’m all about sharing easy, tasty recipes that actually work.


