
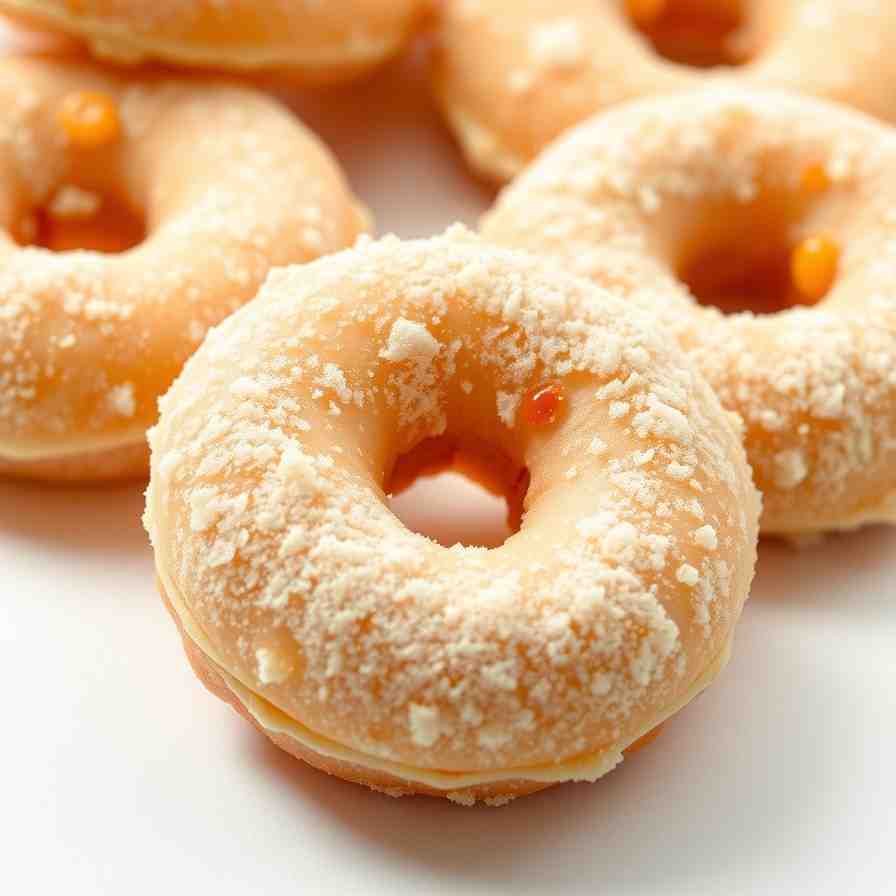
Fluffy Gluten-Free Doughnuts - Easy Oliebollen
Fluffy Gluten-Free Doughnuts - Easy Oliebollen

- Serves: 12 People
- Prepare Time: 25 minutes
- Cooking Time: 20 minutes
- Calories: -
- Difficulty: Medium
Get ready to discover the magic of Oliebollen, the beloved Dutch New Year’s doughnuts! Traditionally a festive treat made with wheat flour, these deep-fried, crispy-on-the-outside, fluffy-on-the-inside delights are usually enjoyed warm, dusted with powdered sugar doughnuts. But what if you're craving this deliciousness and need a gluten-free option? You're in luck! This recipe promises the same authentic, festive taste and irresistible texture, but with a gluten-free twist. No more missing out on these golden-fried gems – our recipe ensures everyone can enjoy a taste of Dutch tradition, making it one of the best gluten-free recipes for a truly special treat.
So, what exactly are Oliebollen? Imagine a cross between a fritter and a classic American doughnut hole, often studded with raisins or apples. They're a staple at Dutch New Year's celebrations, with street stands popping up everywhere, filling the air with their sweet, fried aroma. While classic Oliebollen rely on wheat flour to create their signature airy structure, our recipe tackles the challenge head-on, delivering a genuinely fluffy and delicious gluten-free doughnut that no one will guess is wheat-free. Get ready for an easy, rewarding gluten-free baking experience that brings the joy of Oliebollen to your kitchen, proving that gluten-free treats can be just as amazing!
Ingredients
Directions
- gluten-free baking techniques to ensure your Oliebollen are perfect every time.
- Before You Start – Gluten-Free Dough Tips:
- Getting the Right Batter Consistency: Your batter should be thicker than pancake batter but still scoopable, not pourable. It should hold soft mounds when dropped from a spoon and slowly relax.
- Simple adjustments: If it’s too thin, sprinkle in 1–2 tablespoons of GF flour at a time. If it’s too thick, stir in 1–2 tablespoons of warm milk at a time until it reaches the right consistency.
- Yeast & Rise with Gluten-Free Flour:
- The ideal liquid temperature range for activating yeast is between 105–115°F (40–46°C). Too cold, and the yeast won't activate; too hot, and you'll kill it!
- You’ll know your yeast is active when a foamy cap forms on the surface of the liquid after a few minutes.
- For gluten-free batter, "doubled in size" looks a bit different. Expect lots of bubbles, a slightly domed appearance, and a looser, airy texture rather than a huge expansion.
- Oil Temperature & Frying Basics:
- The target oil temperature range is typically 350°F (175°C). Below this, your gluten-free doughnuts will absorb too much oil and become greasy. Above it, they'll brown too quickly on the outside before cooking through.
- How to test without a thermometer: Drop a tiny blob of batter into the hot oil. If it immediately sizzles gently and floats to the top, it's ready. You can also stick the handle of a wooden spoon into the oil; if bubbles form steadily around the wood, it's good to go.
- Always fry in small batches to help keep the oil temperature steady. Overcrowding the pot will drop the temperature too much.
- Now, let's make some amazing gluten-free Oliebollen!
- Activate the YeastIn a large mixing bowl, combine the warm milk (105-115°F / 40-46°C) and a tablespoon of sugar. Sprinkle the yeast over the top and let it sit for 5-10 minutes until a foamy cap forms. This means your yeast is active and ready to work its magic!
- Mix the Dry IngredientsIn a separate bowl, whisk together the
- gluten-free 1:1 flour blend, remaining sugar, and salt. If you like, this is a great time to add a pinch of optional spices like a little cinnamon or nutmeg for extra flavor.
- Make the BatterOnce your yeast is foamy, add the eggs to the yeast mixture and whisk lightly. Pour this wet mixture into the dry ingredients. Mix with a wooden spoon or a stand mixer with a paddle attachment on low speed until just combined, then increase to medium and beat for 2-3 minutes. The batter should look smooth and have a slight elasticity, as much as gluten-free batter can. Remember the visual cues: thicker than pancake batter, scoopable, holds soft mounds.
- Fold in FruitGently stir in your raisins/currants and optional finely diced apple pieces until they are evenly distributed throughout the batter. Quick tip: For best results, lightly toss your dried fruit in a spoonful of gluten-free flour before adding it to the batter. This helps prevent it from sinking to the bottom during the rise and frying.
- Let the Batter RiseCover the bowl with plastic wrap or a clean kitchen towel. Place it in a warm spot (like a slightly warmed oven that's turned off, or near a sunny window) to proof. Let it rise until it's puffed up and bubbly, about 60-90 minutes. For gluten-free batter, look for lots of visible bubbles and a slightly domed, airy texture. If your kitchen is cooler, allow a bit longer for the rise.
- Heat the OilWhile the batter rises, prepare your frying station. Pour 3-4 inches of neutral oil into your deep, heavy pot. Ensure the pot is no more than half full for safety. Heat the oil over medium-high heat until it reaches 350°F (175°C). Use your kitchen thermometer to monitor the temperature, or use the wooden spoon test described above.
- Shape the DoughnutsLightly oil two spoons or use a small ice cream scoop (about 1.5-2 tablespoons capacity). Dip the spoons/scoop in the hot oil between each batch to prevent sticking. Scoop balls of batter, using the second spoon to gently push the batter into the hot oil. Aim for a consistent size for even cooking – roughly the size of a golf ball or slightly larger.
- Fry Until GoldenCarefully drop 4-5 balls of batter into the hot oil, ensuring you don't overcrowd the pot. Fry for 3-5 minutes per batch, turning them as needed with your slotted spoon or spider. Well-risen Oliebollen may even turn themselves over! They're done when they are deep golden brown all over, float to the surface, and feel slightly light when lifted.
- Drain & SugarTransfer the fried gluten-free doughnuts to a paper-towel-lined wire rack to drain any excess oil. Once they are no longer dripping hot oil but are still warm, generously dust them with powdered sugar.
- Serve & EnjoyThese easy treats to make are best served warm, straight from the fryer. They stay at their peak texture for about an hour or two, but they're so delicious, they rarely last that long!
You may also like


Hey there! I’m just someone who seriously loves good food and believes that cooking doesn’t have to be complicated to be amazing. Whether it’s a quick weeknight dinner or a cozy weekend meal, I’m all about sharing easy, tasty recipes that actually work.


