
Easy Homemade Bread Boule - Homemade Recipe for Bread
Easy Homemade Bread Boule - Homemade Recipe for Bread

- Serves: 8 People
- Prepare Time: 25 minutes
- Cooking Time: 35 minutes
- Calories: -
- Difficulty: Easy
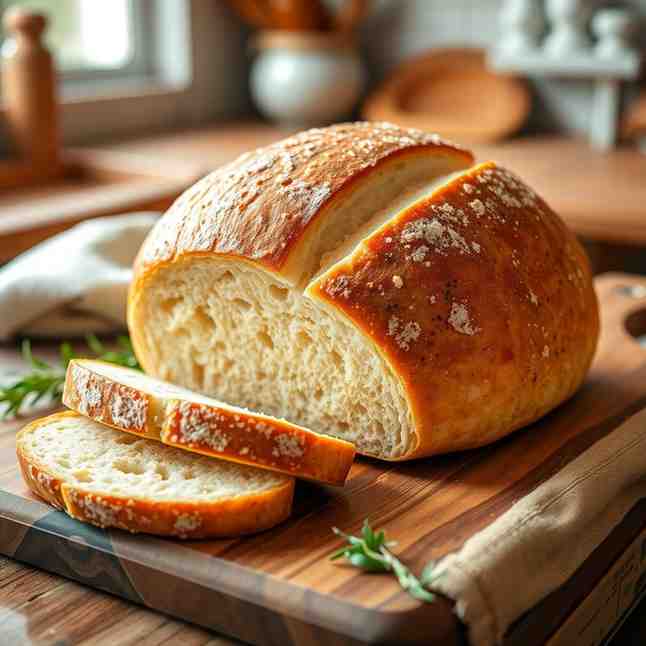
There's nothing quite like the smell of fresh-baked bread filling your home, and with this homemade recipe for bread, you're just a few simple steps away from enjoying your very own bakery-style boule! Imagine a round loaf with a gloriously crispy, crackly crust and an incredibly soft, chewy center. Sounds fancy, right? The best part is, you don't need any special bakery equipment to make this magic happen. All you really need is a Dutch oven, a mixing bowl, and some basic pantry ingredients.
This guide will walk you through everything, from understanding your ingredients to mastering the perfect bake, making it super easy for beginners to conquer the art of making bread from scratch. We'll cover every step with clear instructions, handy visual cues, and even tips for troubleshooting, ensuring your first (or fiftieth!) homemade recipe for bread is a resounding success. Get ready to impress yourself and everyone else with this simple yet stunning great bread recipe!
Ingredients
Directions
- bread dough basics that will make you feel like a pro:
- Gluten Development: When you mix flour and water, proteins in the flour called glutenin and gliadin combine to form gluten. Kneading or stretching and folding helps these gluten strands align and strengthen, giving your bread its structure and chew.
- Hydration: This dough will be relatively sticky, and that's completely normal! High hydration (more water relative to flour) leads to a more open, airy crumb. Resist the urge to add too much extra flour during mixing or kneading.
- Bulk Rise vs. Proofing: The "bulk rise" (or first rise) is when the entire mass of dough ferments and doubles in size. "Proofing" (or second rise) happens after you've shaped the dough, allowing the individual loaf to get its final lift before baking.
- Room Temperature: The temperature of your kitchen significantly affects rise times. Warmer kitchens mean faster rises, while cooler kitchens mean slower rises. Don't worry too much about exact times; focus on the visual cues!
- Visual / Feel Cues: For risen dough, it should look puffy and roughly doubled, with a slightly domed top. When you poke it gently with a floured finger, the dent should slowly spring back about halfway. If it springs back immediately, it needs more time. If it collapses, it's over-proofed.
- Now, let's make some bread!Mix the DoughIf using active dry yeast, combine it with the warm water in your large mixing bowl and let it sit for 5-10 minutes until foamy. If using instant yeast, you can skip blooming and add it directly to the flour. In your bowl, combine the flour, salt, yeast (if instant), and warm water. Mix with a spoon or your hands until all the dry flour is incorporated and you have a shaggy, sticky dough. Don't worry about it being perfectly smooth yet; shaggy and sticky is absolutely normal at this stage.
- Short Rest & First Knead / FoldsCover the bowl with a clean kitchen towel or plastic wrap and let the dough rest for 15-20 minutes. This "autolyse" or light rest allows the flour to fully hydrate, making the dough easier to work with. After the rest, you can either gently knead the dough in the bowl for 5-7 minutes until it starts to feel smoother and slightly elastic, or perform a few rounds of "stretch and folds." To do a stretch and fold, simply grab a portion of the dough, stretch it upwards, and fold it over onto itself. Rotate the bowl and repeat this 4-6 times. Do this every 15-20 minutes for 2-3 rounds. Your goal is a dough that feels smoother and more elastic than it did initially.
- First Rise (Bulk Fermentation)Lightly oil a clean bowl (the same one or a new one). Transfer your dough to the oiled bowl, turning it once to coat. Cover the bowl tightly with plastic wrap or a lid. Let the dough rise at room temperature until it has roughly doubled in size. This usually takes 1.5 to 3 hours in a warm kitchen (around 70-75°F/21-24°C) or longer in a cooler environment. Use the poke test described above to confirm it's ready.
- Shape the BouleOnce the dough has doubled, gently turn it out onto a lightly floured surface. Try to handle it as little as possible to preserve the air bubbles. Gently deflate the dough by pressing out some of the gas. Now, it's time to shape your boule (round loaf). To create surface tension, gently fold the edges of the dough into the center, working your way around the circle. Once all the edges are folded in, flip the dough seam-side down. Using your cupped hands, gently rotate the dough on the counter, dragging it towards you slightly, to create a tight, smooth ball. The surface should look smooth and taut, not tearing.
- Second Rise (Proofing the Boule)Lightly flour a proofing basket (banneton) or a medium-sized bowl lined with a floured kitchen towel. Place your shaped dough seam-side up into the prepared basket/bowl. Cover it loosely with plastic wrap or a towel. Let it proof at room temperature for another 30-60 minutes, or until it passes the poke test (dent springs back slowly).
- Overnight Fridge Proof Option: For a deeper flavor and more convenient baking schedule, you can place the covered dough in the refrigerator for 8-16 hours (or even up to 24 hours). This slows down the proofing. When ready to bake, pull it directly from the fridge and proceed to Step 6.
- Preheat the Oven & Dutch OvenAbout 30-45 minutes before you plan to bake, place your Dutch oven with its lid into your oven and preheat both to a high temperature, typically 450°F (232°C). Preheating the Dutch oven is crucial because the intense, even heat helps create an immediate burst of steam when the dough is added, which is key for a fantastic crust.
- Score & BakeOnce your oven and Dutch oven are fully preheated, carefully remove the hot Dutch oven from the oven. Gently turn your proofed dough out onto a piece of parchment paper, seam-side down. Using a sharp knife or a bread lame, score the top of the dough. A simple cross pattern is perfect for beginners and allows the bread to expand beautifully. Carefully lift the parchment paper with the dough and gently lower it into the hot Dutch oven. Place the lid back on. Bake covered for 25-30 minutes. Then, remove the lid and continue to bake uncovered for another 10-15 minutes, or until the crust is deep golden brown and the internal temperature reaches 200-210°F (93-99°C). If you tap the bottom of the loaf, it should sound hollow.
- Cool & SliceThis step is just as important as baking! Carefully remove the bread from the Dutch oven and transfer it to a wire rack.
- Emphasize letting the bread cool for at least 45-60 minutes (or even longer) before slicing. While it's tempting to cut into that warm, fragrant loaf immediately, cooling allows the internal structure of the bread to set and finishes the cooking process. Slicing too early can result in a gummy texture.
Easy Homemade Bread Boule - Homemade Recipe for Bread
- Serves: 8 People
- Prepare Time: 25 minutes
- Cooking Time: 35 minutes
- Calories: -
- Difficulty: Easy
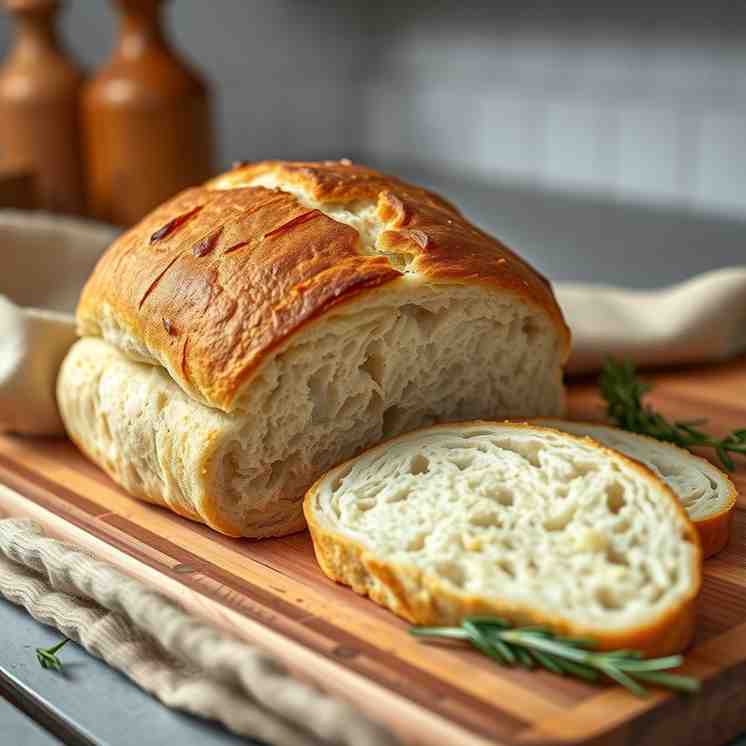
There's nothing quite like the smell of fresh-baked bread filling your home, and with this homemade recipe for bread, you're just a few simple steps away from enjoying your very own bakery-style boule! Imagine a round loaf with a gloriously crispy, crackly crust and an incredibly soft, chewy center. Sounds fancy, right? The best part is, you don't need any special bakery equipment to make this magic happen. All you really need is a Dutch oven, a mixing bowl, and some basic pantry ingredients.
This guide will walk you through everything, from understanding your ingredients to mastering the perfect bake, making it super easy for beginners to conquer the art of making bread from scratch. We'll cover every step with clear instructions, handy visual cues, and even tips for troubleshooting, ensuring your first (or fiftieth!) homemade recipe for bread is a resounding success. Get ready to impress yourself and everyone else with this simple yet stunning great bread recipe!
Ingredients
Directions
- bread dough basics that will make you feel like a pro:
- Gluten Development: When you mix flour and water, proteins in the flour called glutenin and gliadin combine to form gluten. Kneading or stretching and folding helps these gluten strands align and strengthen, giving your bread its structure and chew.
- Hydration: This dough will be relatively sticky, and that's completely normal! High hydration (more water relative to flour) leads to a more open, airy crumb. Resist the urge to add too much extra flour during mixing or kneading.
- Bulk Rise vs. Proofing: The "bulk rise" (or first rise) is when the entire mass of dough ferments and doubles in size. "Proofing" (or second rise) happens after you've shaped the dough, allowing the individual loaf to get its final lift before baking.
- Room Temperature: The temperature of your kitchen significantly affects rise times. Warmer kitchens mean faster rises, while cooler kitchens mean slower rises. Don't worry too much about exact times; focus on the visual cues!
- Visual / Feel Cues: For risen dough, it should look puffy and roughly doubled, with a slightly domed top. When you poke it gently with a floured finger, the dent should slowly spring back about halfway. If it springs back immediately, it needs more time. If it collapses, it's over-proofed.
- Now, let's make some bread!Mix the DoughIf using active dry yeast, combine it with the warm water in your large mixing bowl and let it sit for 5-10 minutes until foamy. If using instant yeast, you can skip blooming and add it directly to the flour. In your bowl, combine the flour, salt, yeast (if instant), and warm water. Mix with a spoon or your hands until all the dry flour is incorporated and you have a shaggy, sticky dough. Don't worry about it being perfectly smooth yet; shaggy and sticky is absolutely normal at this stage.
- Short Rest & First Knead / FoldsCover the bowl with a clean kitchen towel or plastic wrap and let the dough rest for 15-20 minutes. This "autolyse" or light rest allows the flour to fully hydrate, making the dough easier to work with. After the rest, you can either gently knead the dough in the bowl for 5-7 minutes until it starts to feel smoother and slightly elastic, or perform a few rounds of "stretch and folds." To do a stretch and fold, simply grab a portion of the dough, stretch it upwards, and fold it over onto itself. Rotate the bowl and repeat this 4-6 times. Do this every 15-20 minutes for 2-3 rounds. Your goal is a dough that feels smoother and more elastic than it did initially.
- First Rise (Bulk Fermentation)Lightly oil a clean bowl (the same one or a new one). Transfer your dough to the oiled bowl, turning it once to coat. Cover the bowl tightly with plastic wrap or a lid. Let the dough rise at room temperature until it has roughly doubled in size. This usually takes 1.5 to 3 hours in a warm kitchen (around 70-75°F/21-24°C) or longer in a cooler environment. Use the poke test described above to confirm it's ready.
- Shape the BouleOnce the dough has doubled, gently turn it out onto a lightly floured surface. Try to handle it as little as possible to preserve the air bubbles. Gently deflate the dough by pressing out some of the gas. Now, it's time to shape your boule (round loaf). To create surface tension, gently fold the edges of the dough into the center, working your way around the circle. Once all the edges are folded in, flip the dough seam-side down. Using your cupped hands, gently rotate the dough on the counter, dragging it towards you slightly, to create a tight, smooth ball. The surface should look smooth and taut, not tearing.
- Second Rise (Proofing the Boule)Lightly flour a proofing basket (banneton) or a medium-sized bowl lined with a floured kitchen towel. Place your shaped dough seam-side up into the prepared basket/bowl. Cover it loosely with plastic wrap or a towel. Let it proof at room temperature for another 30-60 minutes, or until it passes the poke test (dent springs back slowly).
- Overnight Fridge Proof Option: For a deeper flavor and more convenient baking schedule, you can place the covered dough in the refrigerator for 8-16 hours (or even up to 24 hours). This slows down the proofing. When ready to bake, pull it directly from the fridge and proceed to Step 6.
- Preheat the Oven & Dutch OvenAbout 30-45 minutes before you plan to bake, place your Dutch oven with its lid into your oven and preheat both to a high temperature, typically 450°F (232°C). Preheating the Dutch oven is crucial because the intense, even heat helps create an immediate burst of steam when the dough is added, which is key for a fantastic crust.
- Score & BakeOnce your oven and Dutch oven are fully preheated, carefully remove the hot Dutch oven from the oven. Gently turn your proofed dough out onto a piece of parchment paper, seam-side down. Using a sharp knife or a bread lame, score the top of the dough. A simple cross pattern is perfect for beginners and allows the bread to expand beautifully. Carefully lift the parchment paper with the dough and gently lower it into the hot Dutch oven. Place the lid back on. Bake covered for 25-30 minutes. Then, remove the lid and continue to bake uncovered for another 10-15 minutes, or until the crust is deep golden brown and the internal temperature reaches 200-210°F (93-99°C). If you tap the bottom of the loaf, it should sound hollow.
- Cool & SliceThis step is just as important as baking! Carefully remove the bread from the Dutch oven and transfer it to a wire rack.
- Emphasize letting the bread cool for at least 45-60 minutes (or even longer) before slicing. While it's tempting to cut into that warm, fragrant loaf immediately, cooling allows the internal structure of the bread to set and finishes the cooking process. Slicing too early can result in a gummy texture.
You may also like


Hey there! I’m just someone who seriously loves good food and believes that cooking doesn’t have to be complicated to be amazing. Whether it’s a quick weeknight dinner or a cozy weekend meal, I’m all about sharing easy, tasty recipes that actually work.


