
Easy Fermented Cabbage in a Jar | Homemade Sauerkraut Recipe
Easy Fermented Cabbage in a Jar | Homemade Sauerkraut Recipe

- Serves: 12 People
- Prepare Time: 20 minutes
- Cooking Time: 7-14 Days (
- Calories: -
- Difficulty: Easy
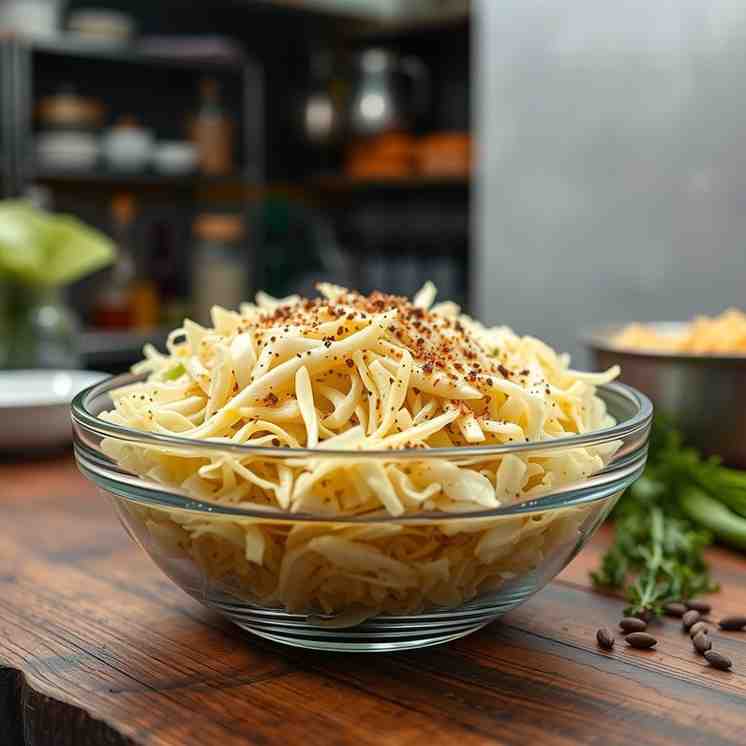
Get ready to dive into the wonderful world of fermented cabbage! If you've been curious about making your own homemade sauerkraut but felt intimidated, you've come to the right place. This guide will walk you through an incredibly easy, beginner-friendly method for creating delicious, probiotic-rich lacto fermented cabbage right in a simple mason jar. Forget fancy crocks or complicated equipment – all you need is a head of cabbage, some salt, and a little patience.
In just about 20 minutes of active prep and a week or two of waiting, you'll have crunchy, tangy fermented cabbage that's perfect for elevating sandwiches, sausages, grain bowls, and salads. We'll cover everything from simple ingredients and step-by-step instructions to essential safety tips, storage advice, and even fun flavor tweaks like fermented cabbage with caraway. So, if you're ready to learn how to ferment cabbage and enjoy the many fermented cabbage benefits, let's get started on your journey to making your very own homemade fermented cabbage!
Ingredients
Directions
- Prep and Weigh Your Cabbage
- Remove any bruised or dirty outer leaves from your cabbage. Reserve one clean, intact outer leaf for later – you’ll use it as a cover.
- If you have a digital scale, weigh your cabbage after trimming. This helps you calculate the precise amount of salt needed.
- Quarter the cabbage, remove the tough core, and then finely shred it using a sharp knife or a food processor with a shredding disc. The finer the shred, the easier it is to massage and pack.
- Salt and Massage
- Place the shredded cabbage in a large mixing bowl.
- Sprinkle the non-iodized salt evenly over the cabbage. If you weighed your cabbage, aim for 2-2.5% of the cabbage's weight in salt. For a 2-3 lb head, this is usually 1.5-2 tablespoons.
- Add any optional flavor boosters you’re using, like caraway seeds or garlic.
- Now, get your hands in there and massage the cabbage! Squeeze, knead, and press the cabbage for 5-10 minutes. The goal is for the cabbage to soften, become pliable, and release a significant amount of brine (liquid). It might seem like a lot of salt at first, but it will draw out the water.
- Pack the Jar and Submerge
- Take your clean 1-quart or 2-quart wide-mouth glass jar.
- Start packing the massaged cabbage firmly into the jar in layers. Use your fist or a blunt tool to press down each layer vigorously. You’ll see the brine rise as you press.
- Continue packing until the jar is full, leaving about 1-2 inches of headspace from the top. Ensure all the cabbage shreds are submerged under their own brine.
- Place the reserved clean outer cabbage leaf on top of the packed cabbage. This acts as a barrier to keep smaller shreds from floating up.
- Place a clean weight on top of the cabbage leaf to keep everything pressed down under the brine. This could be a small, clean jar that fits inside, a fermentation weight, or even a clean stone placed in a small plastic bag.
- If, after weighting, the brine doesn’t completely cover all the cabbage, mix a small amount of extra 2% salt-water brine (1 teaspoon non-iodized salt dissolved in 1/2 cup filtered water) and add just enough to fully submerge the cabbage.
- Close the Jar and Let It Ferment
- Cover your jar:
- Option A: Use a clean cloth secured with a rubber band. This allows airflow while keeping pests out.
- Option B: Use a loose-fitting lid or a specialized fermentation lid (like an airlock). If using a tight lid, you’ll need to "burp" the jar daily to release built-up gases.
- Place the jar on a plate or tray to catch any potential overflow of brine during active fermentation.
- Store the jar in a cool, dark place, out of direct sunlight. An ideal temperature range is 65-72°F (18-22°C).
- Daily Check-Ins
- For the first 1-3 days, you might notice gentle bubbling, some brine overflow, and the cabbage continuing to soften. These are all normal signs of active lacto fermentation.
- Each day, check to ensure all the cabbage remains submerged under the brine. If any pieces float up, press them back down with a clean utensil.
- You might see a harmless white film (Kahm yeast) or some foam appear on the surface. We'll cover safety in more detail, but generally, you can skim these off if desired.
- Taste, Decide, and Move to the Fridge
- You can start tasting your fermented cabbage around Day 5-7. It will be mildly tangy at this stage.
- Continue to taste every couple of days until it reaches your desired level of tanginess and crunch. For a classic, deeper sour flavor, it might take 2-3 weeks.
- Once you’re happy with the flavor and texture, move the jar to the refrigerator.
- Tighten the lid for storage in the fridge. Note that the fermented cabbage will continue to develop flavor, albeit much more slowly, in the cold environment.
Easy Fermented Cabbage in a Jar | Homemade Sauerkraut Recipe

- Serves: 12 People
- Prepare Time: 20 minutes
- Cooking Time: 7-14 Days (
- Calories: -
- Difficulty: Easy
Get ready to dive into the wonderful world of fermented cabbage! If you've been curious about making your own homemade sauerkraut but felt intimidated, you've come to the right place. This guide will walk you through an incredibly easy, beginner-friendly method for creating delicious, probiotic-rich lacto fermented cabbage right in a simple mason jar. Forget fancy crocks or complicated equipment – all you need is a head of cabbage, some salt, and a little patience.
In just about 20 minutes of active prep and a week or two of waiting, you'll have crunchy, tangy fermented cabbage that's perfect for elevating sandwiches, sausages, grain bowls, and salads. We'll cover everything from simple ingredients and step-by-step instructions to essential safety tips, storage advice, and even fun flavor tweaks like fermented cabbage with caraway. So, if you're ready to learn how to ferment cabbage and enjoy the many fermented cabbage benefits, let's get started on your journey to making your very own homemade fermented cabbage!
Ingredients
Directions
- Prep and Weigh Your Cabbage
- Remove any bruised or dirty outer leaves from your cabbage. Reserve one clean, intact outer leaf for later – you’ll use it as a cover.
- If you have a digital scale, weigh your cabbage after trimming. This helps you calculate the precise amount of salt needed.
- Quarter the cabbage, remove the tough core, and then finely shred it using a sharp knife or a food processor with a shredding disc. The finer the shred, the easier it is to massage and pack.
- Salt and Massage
- Place the shredded cabbage in a large mixing bowl.
- Sprinkle the non-iodized salt evenly over the cabbage. If you weighed your cabbage, aim for 2-2.5% of the cabbage's weight in salt. For a 2-3 lb head, this is usually 1.5-2 tablespoons.
- Add any optional flavor boosters you’re using, like caraway seeds or garlic.
- Now, get your hands in there and massage the cabbage! Squeeze, knead, and press the cabbage for 5-10 minutes. The goal is for the cabbage to soften, become pliable, and release a significant amount of brine (liquid). It might seem like a lot of salt at first, but it will draw out the water.
- Pack the Jar and Submerge
- Take your clean 1-quart or 2-quart wide-mouth glass jar.
- Start packing the massaged cabbage firmly into the jar in layers. Use your fist or a blunt tool to press down each layer vigorously. You’ll see the brine rise as you press.
- Continue packing until the jar is full, leaving about 1-2 inches of headspace from the top. Ensure all the cabbage shreds are submerged under their own brine.
- Place the reserved clean outer cabbage leaf on top of the packed cabbage. This acts as a barrier to keep smaller shreds from floating up.
- Place a clean weight on top of the cabbage leaf to keep everything pressed down under the brine. This could be a small, clean jar that fits inside, a fermentation weight, or even a clean stone placed in a small plastic bag.
- If, after weighting, the brine doesn’t completely cover all the cabbage, mix a small amount of extra 2% salt-water brine (1 teaspoon non-iodized salt dissolved in 1/2 cup filtered water) and add just enough to fully submerge the cabbage.
- Close the Jar and Let It Ferment
- Cover your jar:
- Option A: Use a clean cloth secured with a rubber band. This allows airflow while keeping pests out.
- Option B: Use a loose-fitting lid or a specialized fermentation lid (like an airlock). If using a tight lid, you’ll need to "burp" the jar daily to release built-up gases.
- Place the jar on a plate or tray to catch any potential overflow of brine during active fermentation.
- Store the jar in a cool, dark place, out of direct sunlight. An ideal temperature range is 65-72°F (18-22°C).
- Daily Check-Ins
- For the first 1-3 days, you might notice gentle bubbling, some brine overflow, and the cabbage continuing to soften. These are all normal signs of active lacto fermentation.
- Each day, check to ensure all the cabbage remains submerged under the brine. If any pieces float up, press them back down with a clean utensil.
- You might see a harmless white film (Kahm yeast) or some foam appear on the surface. We'll cover safety in more detail, but generally, you can skim these off if desired.
- Taste, Decide, and Move to the Fridge
- You can start tasting your fermented cabbage around Day 5-7. It will be mildly tangy at this stage.
- Continue to taste every couple of days until it reaches your desired level of tanginess and crunch. For a classic, deeper sour flavor, it might take 2-3 weeks.
- Once you’re happy with the flavor and texture, move the jar to the refrigerator.
- Tighten the lid for storage in the fridge. Note that the fermented cabbage will continue to develop flavor, albeit much more slowly, in the cold environment.
You may also like


Hey there! I’m just someone who seriously loves good food and believes that cooking doesn’t have to be complicated to be amazing. Whether it’s a quick weeknight dinner or a cozy weekend meal, I’m all about sharing easy, tasty recipes that actually work.


