
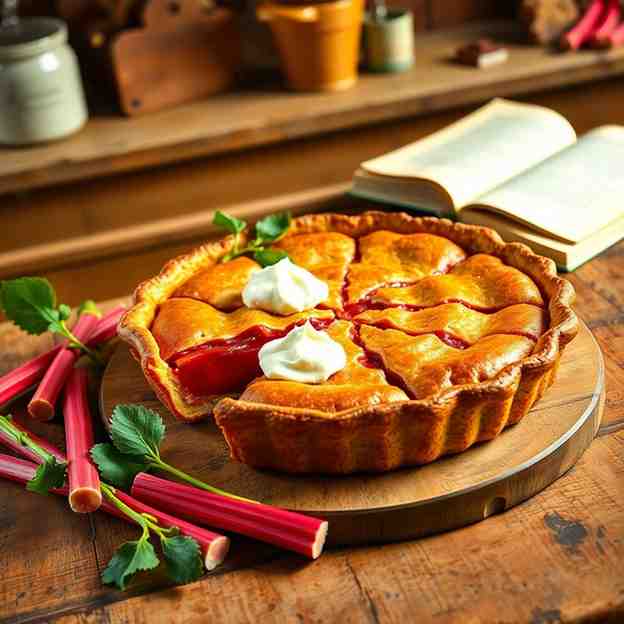
Rhubarb Pie Recipe Sweet-Tart & Never Runny
Rhubarb Pie Recipe Sweet-Tart & Never Runny
- Serves: 8 People
- Prepare Time: 45 minutes
- Cooking Time: 65 minutes
- Calories: 380
- Difficulty: Medium
Welcome, fellow bakers, to the ultimate guide for crafting a truly exceptional rhubarb pie recipe! If you're searching for a homemade rhubarb pie recipe that delivers on every front – a crisp, golden crust, a beautifully jammy, sweet-tart filling, and absolutely no soggy bottoms or runny messes – then you’ve landed in the right place. This isn't just any rhubarb pie recipe from scratch; it's our take on the beloved Aland Raparperipiirakka, a Finnish classic that celebrates the vibrant flavor of fresh rhubarb.
We've meticulously designed this recipe to tackle all the common pitfalls you might encounter online, ensuring a fresh rhubarb pie recipe that's both easy to follow for beginners and rewarding for experienced bakers. Get ready to bake the best recipe for rhubarb pie you've ever tasted, bursting with bright, balanced flavors that will transport you straight to a Nordic summer. Let's get baking!
Why You’ll Love This Recipe:
Never Runny: Our secret thickener blend ensures a perfectly set, jammy filling.
Crisp Crust: Say goodbye to soggy bottoms with our tried-and-true method.
Fresh or Frozen: Works beautifully with both fresh and frozen rhubarb.
Step-by-Step Guidance: Clear, concise instructions make baking a breeze.
Balanced Flavor: A perfect harmony of sweet and tart, highlighting rhubarb’s unique taste.
Before you start, gather these essential tools:
9-inch pie plate (glass or ceramic is recommended for even baking)
Rolling pin
Large mixing bowl
Spatula or wooden spoon
Pastry brush (optional, for egg wash)
Baking sheet (to catch drips and promote bottom crust crispness)
Aluminum foil or a pie shield (to prevent over-browning)
Sharp knife for chopping rhubarb
Cutting board
Measuring cups and spoons
Kitchen scale (optional, but great for accuracy)
Cooling rack
Rhubarb is a unique vegetable, often treated like a fruit in desserts. Its vibrant, tart stalks are what we use for pie, while the leaves are toxic and must not be consumed.
Picking Good Stalks: Look for firm, crisp stalks with a vibrant color (red, pink, or even greenish-red varieties all work). Avoid any limp or bruised stalks.
Trimming & Washing: Trim off both ends of the stalks, discarding the leafy top. Wash the stalks thoroughly under cold running water.
Cutting the Pieces: Cut the rhubarb into even ½-inch to ¾-inch pieces. Consistency in size is key for even baking – this prevents some pieces from being mushy while others remain too firm.
Fresh vs. Frozen Rhubarb:
Fresh Rhubarb: Simply chop and use. If your rhubarb seems particularly wet (e.g., just washed), you can pat it dry with a paper towel.
Frozen Rhubarb: No need to thaw! Use it directly from the freezer. It may release more liquid, so be prepared to add a tiny bit more thickener if the mixture seems very soupy, or extend baking time slightly. Do NOT thaw and drain, as this removes flavor.
Ingredients
Directions
- Make and Chill the Dough:
- If making homemade pie dough, prepare it according to your recipe, divide it into two disks, wrap them, and chill for at least 30 minutes (or up to 2 days).
- If using store-bought dough, remove it from the fridge about 15-20 minutes before you're ready to roll, to allow it to come to a workable temperature.
- Roll the Bottom Crust & Prepare the Pan:
- On a lightly floured surface, roll out one disk of pie dough into a 12-inch circle. Carefully transfer it to your 9-inch pie plate.
- Trim the edges, leaving about a ½-inch overhang. Fold the overhang under, flush with the rim of the pie plate. Lightly crimp the edges (you'll do a final crimp after adding the top crust).
- Place the pie plate in the refrigerator to chill while you prepare the filling.
- Place a large baking sheet on the lowest oven rack and preheat your oven to 425°F (220°C). This preheated baking sheet helps achieve a crisp bottom crust.
- Mix the Filling:
- In a large bowl, combine the chopped rhubarb, granulated sugar, cornstarch, all-purpose flour, fine salt, lemon/orange zest, and any optional spices (cinnamon, nutmeg, cardamom).
- Toss gently until the rhubarb pieces are evenly coated.
- Let the mixture sit for 5-10 minutes. This allows the sugar to start drawing out some juice from the rhubarb. If a lot of liquid accumulates, give it another good stir to re-incorporate the thickeners. If it looks excessively soupy, you can stir in an additional teaspoon of cornstarch.
- Assemble the Pie:
- Remove the chilled bottom crust from the fridge. Sprinkle a thin layer (about 1 tablespoon) of granulated sugar mixed with a teaspoon of flour over the bottom crust. This acts as a barrier to help prevent sogginess.
- Pile the rhubarb mixture into the crust, mounding it slightly higher in the center.
- Dot the top of the rhubarb filling with the small pieces of butter.
- Roll out the second disk of pie dough for the top crust. You can place it directly over the filling, or cut it into strips to create a lattice top
- Trim the top crust, leaving about a ½-inch overhang. Crimp the top and bottom crusts together to seal the pie.
- Cut several vents in the top crust (or ensure your lattice has openings) to allow steam to escape during baking.
- If using, brush the top crust with the egg wash and sprinkle with coarse sugar.
- Bake:
- Carefully place the assembled pie onto the preheated baking sheet on the lowest oven rack.
- Bake at 425°F (220°C) for 15-20 minutes, until the crust just begins to turn golden.
- Reduce the oven temperature to 375°F (190°C) and continue baking for another 45-55 minutes, or until the crust is deep golden brown and the filling is bubbling thickly in the center vents (not just at the edges).
- If the crust edges or top start to brown too quickly, loosely tent the pie with aluminum foil.
- Cool:
- This step is crucial! Once baked, remove the pie from the oven and place it on a wire cooling rack.
- Allow the pie to cool for at least 3-4 hours at room temperature. This extended cooling time is absolutely essential for the filling to fully set up. Cutting into the pie too early will result in a runny, messy slice. Patience is a virtue here!
The following nutritional values are per serving (one piece of cake) Calories ~380 kcal Carbohydrates ~55g Protein ~4g Fat ~16g Making a delicious rhubarb pie shouldn't feel like a marathon! We've got some recommendations for tools and ingredients that can help streamline your baking process, allowing you to enjoy the journey (and the pie!) even more. Problem: Ever struggle with an uneven pie crust that’s too thick in one spot and tears in another? Problem: Is your pie's bottom crust always a little soft or underbaked, despite the top looking perfect? Problem: The edges of your pie crust are browning too quickly, sometimes even burning, while the filling still needs more time to bubble and set. Problem: Making homemade pie dough from scratch feels like a huge time commitment or a daunting, messy task. Click any ingredient for detailed nutritional information:Recipe Nutritional Values
Additional Information
Recipe Success Tips
Achieving Perfection: Baking & Serving Tips
Troubleshooting Common Pie Problems
Ingredient Substitutions & Variations
Cultural Notes: The Finnish Touch
Make-Ahead & Storage Instructions
Frequently Asked Questions
Recommended Kitchen Tools
The Humble Rolling Pin
Agitate: An inconsistent crust can lead to a soggy bottom or burnt edges, making your homemade pie less than perfect and frustrating to work with when you're aiming for that crisp, golden finish.
Solution: A good quality, heavy rolling pin (especially a French-style one without handles) gives you better control and leverage. It helps you roll out dough evenly and efficiently, ensuring a consistent thickness for a perfectly crisp crust every single time.Preheated Baking Sheet
Agitate: A soggy bottom is a common pie tragedy, preventing that satisfying crispness you crave and making your beautiful pie less enjoyable to slice and serve.
Solution: Placing your pie on a preheated baking sheet on the lowest oven rack gives the bottom crust an immediate, intense burst of heat. This helps it crisp up beautifully from the get-go, creating a barrier against moisture and preventing sogginess.Pie Shield or Aluminum Foil
Agitate: Watching your gorgeous crust darken too much can be heartbreaking, especially when you know the inside isn't quite ready, leading to a less-than-perfect presentation and potentially dry edges.
Solution: A simple pie shield, or even carefully molded strips of aluminum foil wrapped around the crust edges, will protect them from over-browning. This allows the filling to cook through completely and reach its jammy perfection, all while maintaining that ideal golden hue on your crust.Store-Bought Pie Crust
Agitate: The thought of chilling, rolling, and handling delicate dough can deter even enthusiastic bakers, making you hesitate to bake a pie at all, especially on a busy day.
Solution: Don't let dough anxiety stop you from enjoying a homemade pie! High-quality store-bought pie crusts are a fantastic shortcut, saving you significant time and effort without compromising too much on taste or texture, letting you focus all your energy on that delicious rhubarb filling. ---Calories per Ingredient
You may also like


Hey there! I’m just someone who seriously loves good food and believes that cooking doesn’t have to be complicated to be amazing. Whether it’s a quick weeknight dinner or a cozy weekend meal, I’m all about sharing easy, tasty recipes that actually work.


