
no-bake Milo chocolate balls Recipe
no-bake Milo chocolate balls Recipe


- Serves: 12 People
- Prepare Time: 10 minutes
- Cooking Time: 20 minutes
- Calories: -
- Difficulty: Easy
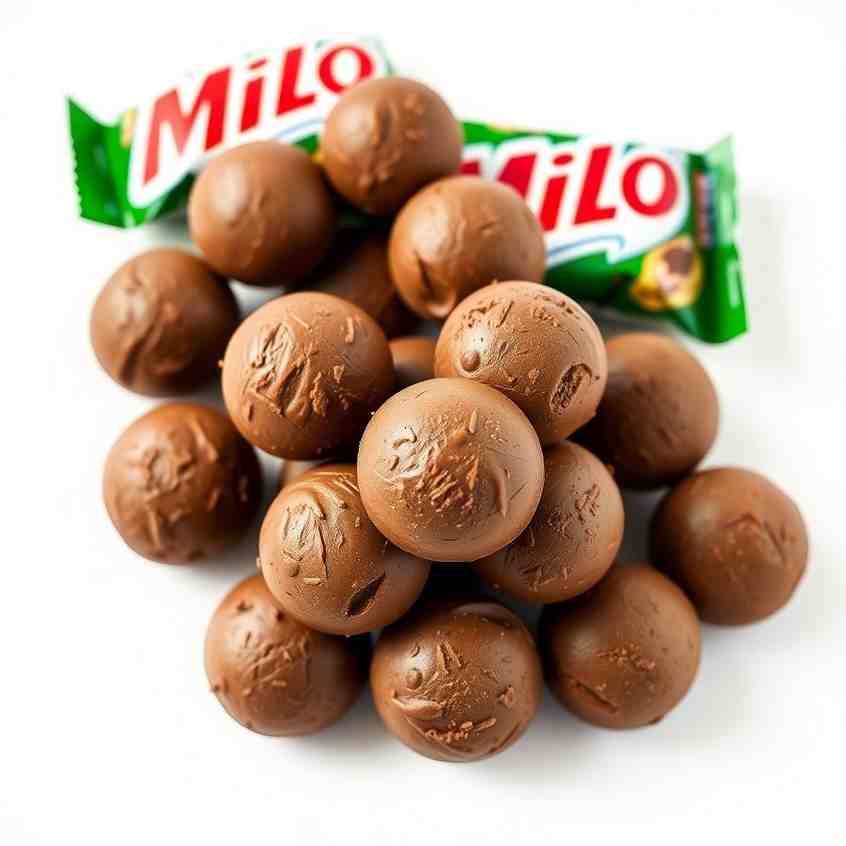
Get ready to whip up some seriously delicious Milo chocolate balls! These easy, no-bake treats are a classic for a reason. Imagine rich, malty chocolate mixed with crunchy cookies and sweet coconut, all rolled into a perfect bite-sized indulgence. We’re talking about Milo coconut balls that come together in about 15 minutes of hands-on time, making them the ultimate after-school snack, party hit, or lunchbox surprise.
What makes these no-bake Milo chocolate balls so special? For starters, they're incredibly simple, requiring just 4-5 pantry ingredients. They capture that nostalgic Aussie Milo flavor but are written with a US kitchen in mind, using easy-to-find graham crackers and clear measurements. Plus, they're fantastic make-ahead snacks that freeze beautifully and thaw right in your lunchbox. Kids absolutely adore the flavor, and adults will find them the perfect companion to a coffee break. Unlike those dried-fruit "health ball" versions, these are the classic cookie and condensed milk style, just like your favorite recipes from Down Under!
Ready to dive in? Let's make some magic!
Here's the only Milo chocolate ball recipe you'll ever need, with one unified ingredients list and method. Get ready for some deliciousness!
Ingredients
Directions
- Crush the Cookies First things first, let's get those cookies crushed! You have a couple of easy options here. For a super-fine crumb, toss your graham crackers or vanilla cookies into a food processor and blitz them until they're uniform and fine. No food processor? No problem! Place the cookies in a sturdy zip-top bag, seal it well, and use a rolling pin to crush them until you have sandy crumbs. The key here is fine crumbs with no big chunks – this helps the balls hold together evenly and gives them a smooth texture.
- Combine the Dry Ingredients Grab a large mixing bowl. Add your finely crushed cookies, the Milo powder, and about half of your desiccated coconut. Give everything a good stir with a spoon or whisk until the Milo is evenly distributed throughout the crumbs. You don't want any streaks of dry Milo powder hiding in there!
- Add Condensed Milk & Mix Now for the magic! Pour in the entire can of sweetened condensed milk. Start mixing with a sturdy spoon or spatula. As the mixture comes together, you'll find it gets quite thick and sticky. This is where your clean hands come in handy! Switch to mixing with your hands; it's the easiest way to ensure everything is thoroughly combined. You're looking for a sticky dough that holds together when you press it, but doesn’t leave pools of condensed milk in the bowl. It should be firm enough to roll without being overly wet.
- Roll into Balls Time to get rolling! Scoop out heaping teaspoons or tablespoons of the mixture – the size is totally up to you. Roll the mixture between your damp hands until it forms a smooth, round ball. A little tip: keep a small bowl of water nearby to re-dampen your hands as you go. This helps prevent the mixture from sticking too much and keeps your balls nice and smooth.
- Coat & Chill Once you've rolled a ball, place the remaining desiccated coconut (or your chosen alternative coating) in a shallow dish. Roll each ball in the coconut until it's fully coated. Place the coated balls on a parchment-lined tray. Once all your balls are rolled and coated, pop the tray into the fridge and chill them until they're firm, usually about 1-2 hours. This chilling step is crucial! Not only does it help them hold their shape, but it also allows the Milo flavor to really mingle and deepen with the cookie crumbs, making them taste even better.
no-bake Milo chocolate balls Recipe
- Serves: 12 People
- Prepare Time: 10 minutes
- Cooking Time: 20 minutes
- Calories: -
- Difficulty: Easy
Get ready to whip up some seriously delicious Milo chocolate balls! These easy, no-bake treats are a classic for a reason. Imagine rich, malty chocolate mixed with crunchy cookies and sweet coconut, all rolled into a perfect bite-sized indulgence. We’re talking about Milo coconut balls that come together in about 15 minutes of hands-on time, making them the ultimate after-school snack, party hit, or lunchbox surprise.
What makes these no-bake Milo chocolate balls so special? For starters, they're incredibly simple, requiring just 4-5 pantry ingredients. They capture that nostalgic Aussie Milo flavor but are written with a US kitchen in mind, using easy-to-find graham crackers and clear measurements. Plus, they're fantastic make-ahead snacks that freeze beautifully and thaw right in your lunchbox. Kids absolutely adore the flavor, and adults will find them the perfect companion to a coffee break. Unlike those dried-fruit "health ball" versions, these are the classic cookie and condensed milk style, just like your favorite recipes from Down Under!
Ready to dive in? Let's make some magic!
Here's the only Milo chocolate ball recipe you'll ever need, with one unified ingredients list and method. Get ready for some deliciousness!
Ingredients
Directions
- Crush the Cookies First things first, let's get those cookies crushed! You have a couple of easy options here. For a super-fine crumb, toss your graham crackers or vanilla cookies into a food processor and blitz them until they're uniform and fine. No food processor? No problem! Place the cookies in a sturdy zip-top bag, seal it well, and use a rolling pin to crush them until you have sandy crumbs. The key here is fine crumbs with no big chunks – this helps the balls hold together evenly and gives them a smooth texture.
- Combine the Dry Ingredients Grab a large mixing bowl. Add your finely crushed cookies, the Milo powder, and about half of your desiccated coconut. Give everything a good stir with a spoon or whisk until the Milo is evenly distributed throughout the crumbs. You don't want any streaks of dry Milo powder hiding in there!
- Add Condensed Milk & Mix Now for the magic! Pour in the entire can of sweetened condensed milk. Start mixing with a sturdy spoon or spatula. As the mixture comes together, you'll find it gets quite thick and sticky. This is where your clean hands come in handy! Switch to mixing with your hands; it's the easiest way to ensure everything is thoroughly combined. You're looking for a sticky dough that holds together when you press it, but doesn’t leave pools of condensed milk in the bowl. It should be firm enough to roll without being overly wet.
- Roll into Balls Time to get rolling! Scoop out heaping teaspoons or tablespoons of the mixture – the size is totally up to you. Roll the mixture between your damp hands until it forms a smooth, round ball. A little tip: keep a small bowl of water nearby to re-dampen your hands as you go. This helps prevent the mixture from sticking too much and keeps your balls nice and smooth.
- Coat & Chill Once you've rolled a ball, place the remaining desiccated coconut (or your chosen alternative coating) in a shallow dish. Roll each ball in the coconut until it's fully coated. Place the coated balls on a parchment-lined tray. Once all your balls are rolled and coated, pop the tray into the fridge and chill them until they're firm, usually about 1-2 hours. This chilling step is crucial! Not only does it help them hold their shape, but it also allows the Milo flavor to really mingle and deepen with the cookie crumbs, making them taste even better.
You may also like


Hey there! I’m just someone who seriously loves good food and believes that cooking doesn’t have to be complicated to be amazing. Whether it’s a quick weeknight dinner or a cozy weekend meal, I’m all about sharing easy, tasty recipes that actually work.


