
Korzinochki - Easy Mini Dessert Recipes & Party Tarts
Korzinochki - Easy Mini Dessert Recipes & Party Tarts


- Serves: 24 People
- Prepare Time: 40 minutes
- Cooking Time: 15 minutes
- Calories: -
- Difficulty: Easy
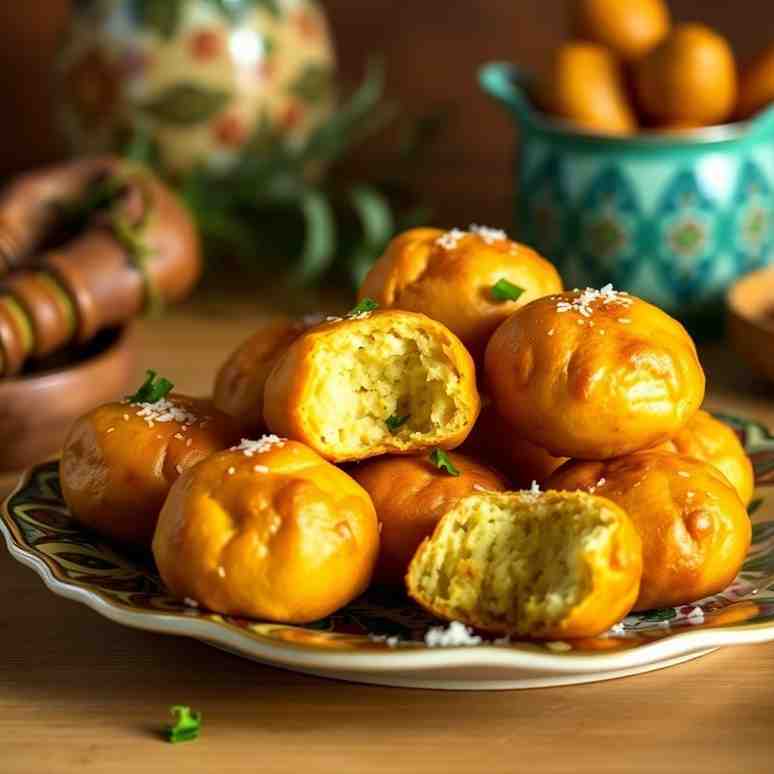
Get ready to bake some serious magic with Korzinochki! These delightful Russian jam tartlets are the ultimate mini dessert recipes easy enough for any home baker, yet impressive enough to steal the show at any gathering. Imagine crisp, buttery shortbread shells cradling a vibrant layer of jam, all crowned with a cloud of airy Italian meringue. They’re not just beautiful; they’re incredibly delicious, making them perfect mini desserts for parties or a sweet treat just for you. We’ll walk you through how to create these charming mini pastries recipes from scratch, covering everything from mastering the pastry tart shells to whipping up that perfect meringue. Plus, we'll share all the make-ahead secrets to ensure your Korzinochki are always fresh and fabulous. Let's get baking!
Why this works: The thick jam creates a protective barrier, while the Italian meringue provides impressive height and stability without making the shells soggy.
Korzinochki, pronounced "kor-zee-notch-kee," translates to "little baskets" in Russian, a nod to their adorable, edible basket shape. These classic individual tartlets feature a tender, crumbly shortbread crust filled with a layer of sweet, often tart, jam and then topped with a billowy swirl of Italian meringue. It's a beloved combination that balances rich, buttery pastry with fruity sweetness and a light, marshmallow-like topping. While their exact origin is a bit fuzzy, they've been a cherished treat in Russian and Eastern European kitchens for generations.
Mini tartlet molds (various sizes like 2.5", 3", or 4") – a muffin tin can also work in a pinch!
Hand or stand mixer (for dough and meringue)
Piping bag and a star tip (for elegant meringue swirls)
Kitchen scale (for precise dough portioning and ingredients)
Candy thermometer (crucial for Italian meringue syrup)
Small saucepan
Mixing bowls
Rolling pin (optional, for even dough thickness)
Fork (for docking shells)
Ingredients
Directions
- Make the Dough (5 min active time): In a large bowl or stand mixer, cream together the softened unsalted butter and granulated sugar until just smooth and combined, but don't over-cream. Mix in the egg yolk, vanilla extract, and salt until well incorporated. Gradually add the all-purpose flour, mixing on low speed or by hand until the dough just comes together into a cohesive ball. Be careful not to overmix, which can make the crust tough.
- Chill (60 min inactive time): Flatten the dough into a disc, wrap it tightly in plastic wrap, and refrigerate for at least 1 hour. This chilling step is essential as it firms up the butter, preventing the shells from shrinking excessively during baking.
- Portion: Once chilled, unwrap the dough. For 2.5" molds, scoop and weigh dough balls of about 20 grams each. Adjust for other sizes: approximately 28g for 3" molds and 40g for 4" molds. This ensures consistent shell thickness.
- Line Molds: Take each dough ball and press it evenly up the sides and across the base of your mini tartlet molds. Aim for a consistent thickness throughout, paying special attention to the corners to avoid thin spots. Use a fork to gently dock (prick) the base of each shell several times. This allows steam to escape and prevents the crust from puffing up.
- Bake: Preheat your oven to 350°F (175°C). Arrange the lined molds on a baking sheet. Bake for 12-15 minutes for 4" shells, 10-12 minutes for 3" shells, and 8-10 minutes for 2.5" shells, or until the edges are a beautiful pale gold. The centers should still be light.
- Cool & Release: Let the baked shells cool in their molds for about 10 minutes. This allows them to firm up. Then, gently press the sides of the molds or lift the removable bottoms to release the shells. Transfer them to a wire rack to cool completely.
- Italian Meringue Step-by-Step Instructions
- Start Whites: Ensure your mixing bowl and whisk attachment are perfectly clean and grease-free. Add the egg whites to the bowl. Begin whipping them on medium speed until they reach soft peaks – they should hold their shape but still curl over at the tip.
- Cook Syrup: While the whites are whipping, combine the granulated sugar and water in a small saucepan. Cook over medium-high heat, stirring occasionally, until the sugar dissolves. Once boiling, stop stirring. Insert a candy thermometer and continue to cook until the syrup reaches precisely 240°F (115–118°C).
- Stream & Whip: As soon as the syrup reaches temperature, remove it from the heat. With your mixer running on medium-high speed, carefully and slowly stream the hot syrup down the side of the bowl, avoiding the whisk itself. Once all the syrup is added, increase the speed to high and whip continuously until the meringue is very stiff, glossy, and holds sharp peaks. Continue whipping until the outside of the bowl is just warm to the touch (this can take 5-10 minutes).
- Flavor: Reduce the mixer speed to low and whisk in the vanilla extract until just combined. Transfer the meringue to a piping bag fitted with your desired star tip.
- Assemble Korzinochki Tartlets
- Jam Barrier: Spoon 1-2 teaspoons of your chosen thick jam into the bottom of each cooled shortcrust shell. Spread it into a thin, even layer.
- Pipe Meringue: Using your piping bag, pipe a tall, elegant swirl of Italian meringue onto the jam layer in each tartlet. For an extra touch, you can briefly torch the meringue with a kitchen torch to create beautiful toasted peaks and set the exterior.
- Chill & Garnish: Place the assembled tartlets in the refrigerator for 20-30 minutes to stabilize the meringue. Garnish with fresh berries, a mint leaf, or a dusting of powdered sugar just before serving for the prettiest presentation.
Korzinochki - Easy Mini Dessert Recipes & Party Tarts

- Serves: 24 People
- Prepare Time: 40 minutes
- Cooking Time: 15 minutes
- Calories: -
- Difficulty: Easy
Get ready to bake some serious magic with Korzinochki! These delightful Russian jam tartlets are the ultimate mini dessert recipes easy enough for any home baker, yet impressive enough to steal the show at any gathering. Imagine crisp, buttery shortbread shells cradling a vibrant layer of jam, all crowned with a cloud of airy Italian meringue. They’re not just beautiful; they’re incredibly delicious, making them perfect mini desserts for parties or a sweet treat just for you. We’ll walk you through how to create these charming mini pastries recipes from scratch, covering everything from mastering the pastry tart shells to whipping up that perfect meringue. Plus, we'll share all the make-ahead secrets to ensure your Korzinochki are always fresh and fabulous. Let's get baking!
Why this works: The thick jam creates a protective barrier, while the Italian meringue provides impressive height and stability without making the shells soggy.
Korzinochki, pronounced "kor-zee-notch-kee," translates to "little baskets" in Russian, a nod to their adorable, edible basket shape. These classic individual tartlets feature a tender, crumbly shortbread crust filled with a layer of sweet, often tart, jam and then topped with a billowy swirl of Italian meringue. It's a beloved combination that balances rich, buttery pastry with fruity sweetness and a light, marshmallow-like topping. While their exact origin is a bit fuzzy, they've been a cherished treat in Russian and Eastern European kitchens for generations.
Mini tartlet molds (various sizes like 2.5", 3", or 4") – a muffin tin can also work in a pinch!
Hand or stand mixer (for dough and meringue)
Piping bag and a star tip (for elegant meringue swirls)
Kitchen scale (for precise dough portioning and ingredients)
Candy thermometer (crucial for Italian meringue syrup)
Small saucepan
Mixing bowls
Rolling pin (optional, for even dough thickness)
Fork (for docking shells)
Ingredients
Directions
- Make the Dough (5 min active time): In a large bowl or stand mixer, cream together the softened unsalted butter and granulated sugar until just smooth and combined, but don't over-cream. Mix in the egg yolk, vanilla extract, and salt until well incorporated. Gradually add the all-purpose flour, mixing on low speed or by hand until the dough just comes together into a cohesive ball. Be careful not to overmix, which can make the crust tough.
- Chill (60 min inactive time): Flatten the dough into a disc, wrap it tightly in plastic wrap, and refrigerate for at least 1 hour. This chilling step is essential as it firms up the butter, preventing the shells from shrinking excessively during baking.
- Portion: Once chilled, unwrap the dough. For 2.5" molds, scoop and weigh dough balls of about 20 grams each. Adjust for other sizes: approximately 28g for 3" molds and 40g for 4" molds. This ensures consistent shell thickness.
- Line Molds: Take each dough ball and press it evenly up the sides and across the base of your mini tartlet molds. Aim for a consistent thickness throughout, paying special attention to the corners to avoid thin spots. Use a fork to gently dock (prick) the base of each shell several times. This allows steam to escape and prevents the crust from puffing up.
- Bake: Preheat your oven to 350°F (175°C). Arrange the lined molds on a baking sheet. Bake for 12-15 minutes for 4" shells, 10-12 minutes for 3" shells, and 8-10 minutes for 2.5" shells, or until the edges are a beautiful pale gold. The centers should still be light.
- Cool & Release: Let the baked shells cool in their molds for about 10 minutes. This allows them to firm up. Then, gently press the sides of the molds or lift the removable bottoms to release the shells. Transfer them to a wire rack to cool completely.
- Italian Meringue Step-by-Step Instructions
- Start Whites: Ensure your mixing bowl and whisk attachment are perfectly clean and grease-free. Add the egg whites to the bowl. Begin whipping them on medium speed until they reach soft peaks – they should hold their shape but still curl over at the tip.
- Cook Syrup: While the whites are whipping, combine the granulated sugar and water in a small saucepan. Cook over medium-high heat, stirring occasionally, until the sugar dissolves. Once boiling, stop stirring. Insert a candy thermometer and continue to cook until the syrup reaches precisely 240°F (115–118°C).
- Stream & Whip: As soon as the syrup reaches temperature, remove it from the heat. With your mixer running on medium-high speed, carefully and slowly stream the hot syrup down the side of the bowl, avoiding the whisk itself. Once all the syrup is added, increase the speed to high and whip continuously until the meringue is very stiff, glossy, and holds sharp peaks. Continue whipping until the outside of the bowl is just warm to the touch (this can take 5-10 minutes).
- Flavor: Reduce the mixer speed to low and whisk in the vanilla extract until just combined. Transfer the meringue to a piping bag fitted with your desired star tip.
- Assemble Korzinochki Tartlets
- Jam Barrier: Spoon 1-2 teaspoons of your chosen thick jam into the bottom of each cooled shortcrust shell. Spread it into a thin, even layer.
- Pipe Meringue: Using your piping bag, pipe a tall, elegant swirl of Italian meringue onto the jam layer in each tartlet. For an extra touch, you can briefly torch the meringue with a kitchen torch to create beautiful toasted peaks and set the exterior.
- Chill & Garnish: Place the assembled tartlets in the refrigerator for 20-30 minutes to stabilize the meringue. Garnish with fresh berries, a mint leaf, or a dusting of powdered sugar just before serving for the prettiest presentation.
You may also like


Hey there! I’m just someone who seriously loves good food and believes that cooking doesn’t have to be complicated to be amazing. Whether it’s a quick weeknight dinner or a cozy weekend meal, I’m all about sharing easy, tasty recipes that actually work.


