
Shor Gogal - Flaky Salted Dough Recipe for Novruz – Bake Now
Shor Gogal - Flaky Salted Dough Recipe for Novruz – Bake Now
- Serves: 14 People
- Prepare Time: 1 hour 30 m
- Cooking Time: 25 minutes
- Calories: -
- Difficulty: Easy
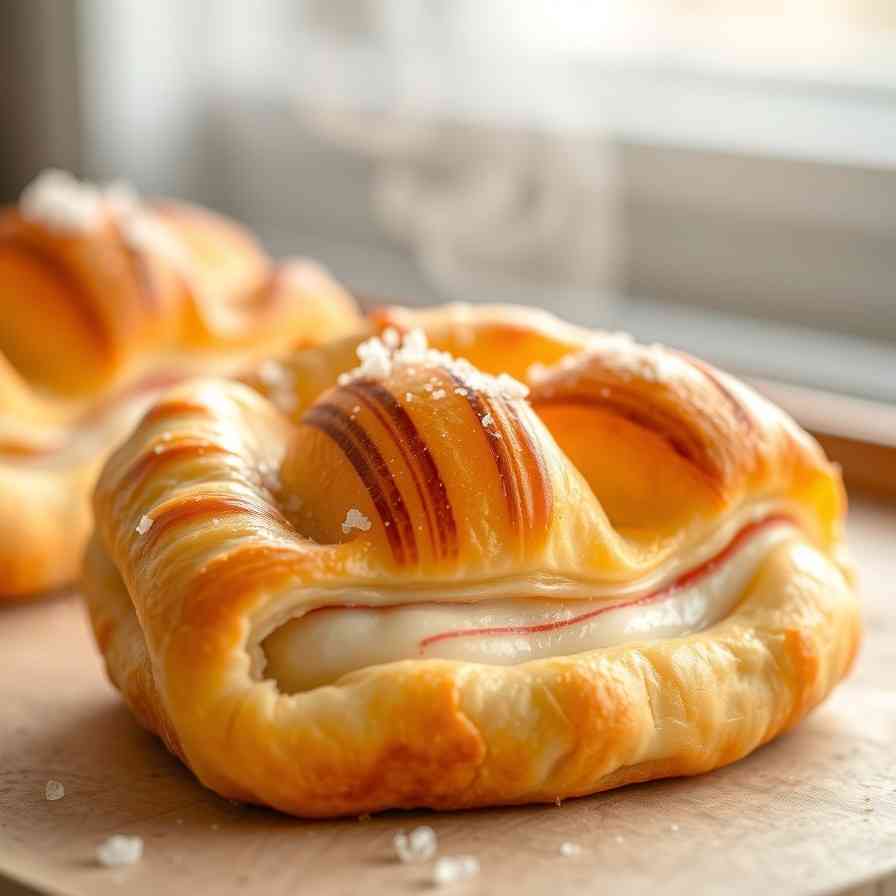
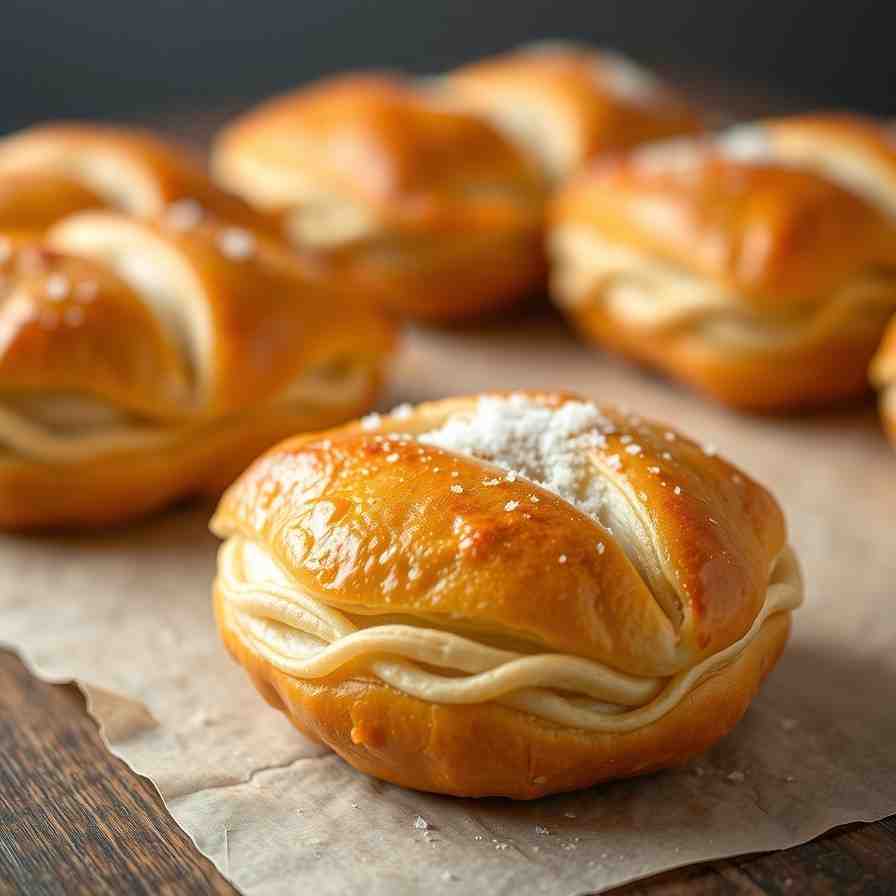
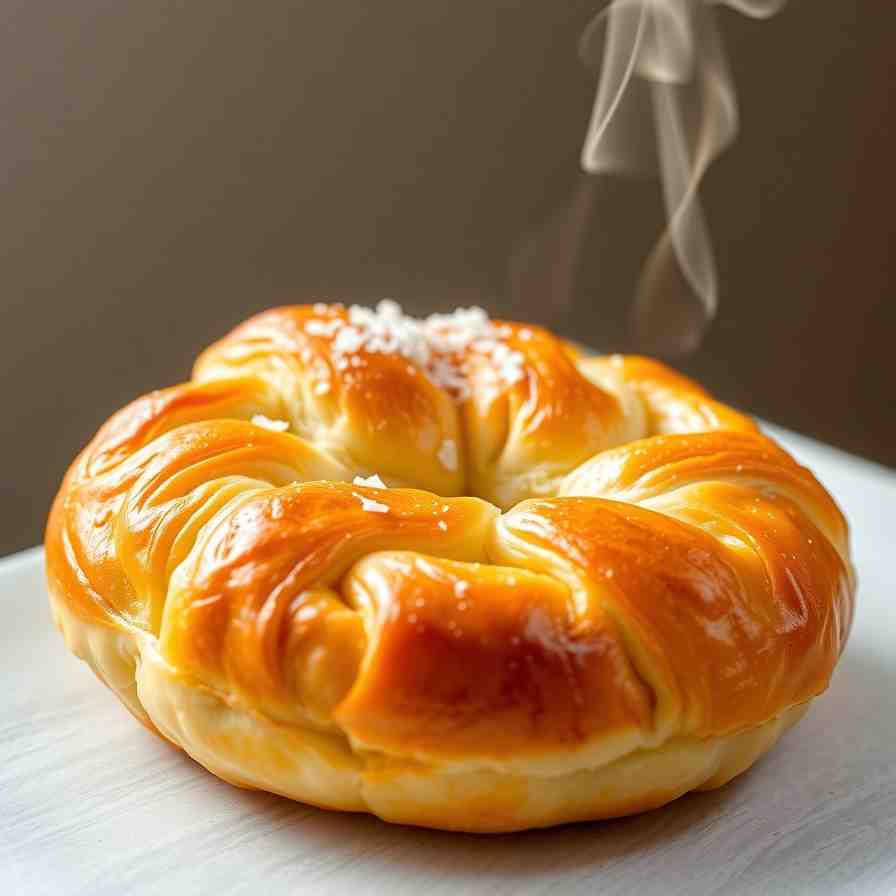
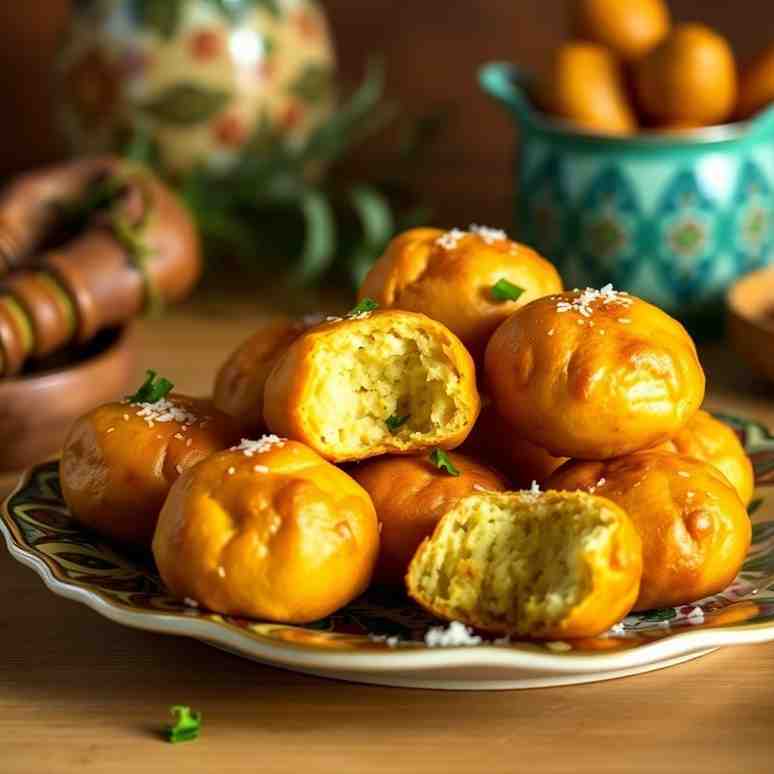
Get ready for an amazing culinary adventure with Azerbaijani Shor Gogal! If you're looking for a truly unique and delightful salty snack that's packed with flavor, you've hit the jackpot. Shor Gogal (sometimes called Shorgoghal) are savory, spice-filled flaky buns that hail from Azerbaijan, and they're a true staple, especially during the joyous spring holiday of Novruz. These beautiful, golden pastries traditionally represent the sun, bringing warmth and light to the celebration.
Now, don't let the "pastry" label fool you – Shor Gogal are definitely not sweet. Instead, they offer a wonderfully rich, savory experience, often enjoyed with a hot cup of sweet black tea. It's a delightful contrast that perfectly balances the rich spices and buttery layers.
You might be wondering how Shor Gogal compares to other Azerbaijani treats. While its cousin Shekerbura is a sweet, nut-filled pastry shaped like a crescent moon, Shor Gogal stands out as the savory, round "sun" of the Novruz table. Both are cherished, but they offer completely different taste experiences.
You're going to absolutely love diving into this salted dough recipe for Shor Gogal. Here’s why this recipe is a must-try:
Flaky Perfection: Imagine layers as delicate as laminated pastry, but achieved with a simpler, more approachable method than traditional croissants. It’s pure baking magic!
Warm, Inviting Spices: We're talking about a symphony of robust, warm spices like fennel, anise (or cumin), turmeric, and black pepper that create an unforgettable aroma and taste. These spices for baking are truly the heart of Shor Gogal.
Tried & True Method: This isn't just any baking ingredients list; it's a clearly tested method, complete with detailed step-by-step instructions.
US-Friendly & Easy to Follow: We've made sure this recipe is super accessible for US bakers, with both cup and gram measurements, clear language, and handy ingredient substitutes. It’s one of those easy recipes for yeast rolls that feels special.
So, roll up your sleeves and get ready to create some truly impressive baked goods recipes with this incredible Shor Gogal recipe. It’s perfect for Novruz, a weekend baking project, or simply as a fantastic addition to your collection of pastry recipes and salty snacks.
Ingredients
Directions
- Activate the Yeast In a small bowl, combine the warm water (105-115°F), sugar, and active dry yeast. Give it a gentle stir and let it sit for 5-10 minutes. You should see a foamy layer form on top, indicating your yeast is alive and ready to party! If it doesn’t foam, your water might have been too hot or cold, or your yeast is old – it’s best to start again with fresh yeast.
- Mix & Knead the Dough In a large mixing bowl (or the bowl of a stand mixer fitted with a dough hook), whisk together the egg, extra yolk, milk, melted butter, salt, and turmeric. Pour in the activated yeast mixture. Gradually add the all-purpose flour, starting with 4 cups, mixing until a shaggy dough forms. If using a stand mixer, knead on medium-low speed for 8-10 minutes. If kneading by hand, turn the dough out onto a lightly floured surface and knead for 10-15 minutes. The dough should become smooth, elastic, and slightly tacky to the touch – avoid adding too much extra flour, as this can make the buns dense. Shape the dough into a ball, place it in a lightly oiled bowl, cover it with plastic wrap or a clean kitchen towel, and let it rise in a warm place for 1 to 1.5 hours, or until it has doubled in size.
- Make the Spice Filling While the dough is rising, prepare your filling. Lightly toast the fennel and anise (or cumin) seeds in a dry skillet over medium-low heat for 1-2 minutes until fragrant. Be careful not to burn them! Let them cool slightly, then lightly grind them using a spice grinder or mortar and pestle – you want them slightly crushed, not a fine powder.
- In the same skillet, dry roast the 1 cup of all-purpose flour over medium-low heat, stirring constantly, for 5-7 minutes until it turns a pale cream color and smells slightly nutty. Remove from heat and transfer to a bowl. Stir in the ground spices, turmeric, black pepper, and salt. Pour in the melted butter or ghee and mix well with a fork until the mixture is sandy but cohesive enough to clump together when squeezed. It should not be greasy.
- Divide Dough & Roll Layers Once your dough has doubled, gently punch it down to release the air. Turn it out onto a lightly floured surface and divide it into 8-10 equal balls (depending on how many buns you want and their desired size). Cover the balls with a towel.
- One by one, roll each dough ball into a very thin circle or rectangle, about 10-12 inches in diameter. You should be able to see some translucency when held up. Lightly brush the surface of the rolled dough with melted clarified butter or ghee, going almost to the edges. Stack the buttered layers on top of each other, brushing butter between each layer. Save the last dough circle for the top and do not butter its surface.
- Roll into a Log & Cut Carefully roll the stacked dough layers into a tight log, starting from one of the long sides. Roll it as tightly as you can to ensure pronounced swirls in your finished buns. Once rolled, gently trim the ends if they look uneven. Cut the log into equal pieces, about 1.5 to 2 inches thick. You should get 12-14 pieces. Orient each cut piece so the spiral side faces up.
- Shape & Fill Each Bun Take one cut piece and gently press down on the center of the spiral side with your thumb to create a slight indentation. Then, gently open one side of the dough (like a clam shell) to form a pocket without disturbing the spiral too much. Spoon about 1-1.5 tablespoons of the spice filling into this pocket. Carefully pinch the seam closed, ensuring it’s well-sealed to prevent filling from leaking during baking. Flip the bun seam-side down onto your work surface. Gently flatten it into a round disc, about 3-4 inches in diameter, making sure the beautiful spiral remains visible on top. Don't flatten it too thin, or the layers might get lost.
- Proof Shaped Buns Arrange the shaped buns on a large baking sheet lined with parchment paper, leaving about 2 inches of space between each bun. Cover them loosely with plastic wrap or a light kitchen towel. Let them rise in a warm place for another 20-30 minutes, or until they look slightly puffy but not fully doubled in size. This short proofing helps them become light and flaky.
- Glaze, Top & Bake Preheat your oven to 375°F (190°C).
- In a small bowl, whisk together the egg yolk(s) with the milk or oil, and saffron water (if using) to create your glaze. Gently brush the tops of the proofed buns with this egg wash. Sprinkle generously with nigella or sesame seeds.
- Bake for 20-25 minutes, or until the Shor Gogal are deeply golden brown, with beautifully flaky edges and no pale spots. The exact baking time may vary depending on your oven.
- Cool & Serve Once baked, transfer the Shor Gogal to a wire rack and let them cool for 5-10 minutes. This allows the layers to set properly, but they’re best enjoyed warm! Serve them with sweet black tea, as part of a traditional Novruz spread, or simply as a delicious savory snack anytime.
Shor Gogal - Flaky Salted Dough Recipe for Novruz – Bake Now
- Serves: 14 People
- Prepare Time: 1 hour 30 m
- Cooking Time: 25 minutes
- Calories: -
- Difficulty: Easy
Get ready for an amazing culinary adventure with Azerbaijani Shor Gogal! If you're looking for a truly unique and delightful salty snack that's packed with flavor, you've hit the jackpot. Shor Gogal (sometimes called Shorgoghal) are savory, spice-filled flaky buns that hail from Azerbaijan, and they're a true staple, especially during the joyous spring holiday of Novruz. These beautiful, golden pastries traditionally represent the sun, bringing warmth and light to the celebration.
Now, don't let the "pastry" label fool you – Shor Gogal are definitely not sweet. Instead, they offer a wonderfully rich, savory experience, often enjoyed with a hot cup of sweet black tea. It's a delightful contrast that perfectly balances the rich spices and buttery layers.
You might be wondering how Shor Gogal compares to other Azerbaijani treats. While its cousin Shekerbura is a sweet, nut-filled pastry shaped like a crescent moon, Shor Gogal stands out as the savory, round "sun" of the Novruz table. Both are cherished, but they offer completely different taste experiences.
You're going to absolutely love diving into this salted dough recipe for Shor Gogal. Here’s why this recipe is a must-try:
Flaky Perfection: Imagine layers as delicate as laminated pastry, but achieved with a simpler, more approachable method than traditional croissants. It’s pure baking magic!
Warm, Inviting Spices: We're talking about a symphony of robust, warm spices like fennel, anise (or cumin), turmeric, and black pepper that create an unforgettable aroma and taste. These spices for baking are truly the heart of Shor Gogal.
Tried & True Method: This isn't just any baking ingredients list; it's a clearly tested method, complete with detailed step-by-step instructions.
US-Friendly & Easy to Follow: We've made sure this recipe is super accessible for US bakers, with both cup and gram measurements, clear language, and handy ingredient substitutes. It’s one of those easy recipes for yeast rolls that feels special.
So, roll up your sleeves and get ready to create some truly impressive baked goods recipes with this incredible Shor Gogal recipe. It’s perfect for Novruz, a weekend baking project, or simply as a fantastic addition to your collection of pastry recipes and salty snacks.
Ingredients
Directions
- Activate the Yeast In a small bowl, combine the warm water (105-115°F), sugar, and active dry yeast. Give it a gentle stir and let it sit for 5-10 minutes. You should see a foamy layer form on top, indicating your yeast is alive and ready to party! If it doesn’t foam, your water might have been too hot or cold, or your yeast is old – it’s best to start again with fresh yeast.
- Mix & Knead the Dough In a large mixing bowl (or the bowl of a stand mixer fitted with a dough hook), whisk together the egg, extra yolk, milk, melted butter, salt, and turmeric. Pour in the activated yeast mixture. Gradually add the all-purpose flour, starting with 4 cups, mixing until a shaggy dough forms. If using a stand mixer, knead on medium-low speed for 8-10 minutes. If kneading by hand, turn the dough out onto a lightly floured surface and knead for 10-15 minutes. The dough should become smooth, elastic, and slightly tacky to the touch – avoid adding too much extra flour, as this can make the buns dense. Shape the dough into a ball, place it in a lightly oiled bowl, cover it with plastic wrap or a clean kitchen towel, and let it rise in a warm place for 1 to 1.5 hours, or until it has doubled in size.
- Make the Spice Filling While the dough is rising, prepare your filling. Lightly toast the fennel and anise (or cumin) seeds in a dry skillet over medium-low heat for 1-2 minutes until fragrant. Be careful not to burn them! Let them cool slightly, then lightly grind them using a spice grinder or mortar and pestle – you want them slightly crushed, not a fine powder.
- In the same skillet, dry roast the 1 cup of all-purpose flour over medium-low heat, stirring constantly, for 5-7 minutes until it turns a pale cream color and smells slightly nutty. Remove from heat and transfer to a bowl. Stir in the ground spices, turmeric, black pepper, and salt. Pour in the melted butter or ghee and mix well with a fork until the mixture is sandy but cohesive enough to clump together when squeezed. It should not be greasy.
- Divide Dough & Roll Layers Once your dough has doubled, gently punch it down to release the air. Turn it out onto a lightly floured surface and divide it into 8-10 equal balls (depending on how many buns you want and their desired size). Cover the balls with a towel.
- One by one, roll each dough ball into a very thin circle or rectangle, about 10-12 inches in diameter. You should be able to see some translucency when held up. Lightly brush the surface of the rolled dough with melted clarified butter or ghee, going almost to the edges. Stack the buttered layers on top of each other, brushing butter between each layer. Save the last dough circle for the top and do not butter its surface.
- Roll into a Log & Cut Carefully roll the stacked dough layers into a tight log, starting from one of the long sides. Roll it as tightly as you can to ensure pronounced swirls in your finished buns. Once rolled, gently trim the ends if they look uneven. Cut the log into equal pieces, about 1.5 to 2 inches thick. You should get 12-14 pieces. Orient each cut piece so the spiral side faces up.
- Shape & Fill Each Bun Take one cut piece and gently press down on the center of the spiral side with your thumb to create a slight indentation. Then, gently open one side of the dough (like a clam shell) to form a pocket without disturbing the spiral too much. Spoon about 1-1.5 tablespoons of the spice filling into this pocket. Carefully pinch the seam closed, ensuring it’s well-sealed to prevent filling from leaking during baking. Flip the bun seam-side down onto your work surface. Gently flatten it into a round disc, about 3-4 inches in diameter, making sure the beautiful spiral remains visible on top. Don't flatten it too thin, or the layers might get lost.
- Proof Shaped Buns Arrange the shaped buns on a large baking sheet lined with parchment paper, leaving about 2 inches of space between each bun. Cover them loosely with plastic wrap or a light kitchen towel. Let them rise in a warm place for another 20-30 minutes, or until they look slightly puffy but not fully doubled in size. This short proofing helps them become light and flaky.
- Glaze, Top & Bake Preheat your oven to 375°F (190°C).
- In a small bowl, whisk together the egg yolk(s) with the milk or oil, and saffron water (if using) to create your glaze. Gently brush the tops of the proofed buns with this egg wash. Sprinkle generously with nigella or sesame seeds.
- Bake for 20-25 minutes, or until the Shor Gogal are deeply golden brown, with beautifully flaky edges and no pale spots. The exact baking time may vary depending on your oven.
- Cool & Serve Once baked, transfer the Shor Gogal to a wire rack and let them cool for 5-10 minutes. This allows the layers to set properly, but they’re best enjoyed warm! Serve them with sweet black tea, as part of a traditional Novruz spread, or simply as a delicious savory snack anytime.
You may also like


Hey there! I’m just someone who seriously loves good food and believes that cooking doesn’t have to be complicated to be amazing. Whether it’s a quick weeknight dinner or a cozy weekend meal, I’m all about sharing easy, tasty recipes that actually work.


