
Tarta Pascualina Recipe Easy Easter Pie
Tarta Pascualina Recipe Easy Easter Pie

- Serves: 8 People
- Prepare Time: 45 minutes
- Cooking Time: 50 minutes
- Calories: -
- Difficulty: Medium
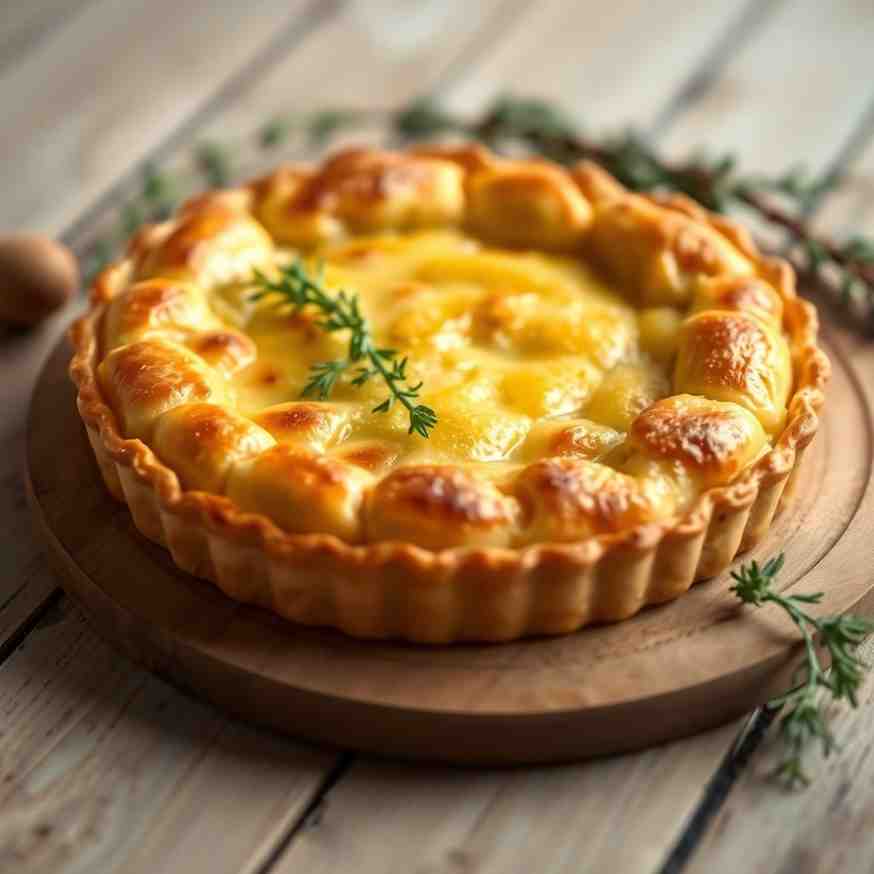
Ever heard of a pie that hides a delicious secret inside? Get ready to discover Tarta Pascualina, a savory Italian-Argentine Easter pie that's as charming as it is delicious! Imagine flaky, buttery pastry wrapped around a creamy, cheesy spinach and ricotta filling, with whole eggs baked right into the center—a delightful surprise with every slice. This egg tart is more than just a recipe; it's a tradition, a symbol of spring and renewal, especially during Easter.
Originally from the Liguria region of Italy, where it's known as Torta Pasqualina, this incredible savory tart found a second home and a new name in Argentina and Uruguay. Our recipe brings you the best of both worlds: authentic, rich flavors with a super beginner-friendly approach. We're talking classic spinach-ricotta goodness, those iconic hidden eggs, and the convenience of store-bought puff pastry for a seriously impressive result without all the fuss. Whether you're a seasoned baker or just looking for a unique main dish for your next brunch, this tarta pascualina is designed for success. It’s perfect for entertaining, delicious warm or cold, and a fantastic vegetarian main that feels truly special. Let's get baking!
Ingredients
Directions
- Prep the Greens
- If using fresh spinach (and/or chard), wash it thoroughly. Trim any tough stems from the chard. Roughly chop the greens.
- Bring a large pot of salted water to a boil. Add the chopped greens and blanch for 1-2 minutes until wilted.
- Immediately transfer the blanched greens to a colander and rinse with cold water to stop cooking.
- Now, for the crucial part: squeeze the greens very dry. Place them in a clean kitchen towel or several layers of paper towels and twist firmly to wring out as much liquid as possible. The drier, the better! You want them to look like a compact ball, not soggy. (If using frozen spinach, thaw it completely and squeeze it dry using the same method.)
- Finely chop the squeezed greens and set aside.
- Build the Filling
- In a large skillet, heat 2 tablespoons of olive oil over medium heat. Add the chopped onion and sauté for 5-7 minutes until translucent and softened. Add the minced garlic and cook for another minute until fragrant.
- Add the finely chopped, squeezed greens to the skillet. Cook for 2-3 minutes, stirring constantly, to cook off any remaining moisture. This step is key for a non-soggy pie!
- Remove the skillet from the heat and let the greens mixture cool completely. You can spread it on a plate to speed this up.
- In a large bowl, combine the cooled greens mixture, well-drained ricotta cheese, grated Parmigiano Reggiano (or Pecorino Romano), nutmeg, 1 teaspoon of salt, and 1/2 teaspoon of black pepper.
- Crack one of the eggs into a small bowl, lightly beat it, and add it to the filling mixture. Mix everything thoroughly until well combined. The filling should be thick and firm, similar to a spinach dip, not watery or loose.
- Preheat your oven to 375°F (190°C).
- Lightly grease a 9-inch springform pan or a deep pie dish with olive oil or melted butter. If using a springform, you can also line the bottom with a circle of parchment paper for easier removal.
- On a lightly floured surface, roll out one sheet of cold puff pastry into a circle or square large enough to cover the bottom and sides of your pan, with about a 1-inch overhang.
- Carefully transfer the rolled pastry to the prepared pan. Gently press it into the bottom and up the sides. If there are any small cracks, you can patch them with excess pastry. Keep the pastry as cool as possible.
- Spread the spinach-ricotta filling evenly over the puff pastry in the pan.
- Using the back of a spoon, create 4 deep wells in the filling, spaced out. These will be where your whole eggs go.
- Carefully crack one of the remaining 4 whole eggs into each well. If desired, lightly sprinkle each egg with a pinch of salt and pepper.
- Pro Tip: For a beautiful presentation, you can make a small notch or decorative cut on the rim of the bottom pastry crust directly above each egg. This will serve as a guide for slicing, ensuring every piece reveals a perfectly cooked egg cross-section!
- On your lightly floured surface, roll out the second sheet of cold puff pastry into a circle slightly larger than the top of your pan.
- Carefully lay this second pastry sheet over the filling, covering the eggs.
- Trim any excess pastry, leaving about a 1/2-inch overhang. Crimp or press the edges of the top and bottom pastry together to seal the pie securely. You can use a fork to create a decorative edge.
- Using a sharp knife, cut 4 small slits (about 1-inch long) in the top pastry, directly above where each whole egg is. These vents allow steam to escape and also act as visual guides for slicing.
- If using an egg wash, lightly brush the top of the pie with the beaten egg. This will give it a beautiful golden-brown shine. Alternatively, you can brush with a little olive oil.
- Place the pie on a baking sheet (to catch any potential drips) and transfer it to the preheated oven.
- Bake for 30 minutes on a lower rack to ensure the bottom crust cooks through. Then, move the pie to the middle rack and continue baking for another 20-30 minutes, or until the top is deep golden brown and the filling is set.
- Once baked, remove the pie from the oven and let it cool on a wire rack for at least 45-60 minutes. This cooling time is crucial for the filling to fully set and for the pie to slice cleanly without collapsing.
- If using a springform pan, carefully release the sides after cooling. Slice the torta using your egg guides (if you made them) and serve.
Tarta Pascualina Recipe Easy Easter Pie
- Serves: 8 People
- Prepare Time: 45 minutes
- Cooking Time: 50 minutes
- Calories: -
- Difficulty: Medium
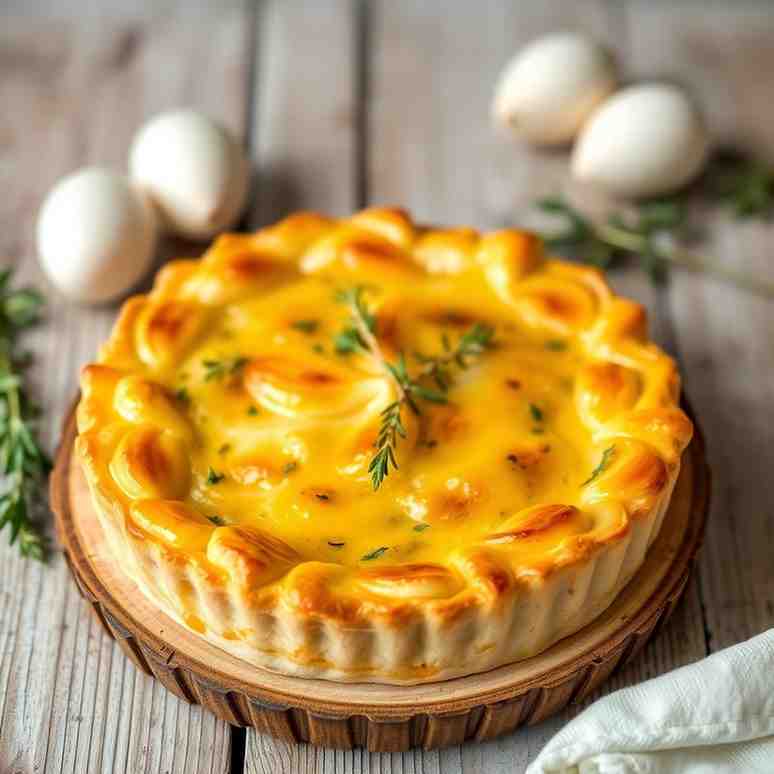
Ever heard of a pie that hides a delicious secret inside? Get ready to discover Tarta Pascualina, a savory Italian-Argentine Easter pie that's as charming as it is delicious! Imagine flaky, buttery pastry wrapped around a creamy, cheesy spinach and ricotta filling, with whole eggs baked right into the center—a delightful surprise with every slice. This egg tart is more than just a recipe; it's a tradition, a symbol of spring and renewal, especially during Easter.
Originally from the Liguria region of Italy, where it's known as Torta Pasqualina, this incredible savory tart found a second home and a new name in Argentina and Uruguay. Our recipe brings you the best of both worlds: authentic, rich flavors with a super beginner-friendly approach. We're talking classic spinach-ricotta goodness, those iconic hidden eggs, and the convenience of store-bought puff pastry for a seriously impressive result without all the fuss. Whether you're a seasoned baker or just looking for a unique main dish for your next brunch, this tarta pascualina is designed for success. It’s perfect for entertaining, delicious warm or cold, and a fantastic vegetarian main that feels truly special. Let's get baking!
Ingredients
Directions
- Prep the Greens
- If using fresh spinach (and/or chard), wash it thoroughly. Trim any tough stems from the chard. Roughly chop the greens.
- Bring a large pot of salted water to a boil. Add the chopped greens and blanch for 1-2 minutes until wilted.
- Immediately transfer the blanched greens to a colander and rinse with cold water to stop cooking.
- Now, for the crucial part: squeeze the greens very dry. Place them in a clean kitchen towel or several layers of paper towels and twist firmly to wring out as much liquid as possible. The drier, the better! You want them to look like a compact ball, not soggy. (If using frozen spinach, thaw it completely and squeeze it dry using the same method.)
- Finely chop the squeezed greens and set aside.
- Build the Filling
- In a large skillet, heat 2 tablespoons of olive oil over medium heat. Add the chopped onion and sauté for 5-7 minutes until translucent and softened. Add the minced garlic and cook for another minute until fragrant.
- Add the finely chopped, squeezed greens to the skillet. Cook for 2-3 minutes, stirring constantly, to cook off any remaining moisture. This step is key for a non-soggy pie!
- Remove the skillet from the heat and let the greens mixture cool completely. You can spread it on a plate to speed this up.
- In a large bowl, combine the cooled greens mixture, well-drained ricotta cheese, grated Parmigiano Reggiano (or Pecorino Romano), nutmeg, 1 teaspoon of salt, and 1/2 teaspoon of black pepper.
- Crack one of the eggs into a small bowl, lightly beat it, and add it to the filling mixture. Mix everything thoroughly until well combined. The filling should be thick and firm, similar to a spinach dip, not watery or loose.
- Preheat your oven to 375°F (190°C).
- Lightly grease a 9-inch springform pan or a deep pie dish with olive oil or melted butter. If using a springform, you can also line the bottom with a circle of parchment paper for easier removal.
- On a lightly floured surface, roll out one sheet of cold puff pastry into a circle or square large enough to cover the bottom and sides of your pan, with about a 1-inch overhang.
- Carefully transfer the rolled pastry to the prepared pan. Gently press it into the bottom and up the sides. If there are any small cracks, you can patch them with excess pastry. Keep the pastry as cool as possible.
- Spread the spinach-ricotta filling evenly over the puff pastry in the pan.
- Using the back of a spoon, create 4 deep wells in the filling, spaced out. These will be where your whole eggs go.
- Carefully crack one of the remaining 4 whole eggs into each well. If desired, lightly sprinkle each egg with a pinch of salt and pepper.
- Pro Tip: For a beautiful presentation, you can make a small notch or decorative cut on the rim of the bottom pastry crust directly above each egg. This will serve as a guide for slicing, ensuring every piece reveals a perfectly cooked egg cross-section!
- On your lightly floured surface, roll out the second sheet of cold puff pastry into a circle slightly larger than the top of your pan.
- Carefully lay this second pastry sheet over the filling, covering the eggs.
- Trim any excess pastry, leaving about a 1/2-inch overhang. Crimp or press the edges of the top and bottom pastry together to seal the pie securely. You can use a fork to create a decorative edge.
- Using a sharp knife, cut 4 small slits (about 1-inch long) in the top pastry, directly above where each whole egg is. These vents allow steam to escape and also act as visual guides for slicing.
- If using an egg wash, lightly brush the top of the pie with the beaten egg. This will give it a beautiful golden-brown shine. Alternatively, you can brush with a little olive oil.
- Place the pie on a baking sheet (to catch any potential drips) and transfer it to the preheated oven.
- Bake for 30 minutes on a lower rack to ensure the bottom crust cooks through. Then, move the pie to the middle rack and continue baking for another 20-30 minutes, or until the top is deep golden brown and the filling is set.
- Once baked, remove the pie from the oven and let it cool on a wire rack for at least 45-60 minutes. This cooling time is crucial for the filling to fully set and for the pie to slice cleanly without collapsing.
- If using a springform pan, carefully release the sides after cooling. Slice the torta using your egg guides (if you made them) and serve.
The following nutritional values are per serving (one piece of cake) Calories 350-450 kcal Carbohydrates 25-35g Protein 15-20g Fat 20-30g Sometimes, getting a delicious meal on the table feels like a race against the clock. But don't you worry! We've got some smart shortcuts and handy tools to make your Torta Pasqualina journey smooth and speedy. #### Problem: Prepping fresh greens can be time-consuming and messy, especially if you're dealing with a lot of spinach and chard. #### Agitate: Washing, trimming, chopping, blanching, and squeezing can add significant time to your prep, leaving you with a sink full of greens and a dwindling evening. Sometimes, getting a delicious meal on the table feels like a race against the clock. But don't you worry! We've got some smart shortcuts and handy tools to make your Torta Pasqualina journey smooth and speedy. #### Problem: Prepping fresh greens can be time-consuming and messy, especially if you're dealing with a lot of spinach and chard. Click any ingredient for detailed nutritional information:Recipe Nutritional Values
Additional Information
Recipe Success Tips
Ingredient Substitutions & Variations
Cultural Variations
Make-Ahead & Storage Instructions
Frequently Asked Questions
Recommended Kitchen Tools
Kitchen Tool
Calories per Ingredient
You may also like


Hey there! I’m just someone who seriously loves good food and believes that cooking doesn’t have to be complicated to be amazing. Whether it’s a quick weeknight dinner or a cozy weekend meal, I’m all about sharing easy, tasty recipes that actually work.


